How to Create Headers and Footers with Beaver Themer
Page builders are great for creating beautiful pages, but they often don’t extend customization to headers and footers. This limitation can lead to visual inconsistencies that negatively impact user experience (UX) and brand cohesion.
Fortunately, our Beaver Themer theme building plugin offers an easy way to design custom headers and footers, keeping your entire site visually consistent.
In this guide, we’ll explore four straightforward steps to create headers and footers with Beaver Themer. Let’s dive in!
Table of Contents
- An Introduction to Beaver Themer
- How to Create Headers with Beaver Themer (In 4 Steps)
- How to Create Footers with Beaver Themer (In 4 Steps)
- Final Thoughts
- Related Questions
An Introduction to Beaver Themer
Beaver Themer takes page building to a whole new level by allowing you to customize site areas often defined by your theme—like headers, footers, and more. This opens up the possibility for a cohesive, branded look across your entire site:
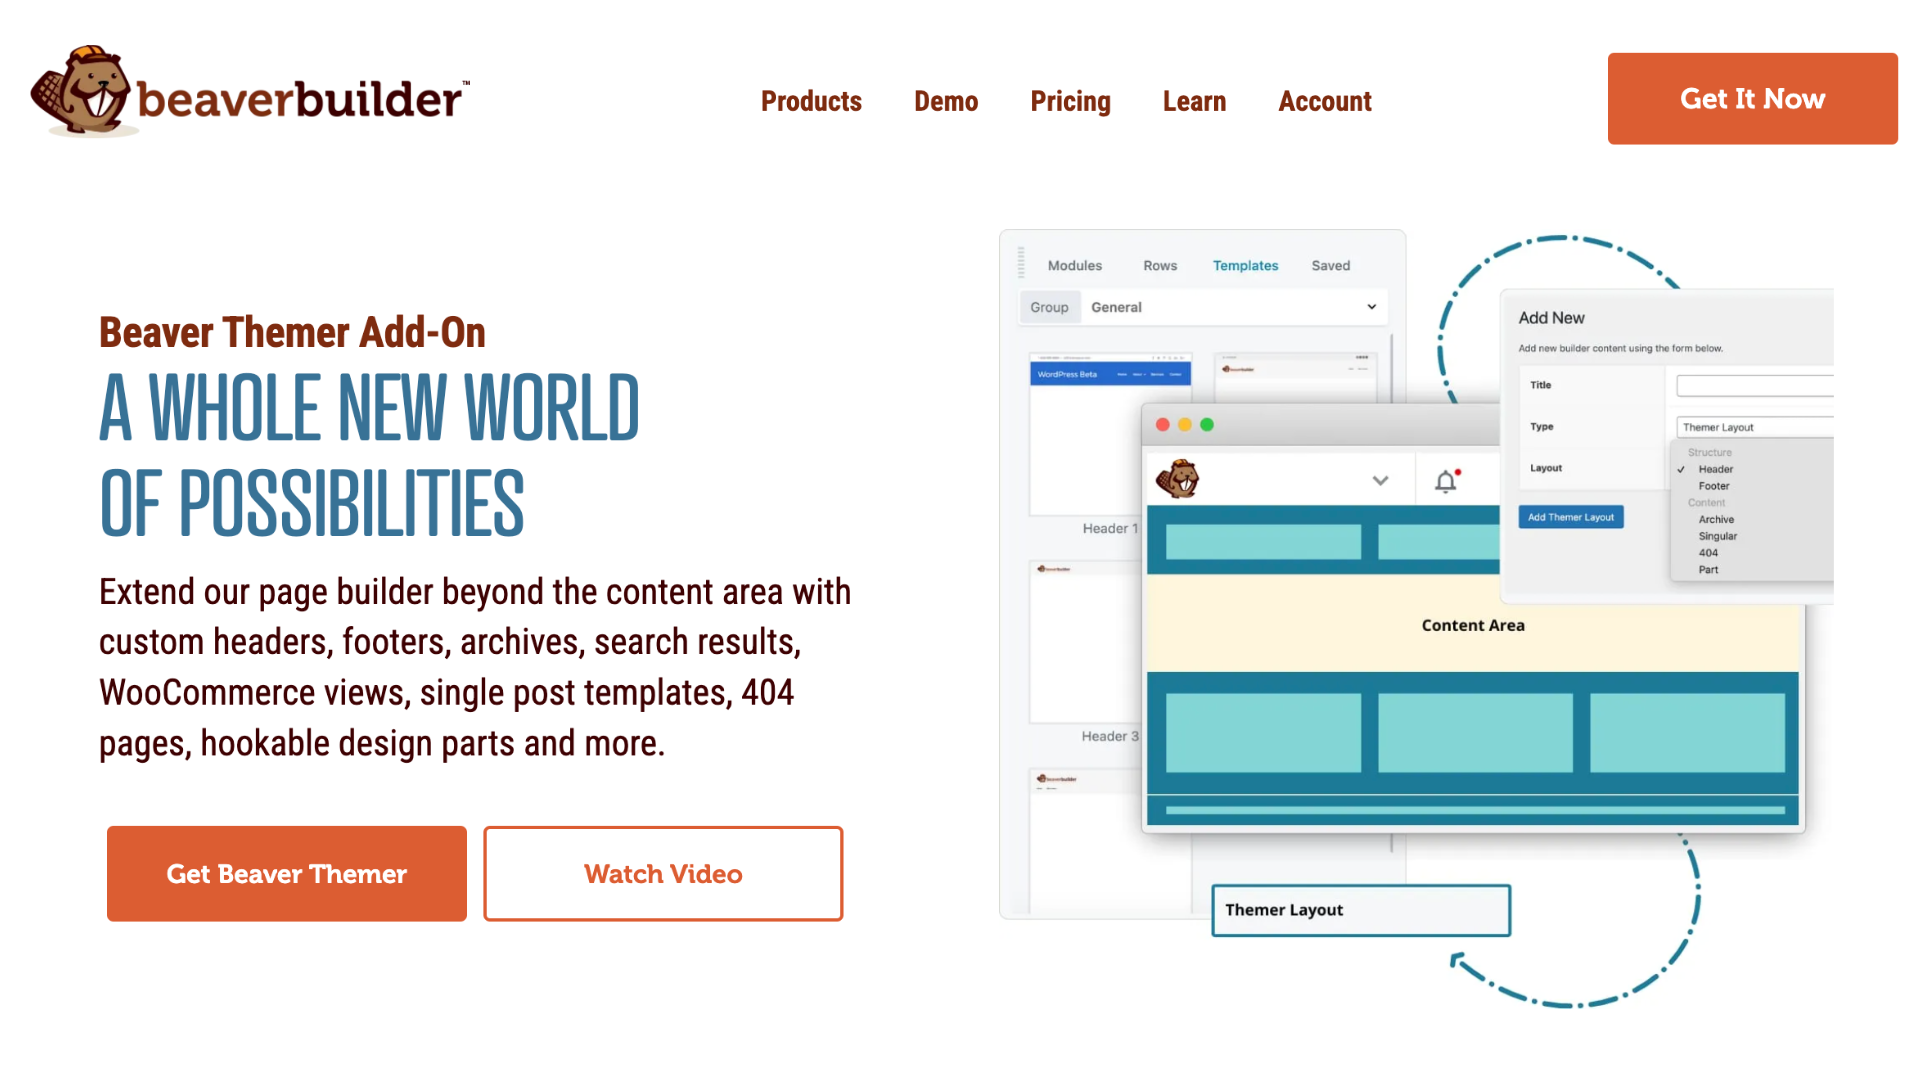
With Beaver Themer, you can:
- Adjust headers, footers, announcement bars, and CTAs.
- Design custom layouts for 404 pages, search pages, and blog archives.
- Create templates for custom post types.
- Control the display settings across all pages or only selected pages.
With Beaver Builder’s drag-and-drop editor, adding and styling elements is as easy as building a standard page, complete with color options, layouts, and modules like buttons and contact forms.
Get Access to Beaver Themer with Premium Plans
The good news is that Beaver Themer is included with any premium Beaver Builder plan:
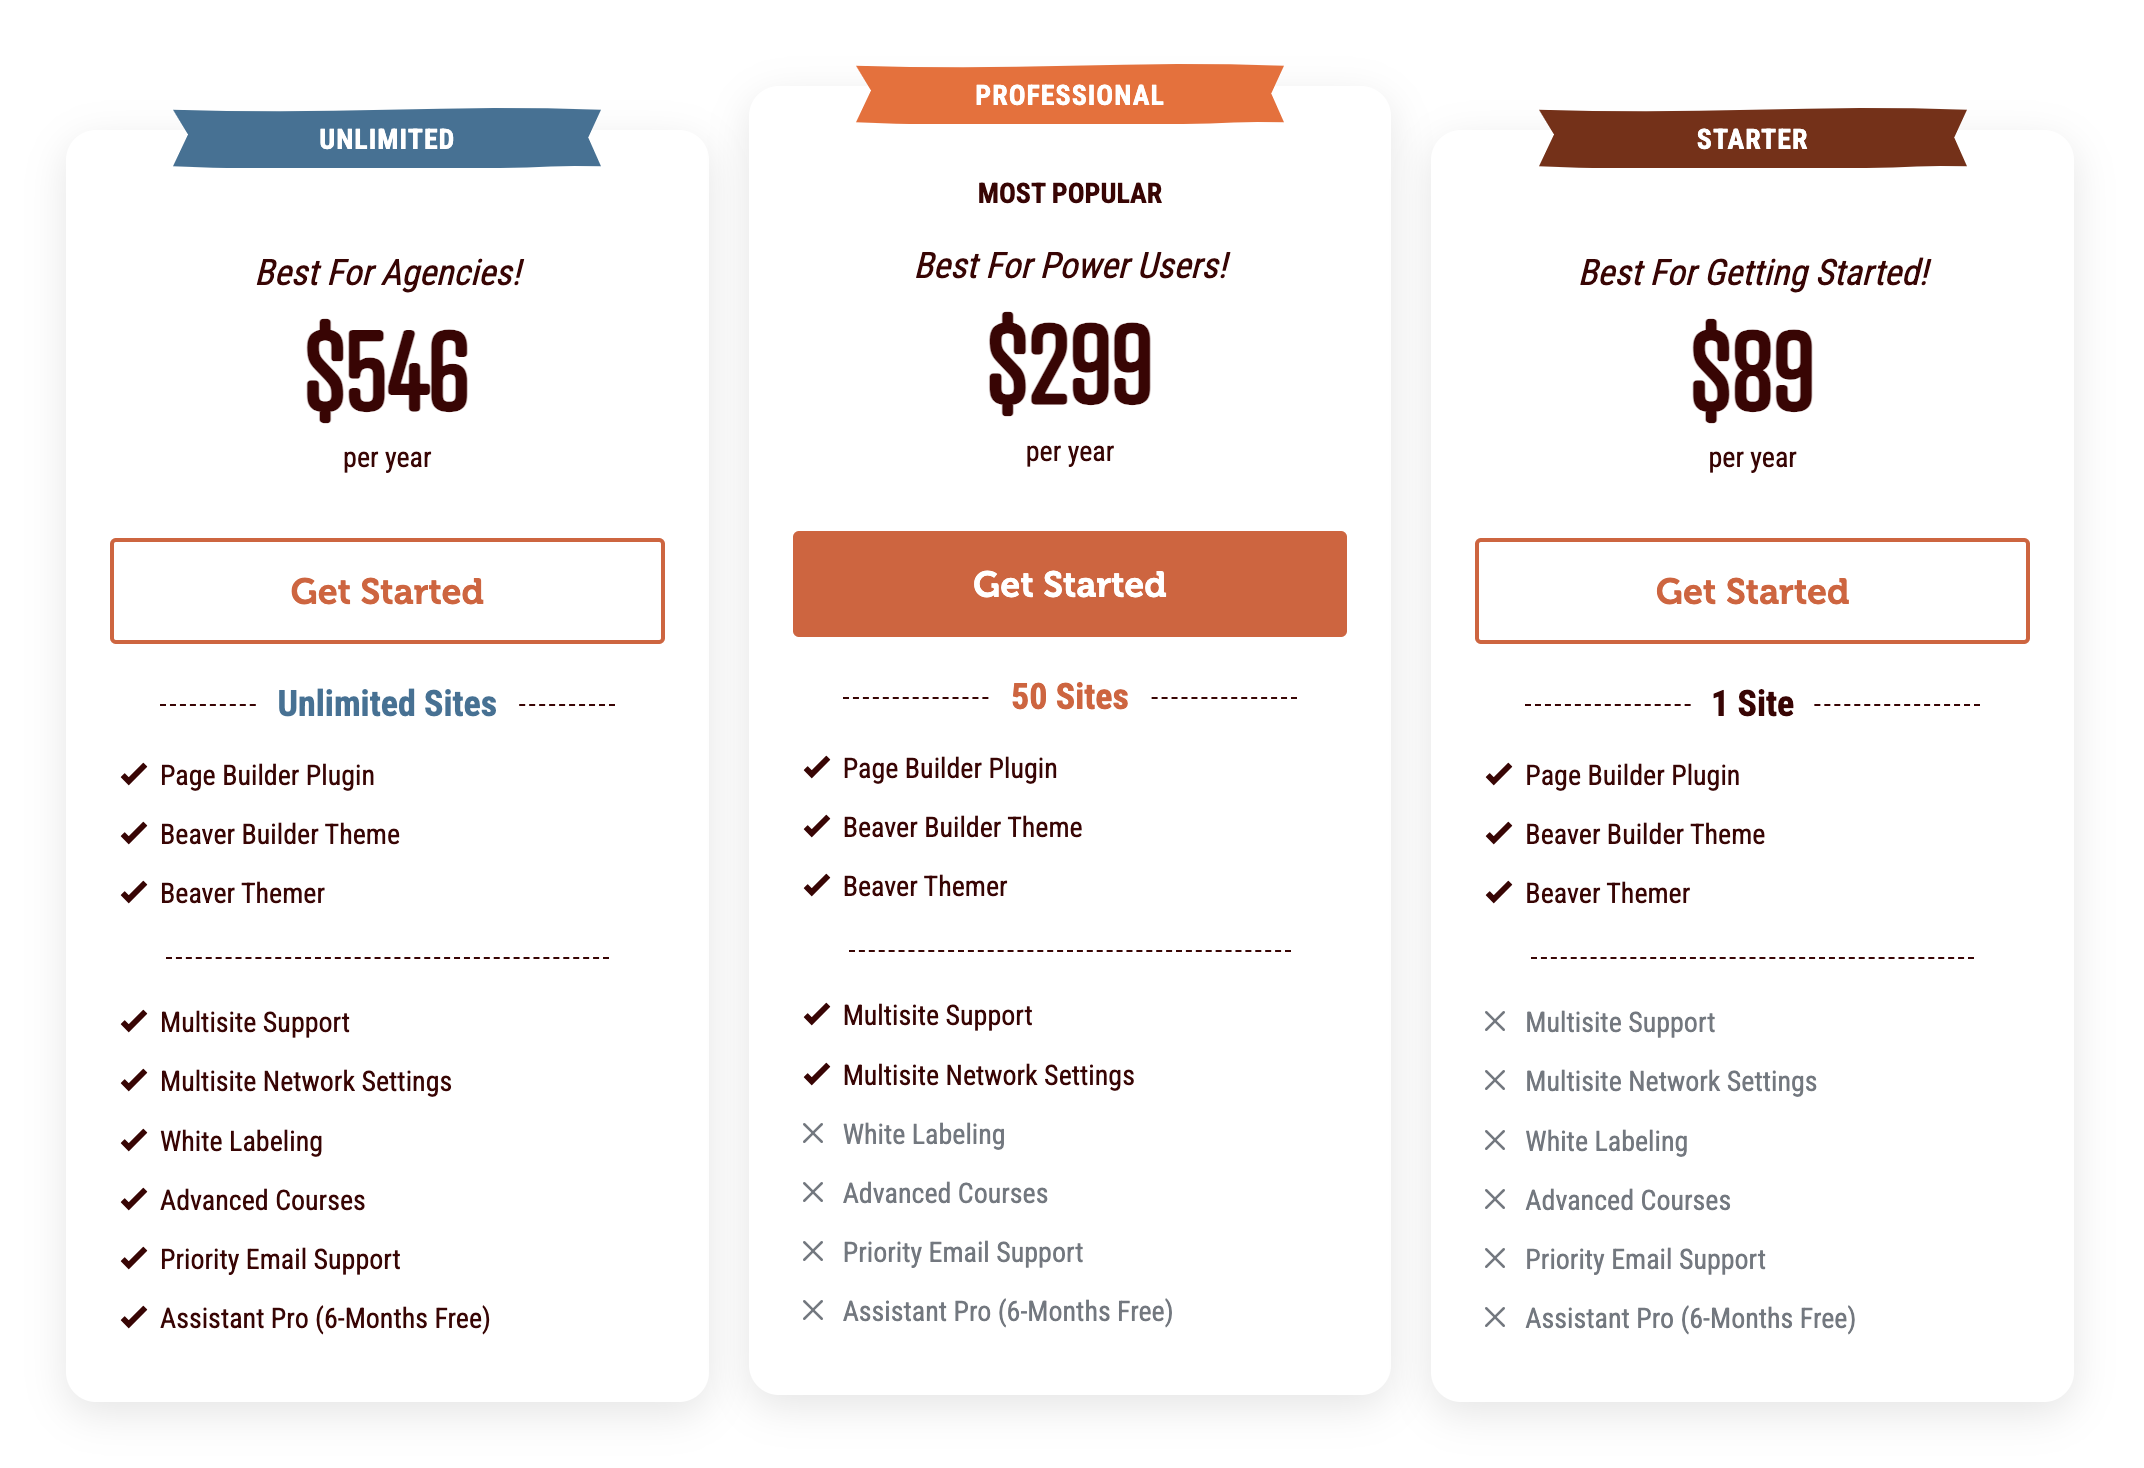
This means that when you invest in a premium plan, you gain access to advanced customization options.
Now that we’ve explored the benefits of Beaver Themer, let’s jump into the step-by-step process of creating headers with Beaver Themer.
How to Create Headers with Beaver Themer (In 4 Steps)
A custom header can help showcase your branding, make your site easier to navigate, and highlight key CTAs. Here’s how to create one with Beaver Themer:
To get started, be sure you have the premium Beaver Builder page builder and Beaver Themer plugins installed, activated, and licensed. Also, create a menu for your site by going to Appearance > Menus in the WordPress dashboard.
Step 1: Create a New Themer Layout
To create a new Themer layout, click on Beaver Builder > Themer Layouts from your WordPress admin area. Then, select Add New:

Here, you can give your layout a Title:
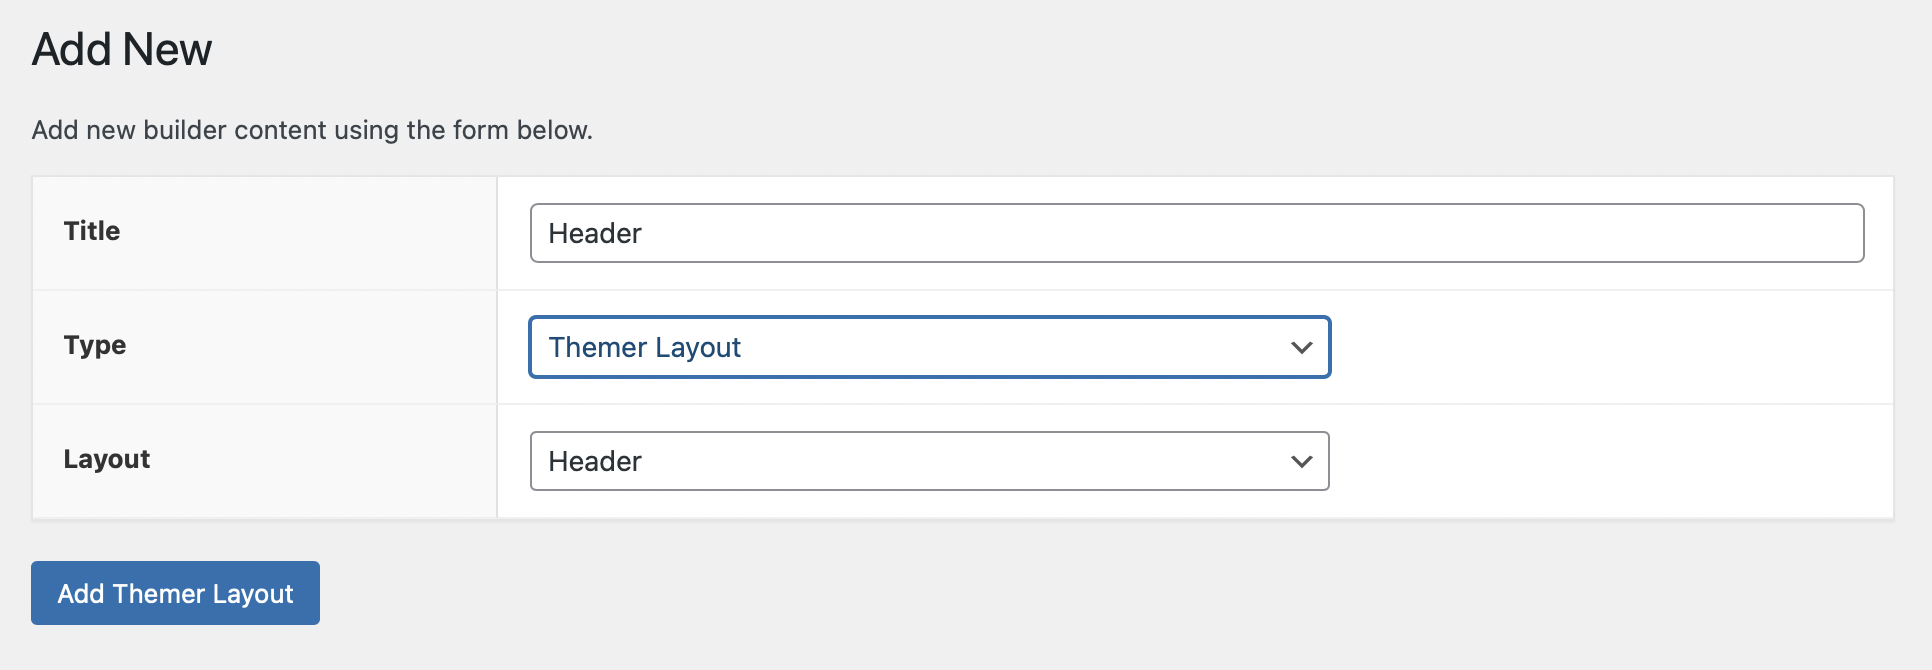
For Type, select Themer Layout. For Layout, use the dropdown menu to choose Header. Click Add Themer Layout to proceed.
Step 2: Configure the Settings
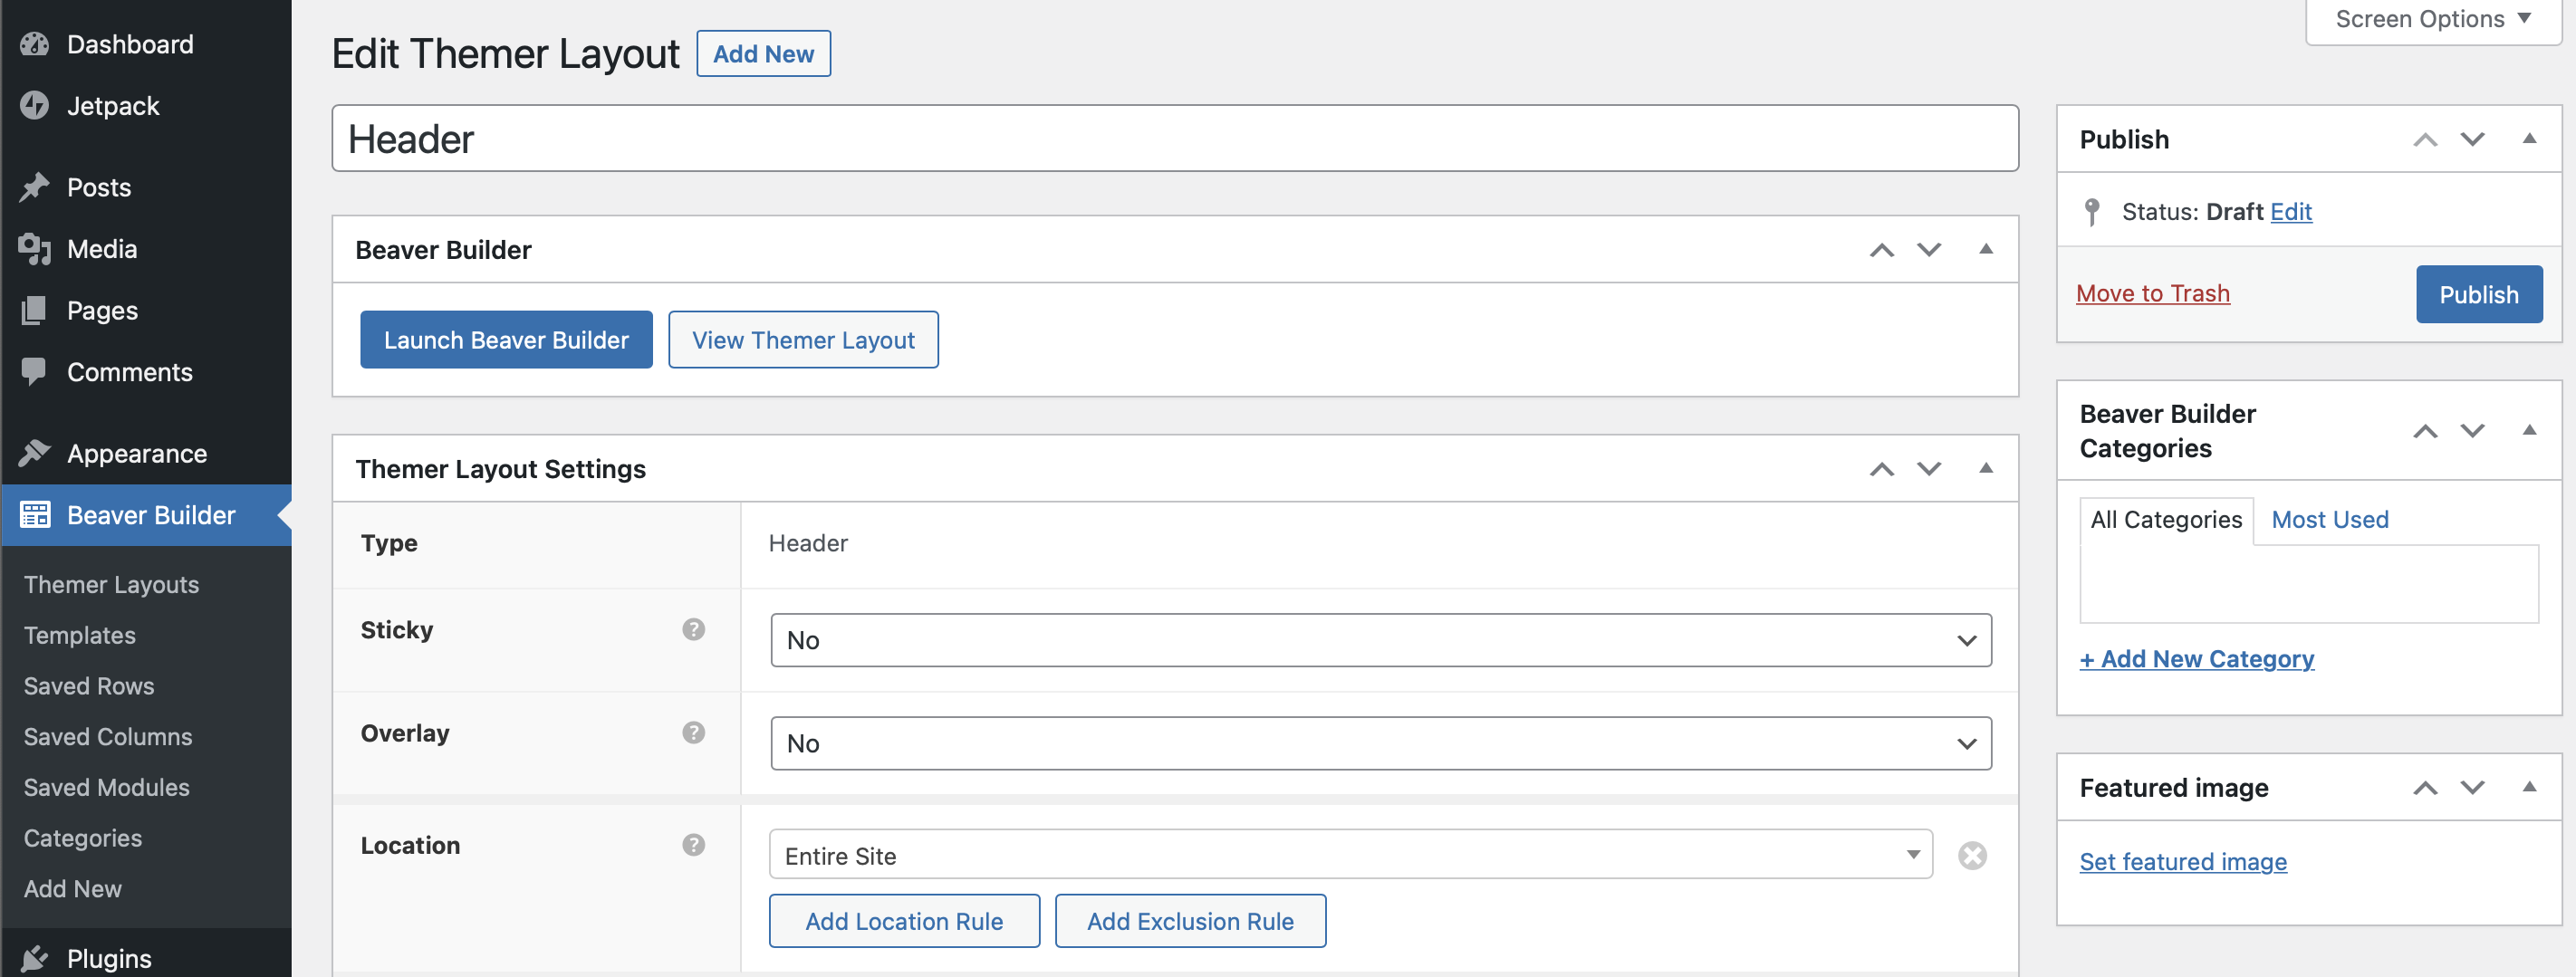
Next, on the settings page, define where and how the header will display:
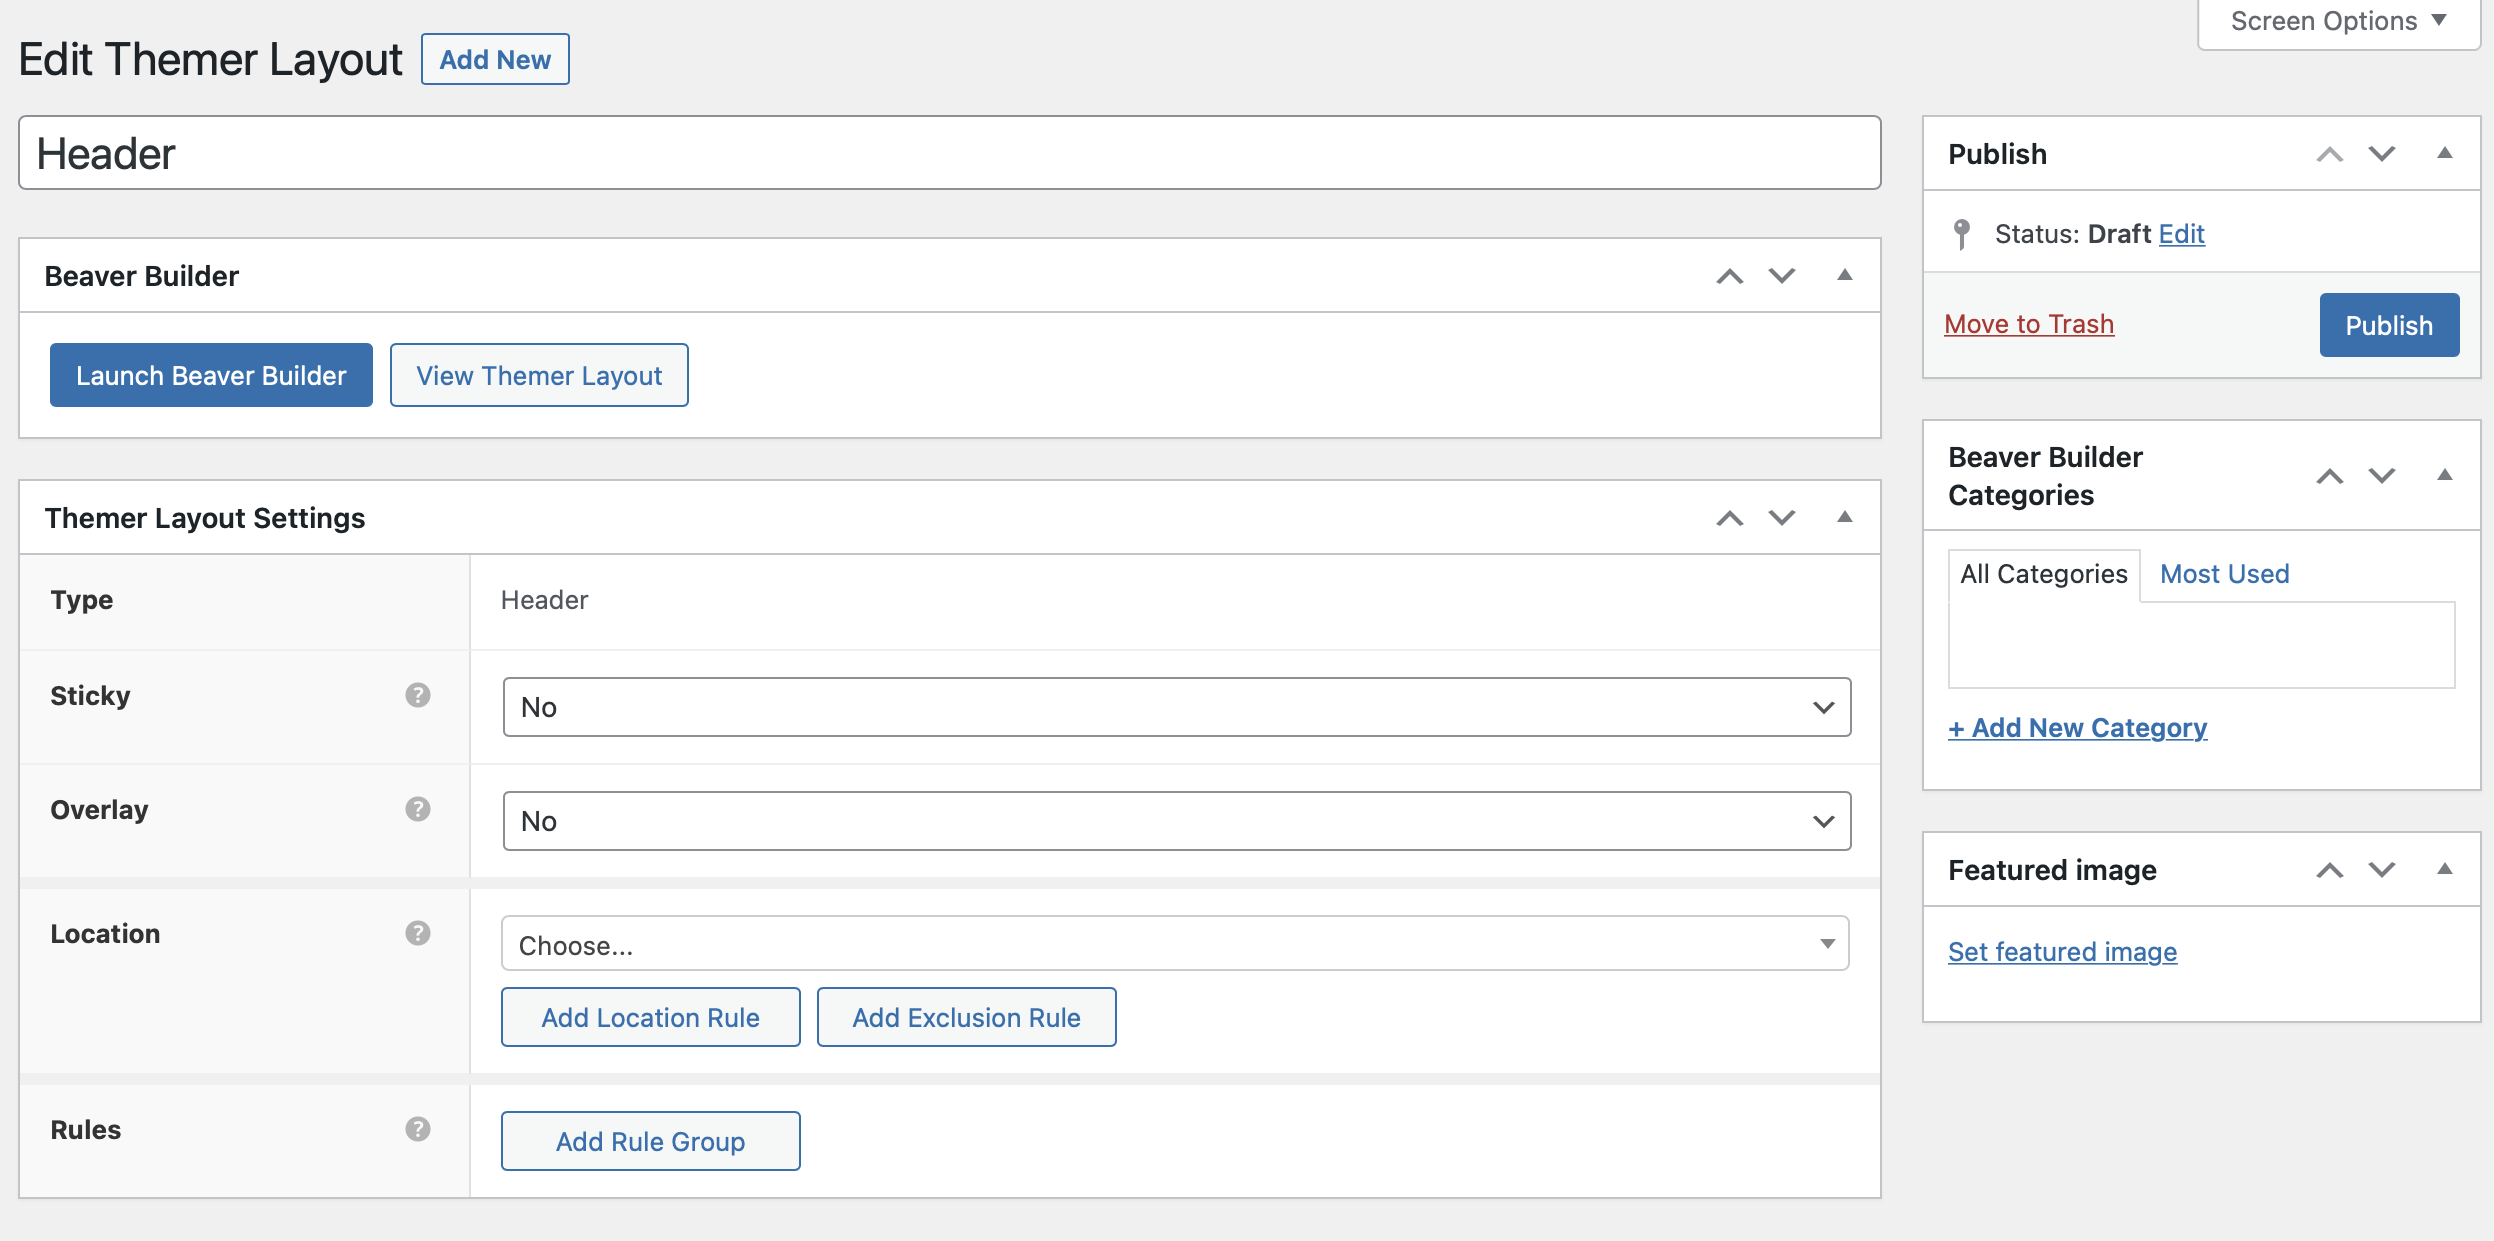
- Sticky Header: This header style stays fixed at the top of the browser window as you scroll down the page.
- Overlay Header: Select this to make the header background transparent, allowing content to sit at the top of the screen.
- Location: Choose if the header should display across the entire site or on specific pages only.
- Rules: Control visibility based on user login status or other criteria.
Click Publish to save these settings.
Step 3: Customize Your Header Layout
Now that your settings are configured, click Launch Beaver Builder to open your new header in the editor:
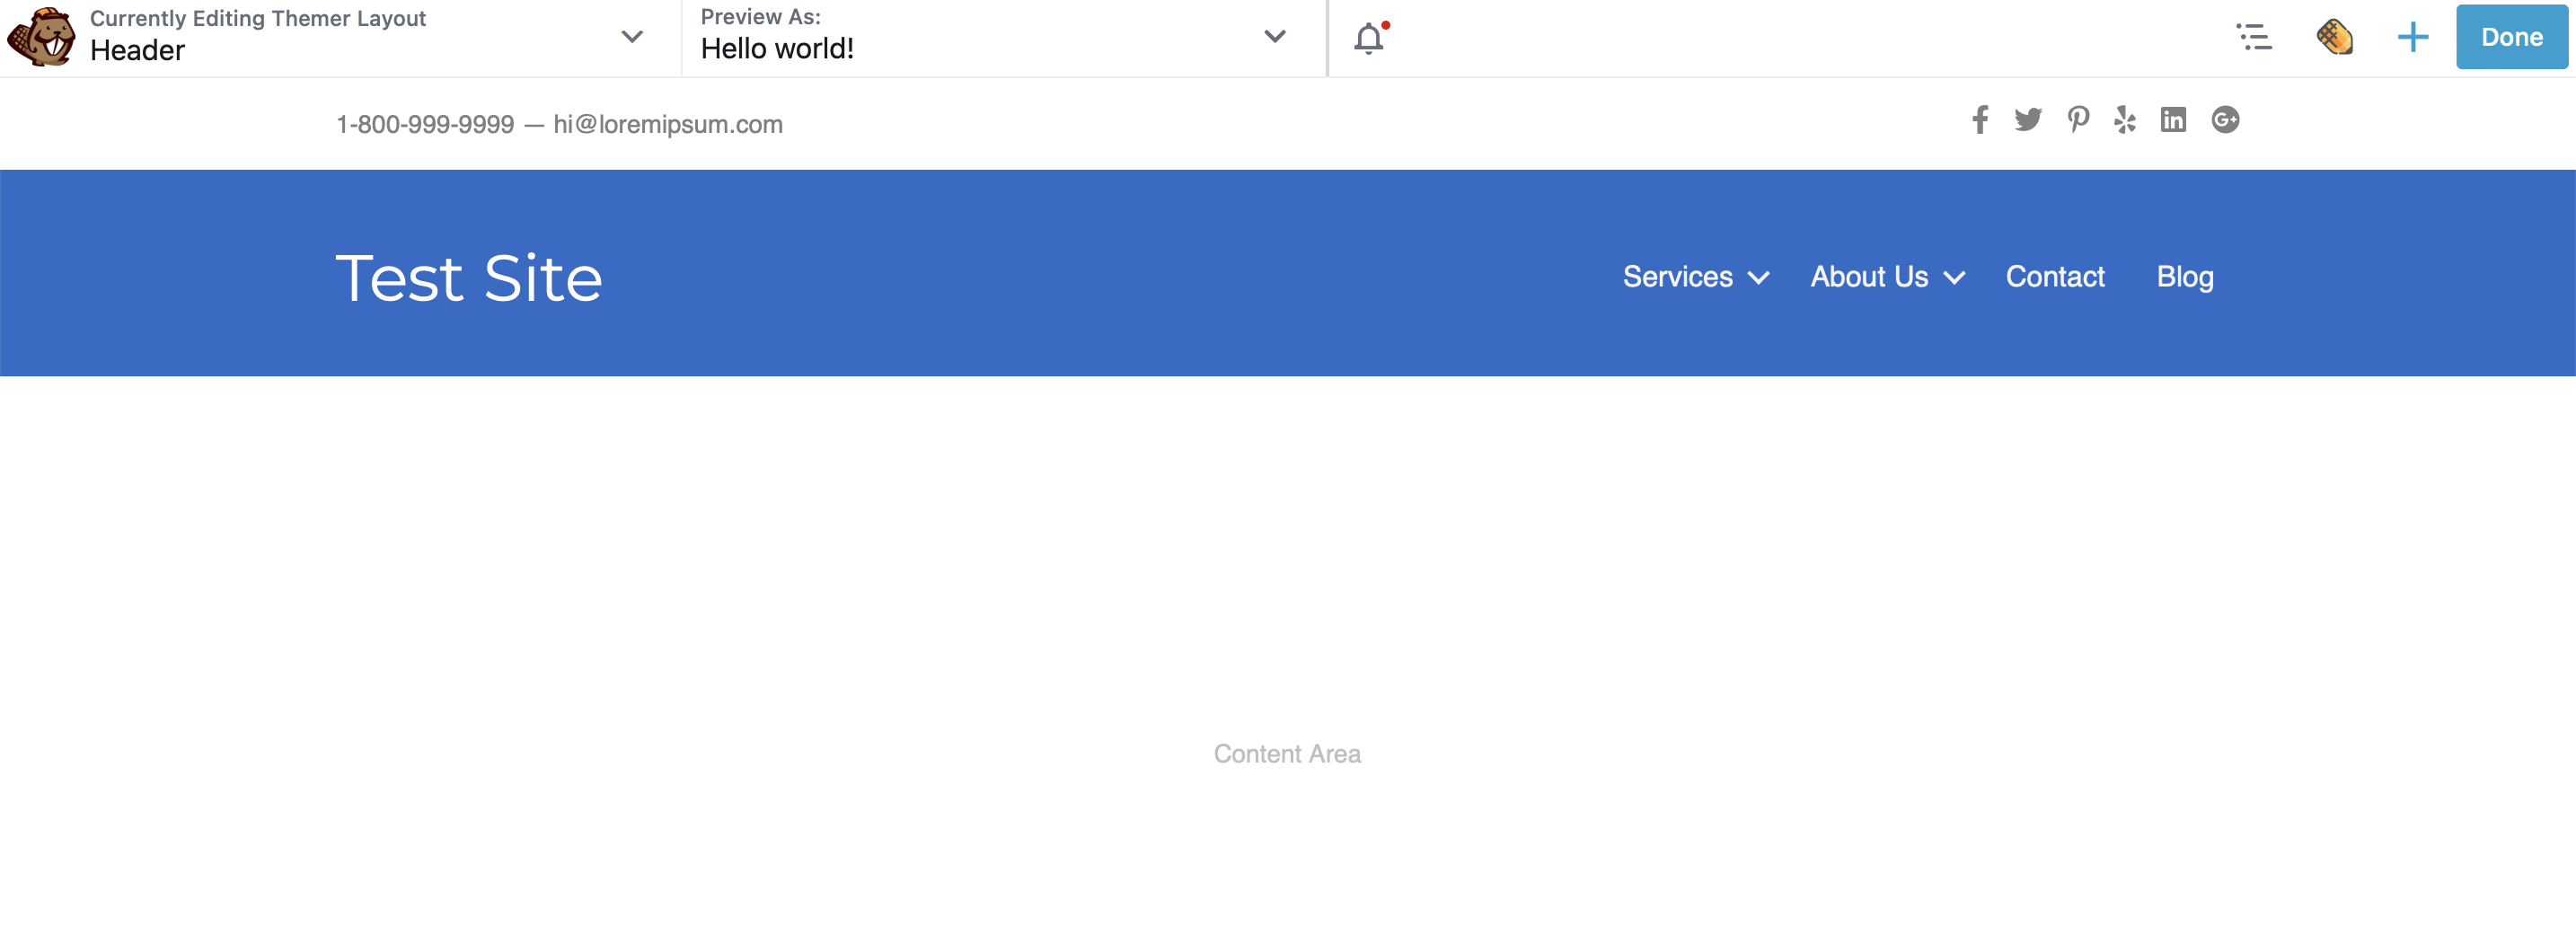
Here, Beaver Builder automatically provides you with a default header template with several modules including those for contact details, social icons, a title, and a menu:
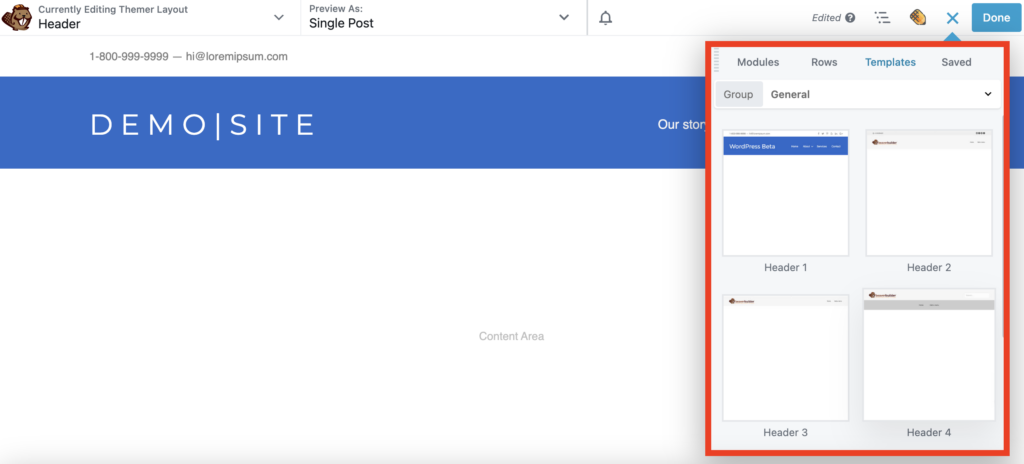
You can delete these modules to build your header from scratch, or, if you prefer, start with a different pre-designed header template available in the Content panel:
You can also personalize each module with your own details. For example, you can add links to your social accounts or edit the website title. Just click on the module you wish to edit, and the settings popup box will appear for easy customization.
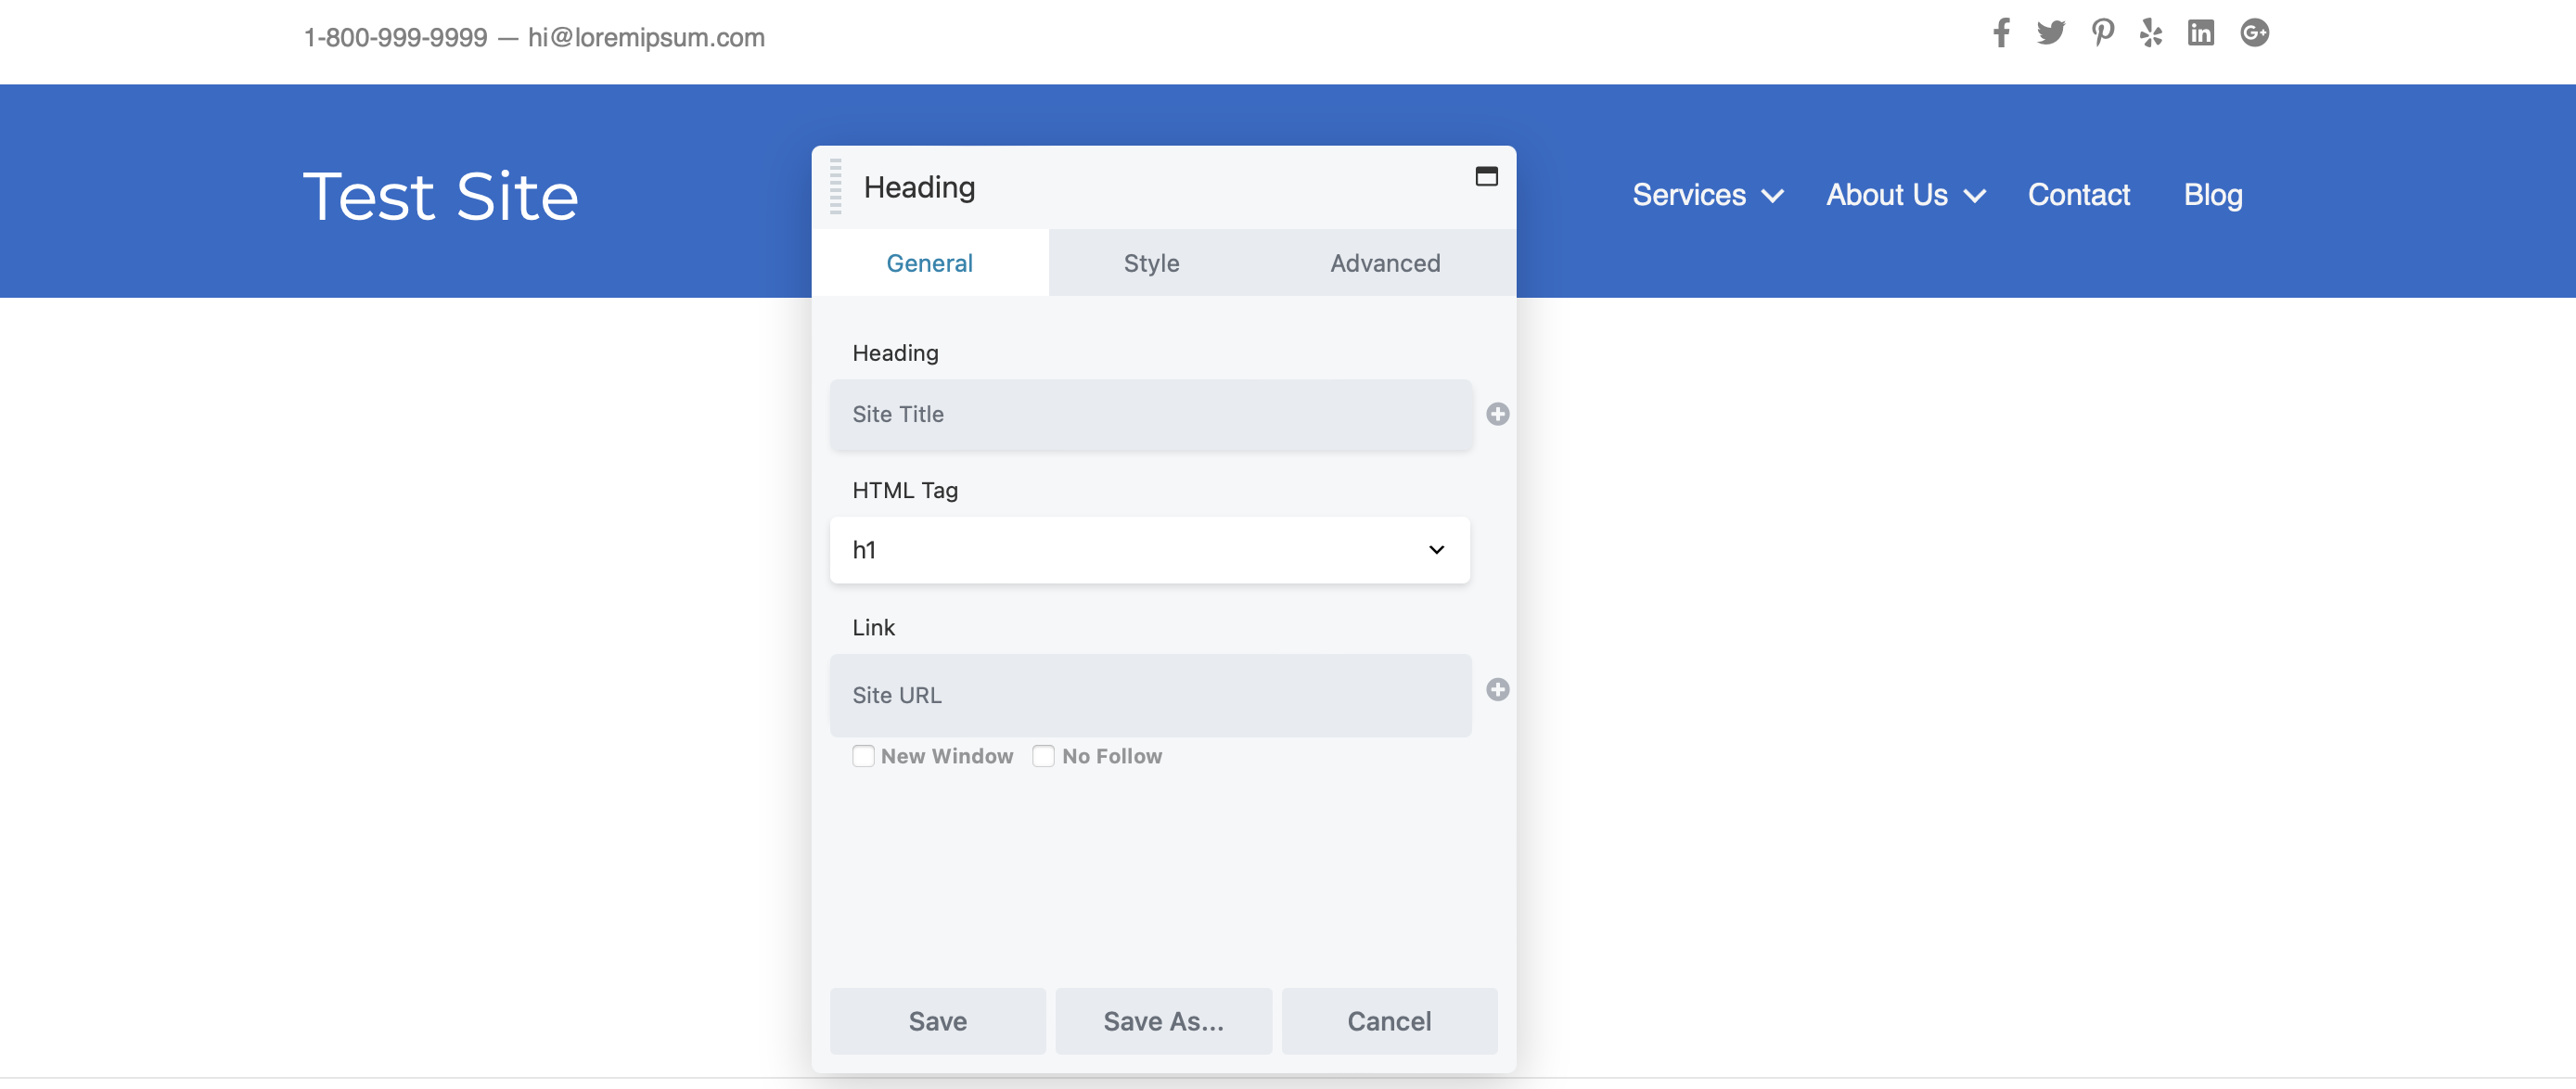
Some modules use a field connection to dynamically generate content. For example, your website heading might automatically pull from your Site Title in WordPress settings. To remove this field connection, simply click the “X” next to it.
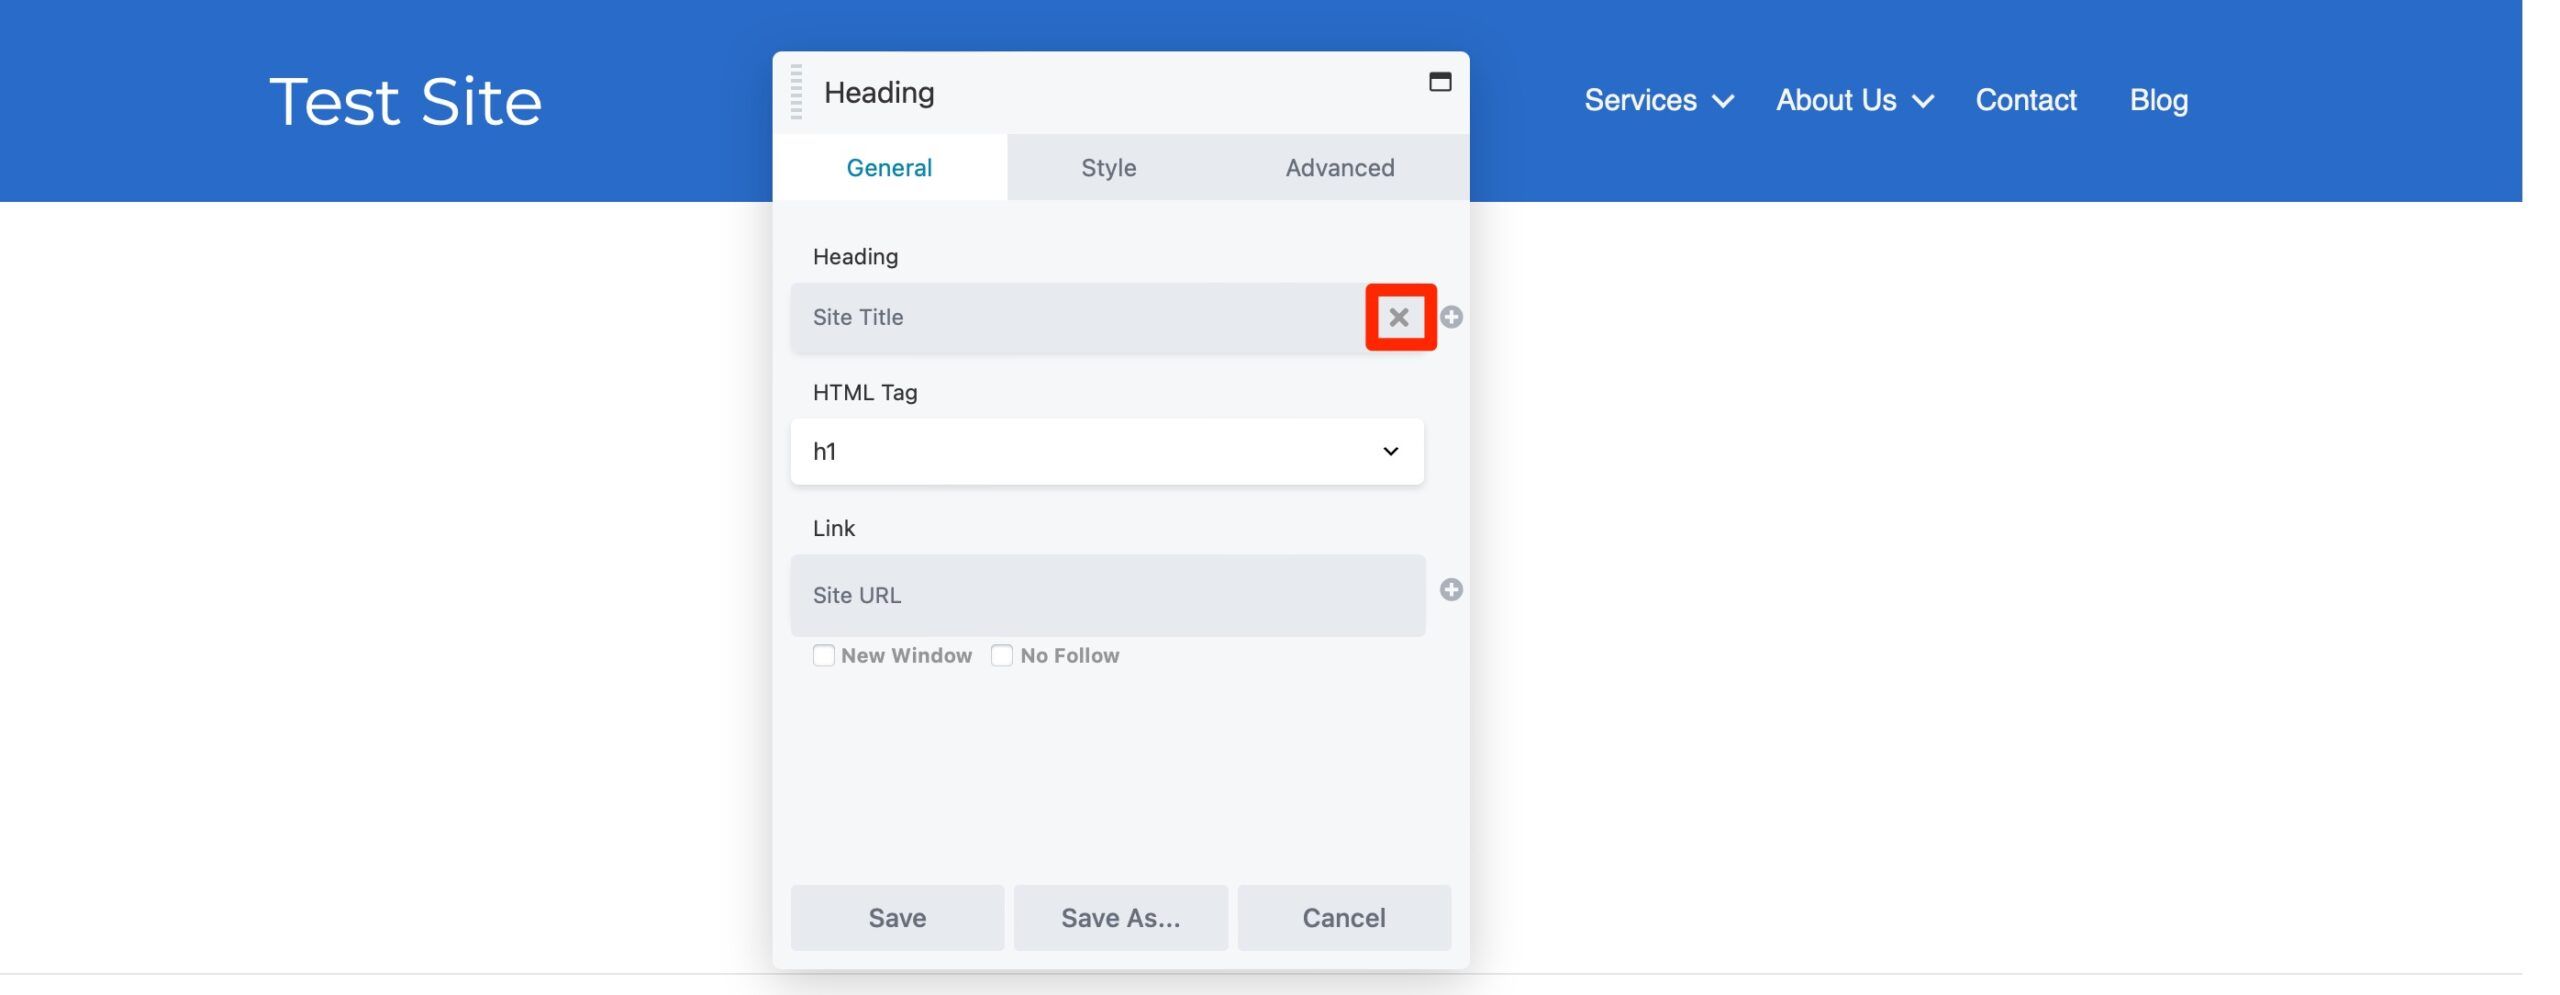
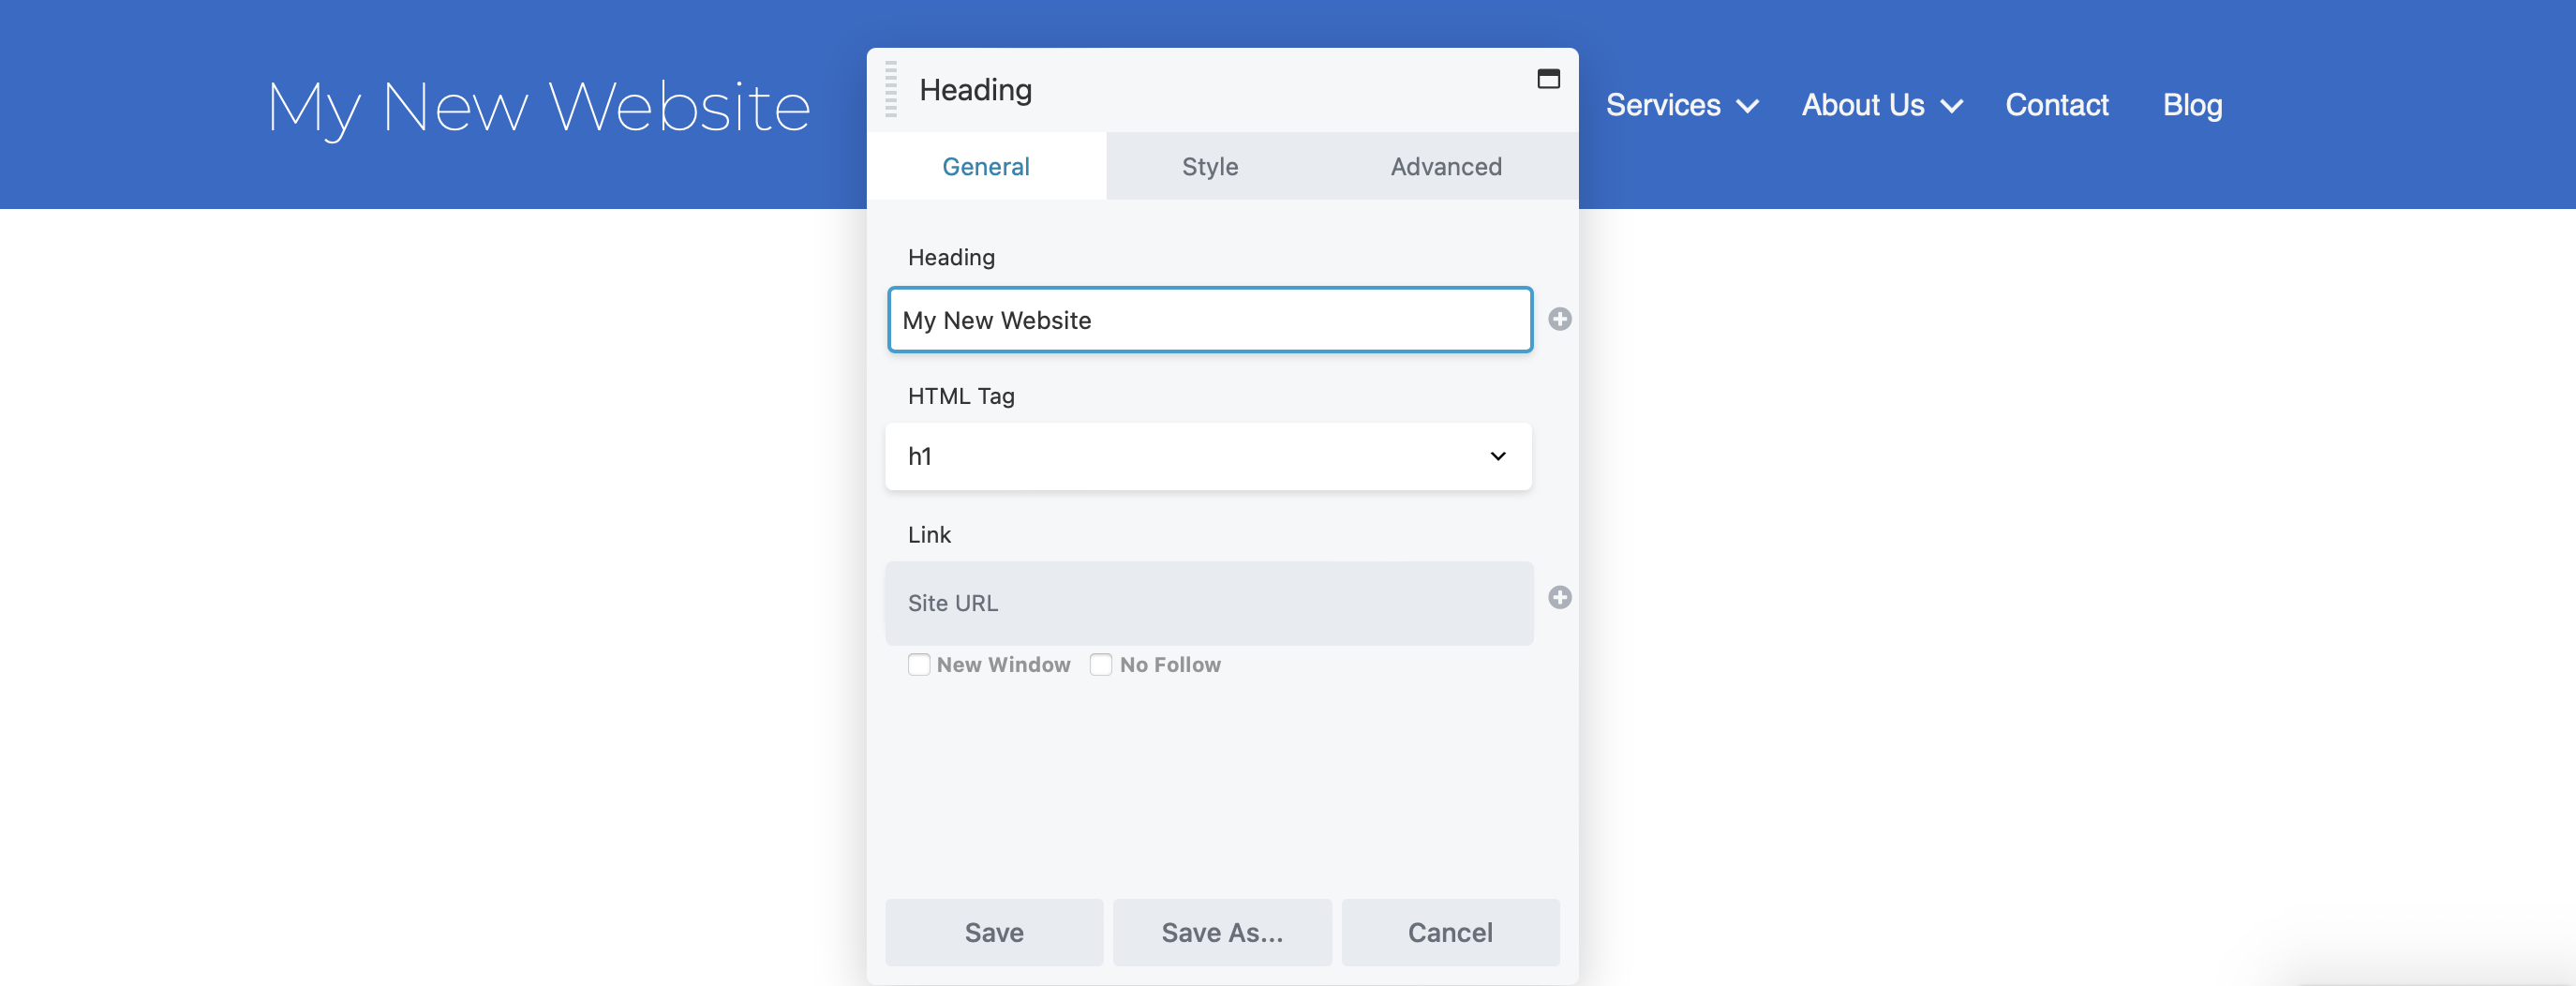
Then, simply type your preferred title into the Heading text field:
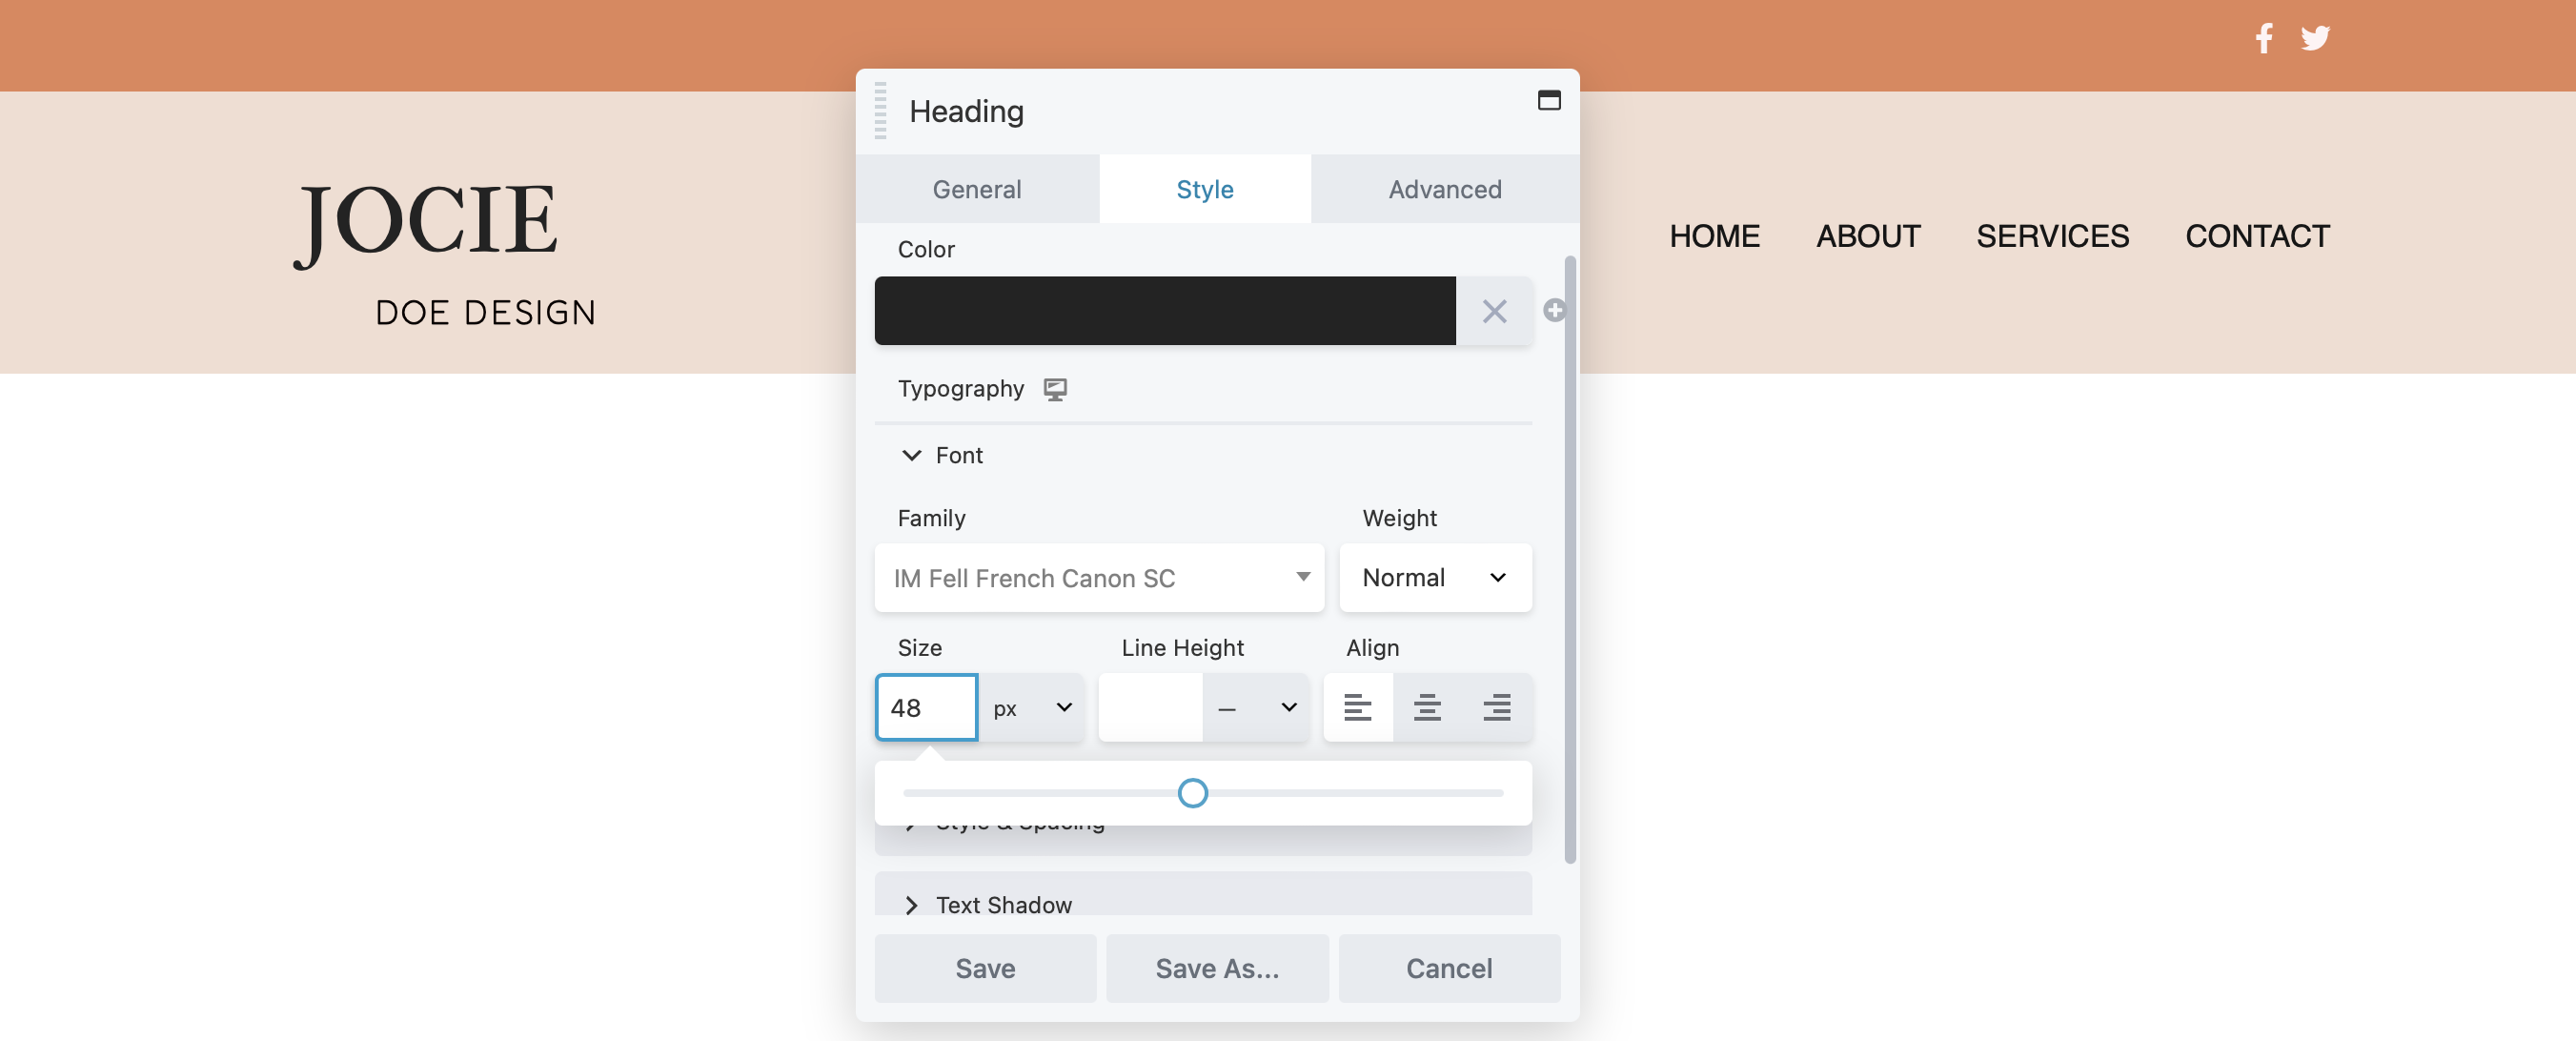
In the Style tab, you can adjust colors, fonts, and more to match your brand’s look. Use the color picker to select the ideal shade, and choose a font that aligns with your brand’s personality. Finally, adjust the font size using the slider for a perfect fit.
If you’d like to rearrange the modules in your header, simply click the Move icon and drag each module to your preferred position within the layout:

To update the background color of your row, click the Wrench icon. In the Row Settings popup, go to the Style tab, then scroll to Background Color and choose your desired shade:
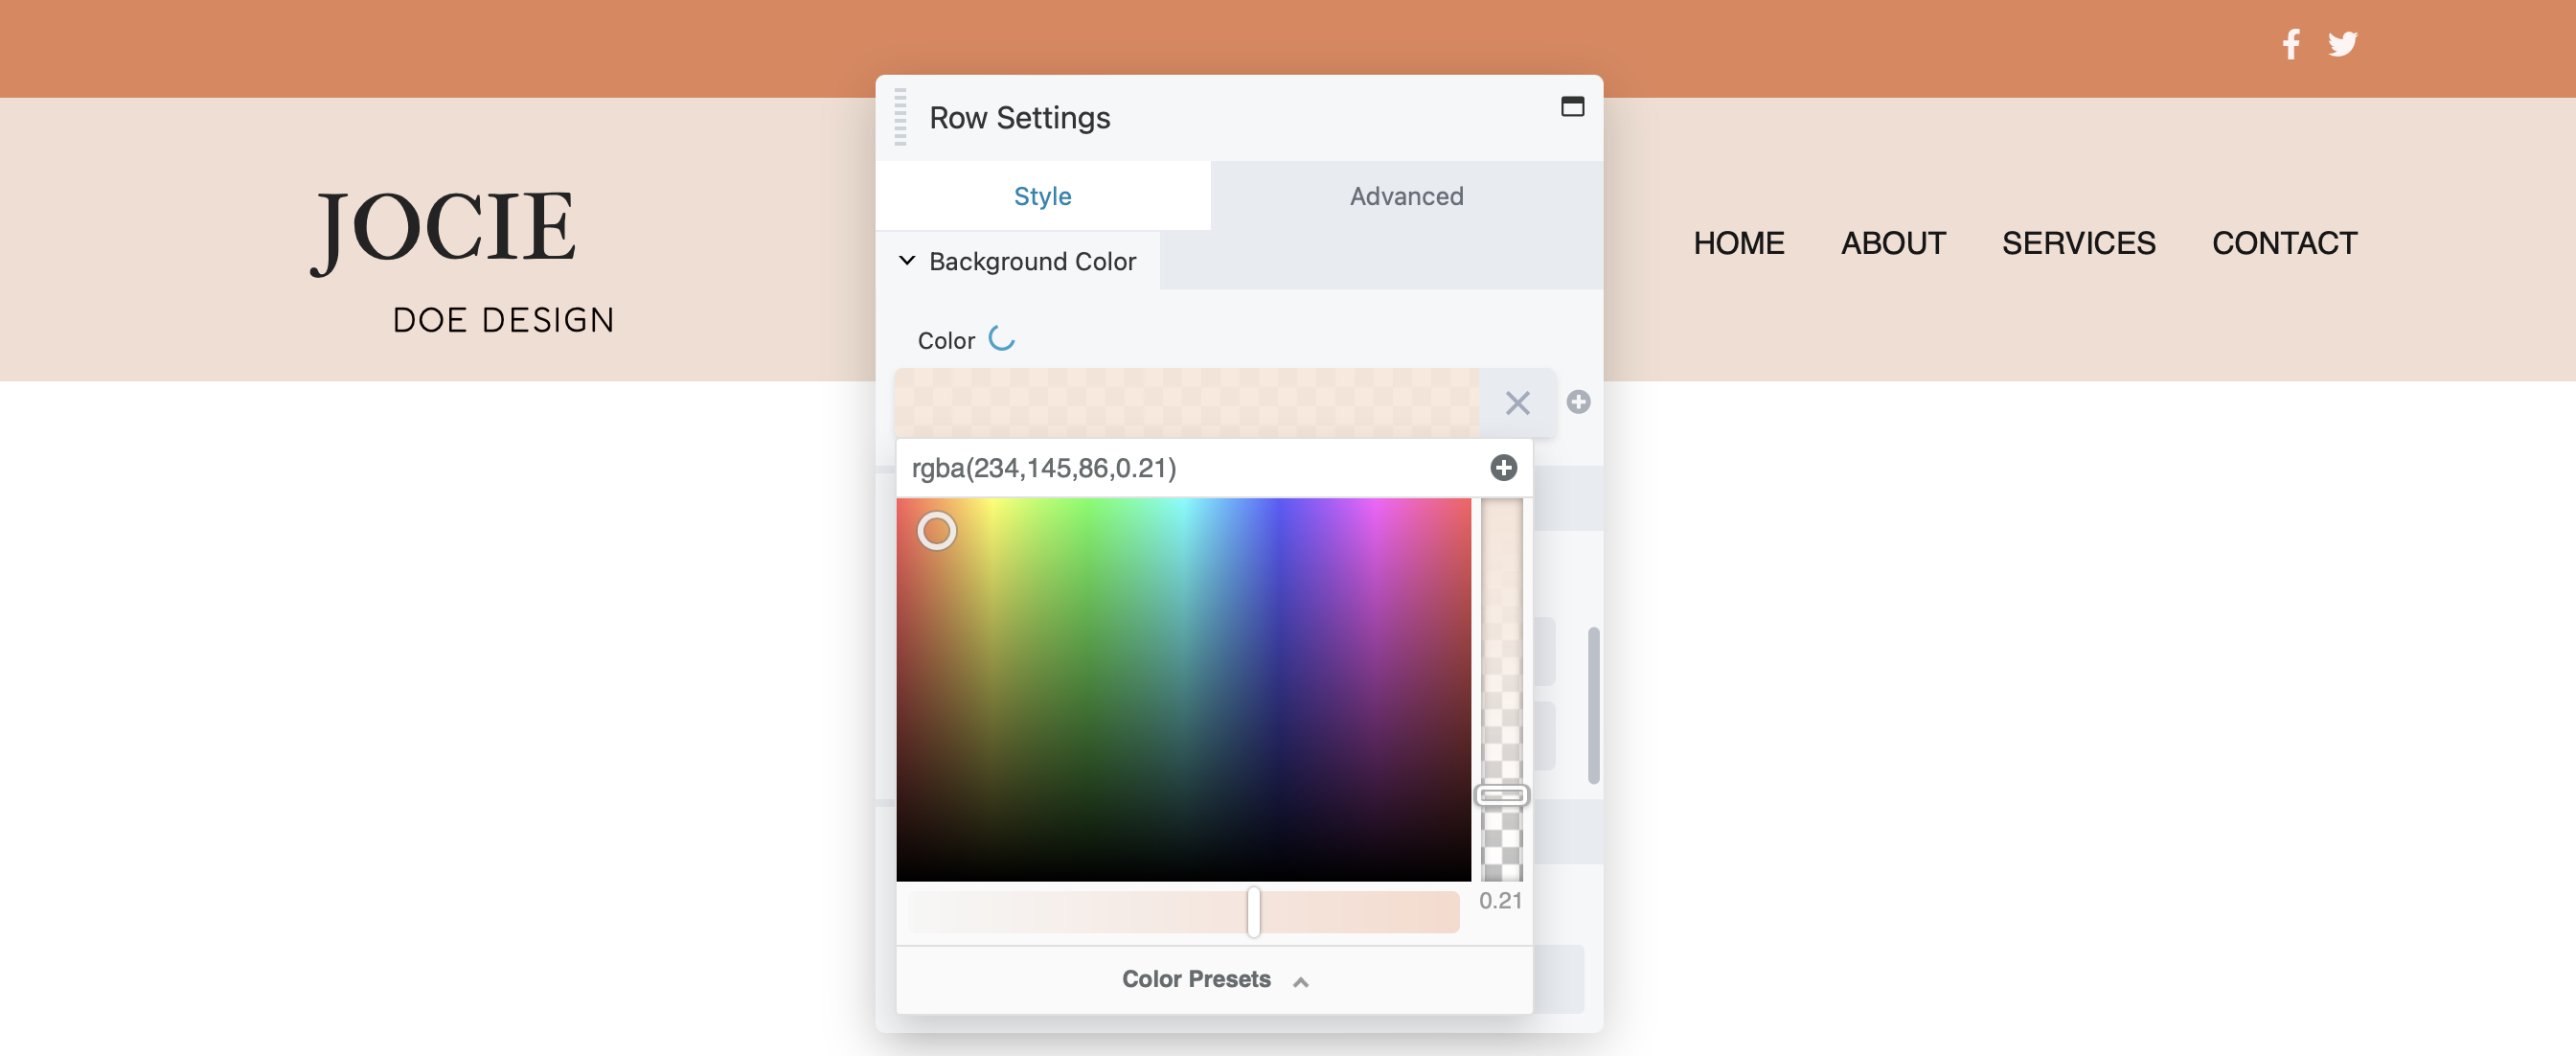
Note that you can edit any row, column, or module in the same manner by clicking on the Wrench icon.
Step 4: Add Content to Your Header
You might also consider adding more modules to your header. As noted earlier, Beaver Builder allows for dynamic content through field connections.
To set up your own field connections, simply click the + icon next to the box to view the available fields:
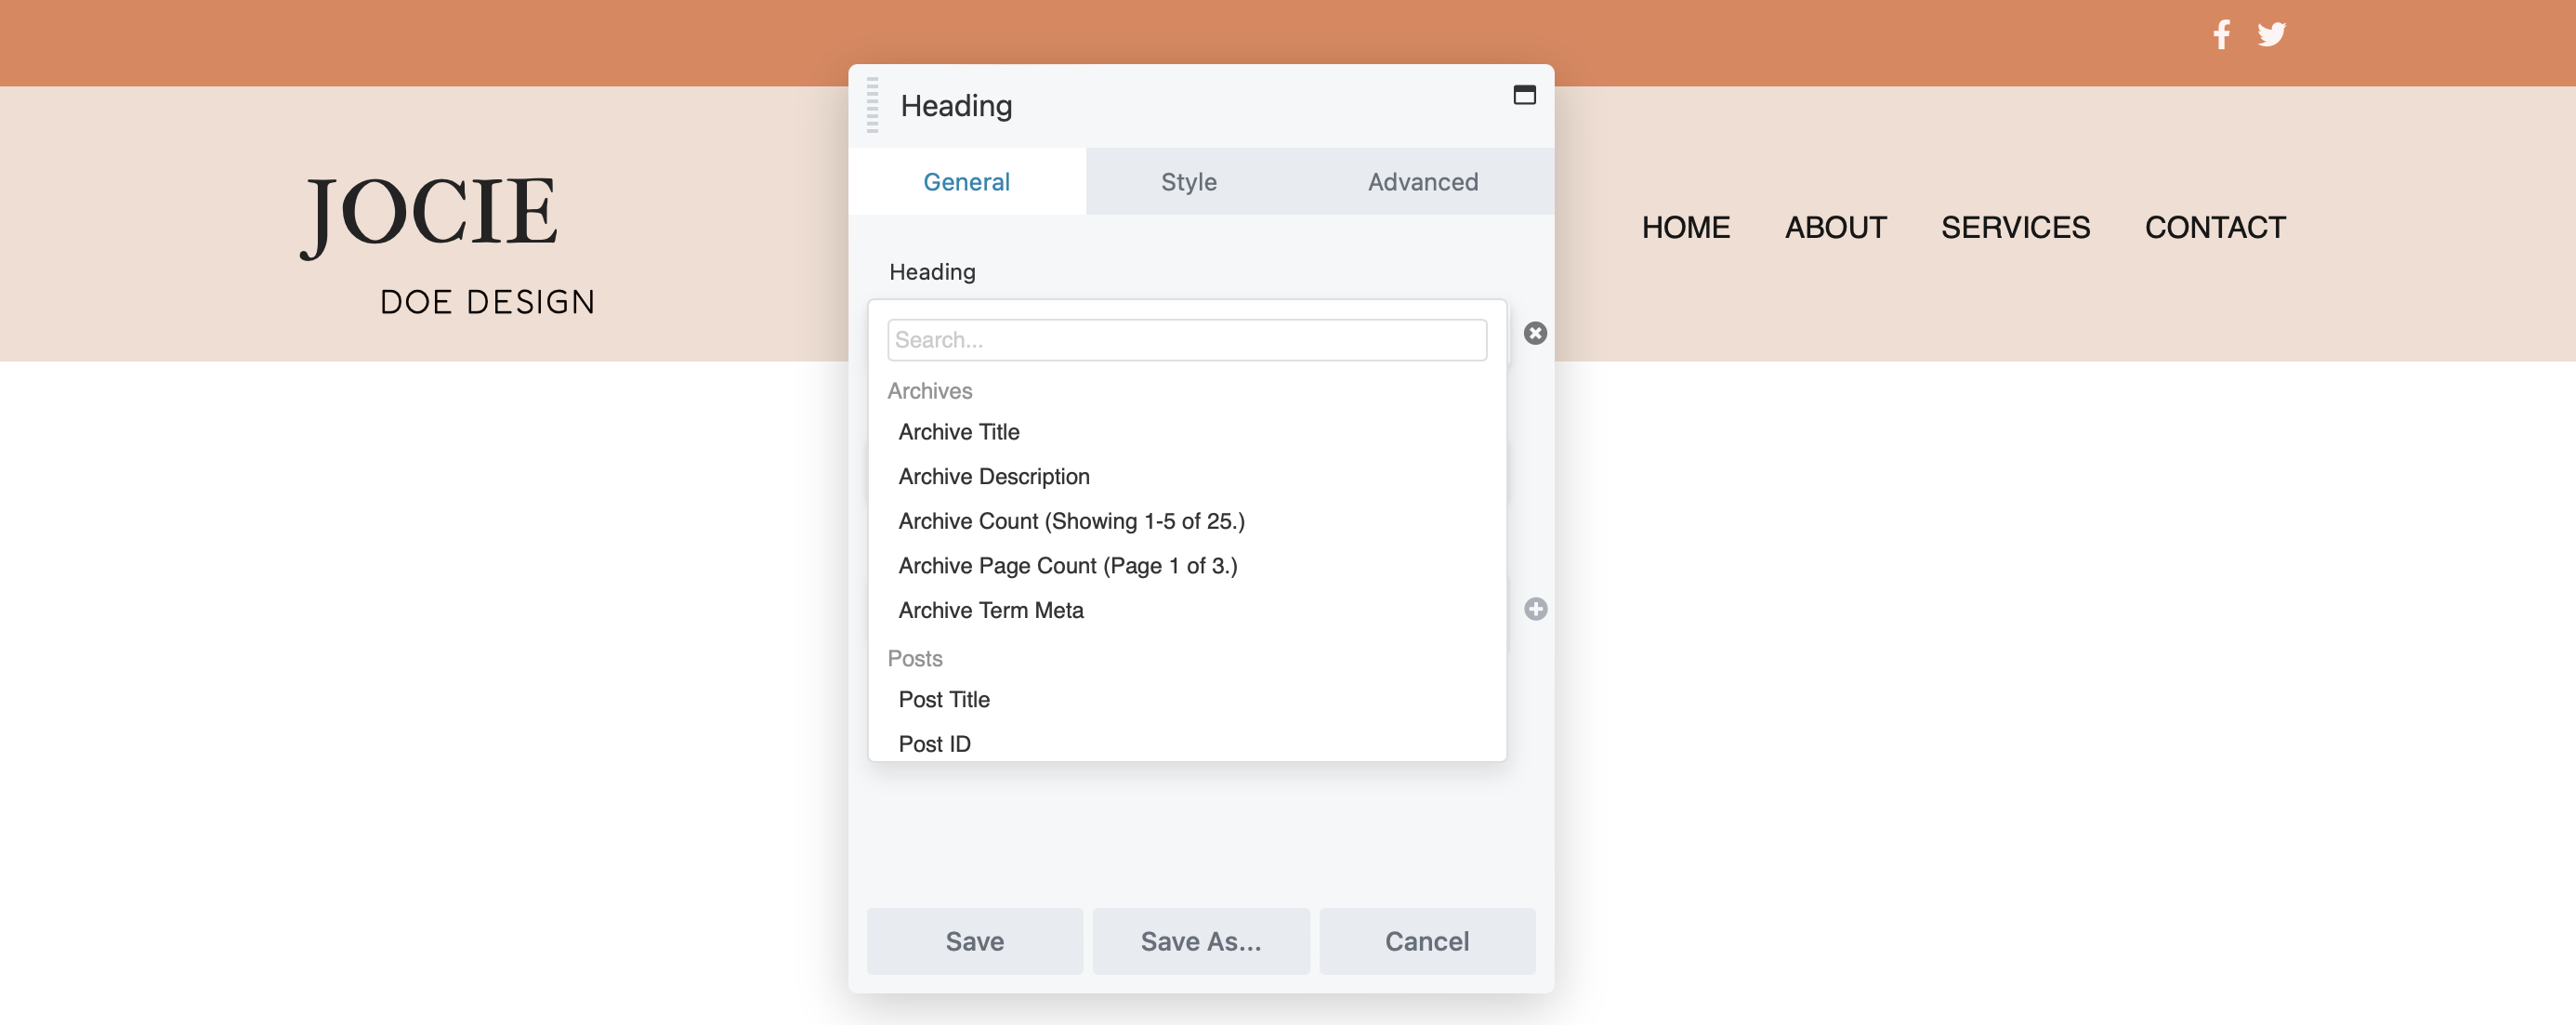
Then, click Connect to generate your dynamic content.
One of the best parts about creating a header with Beaver Builder is that you can choose any of the modules to add to your header. To access your available modules, simply click on the + icon:
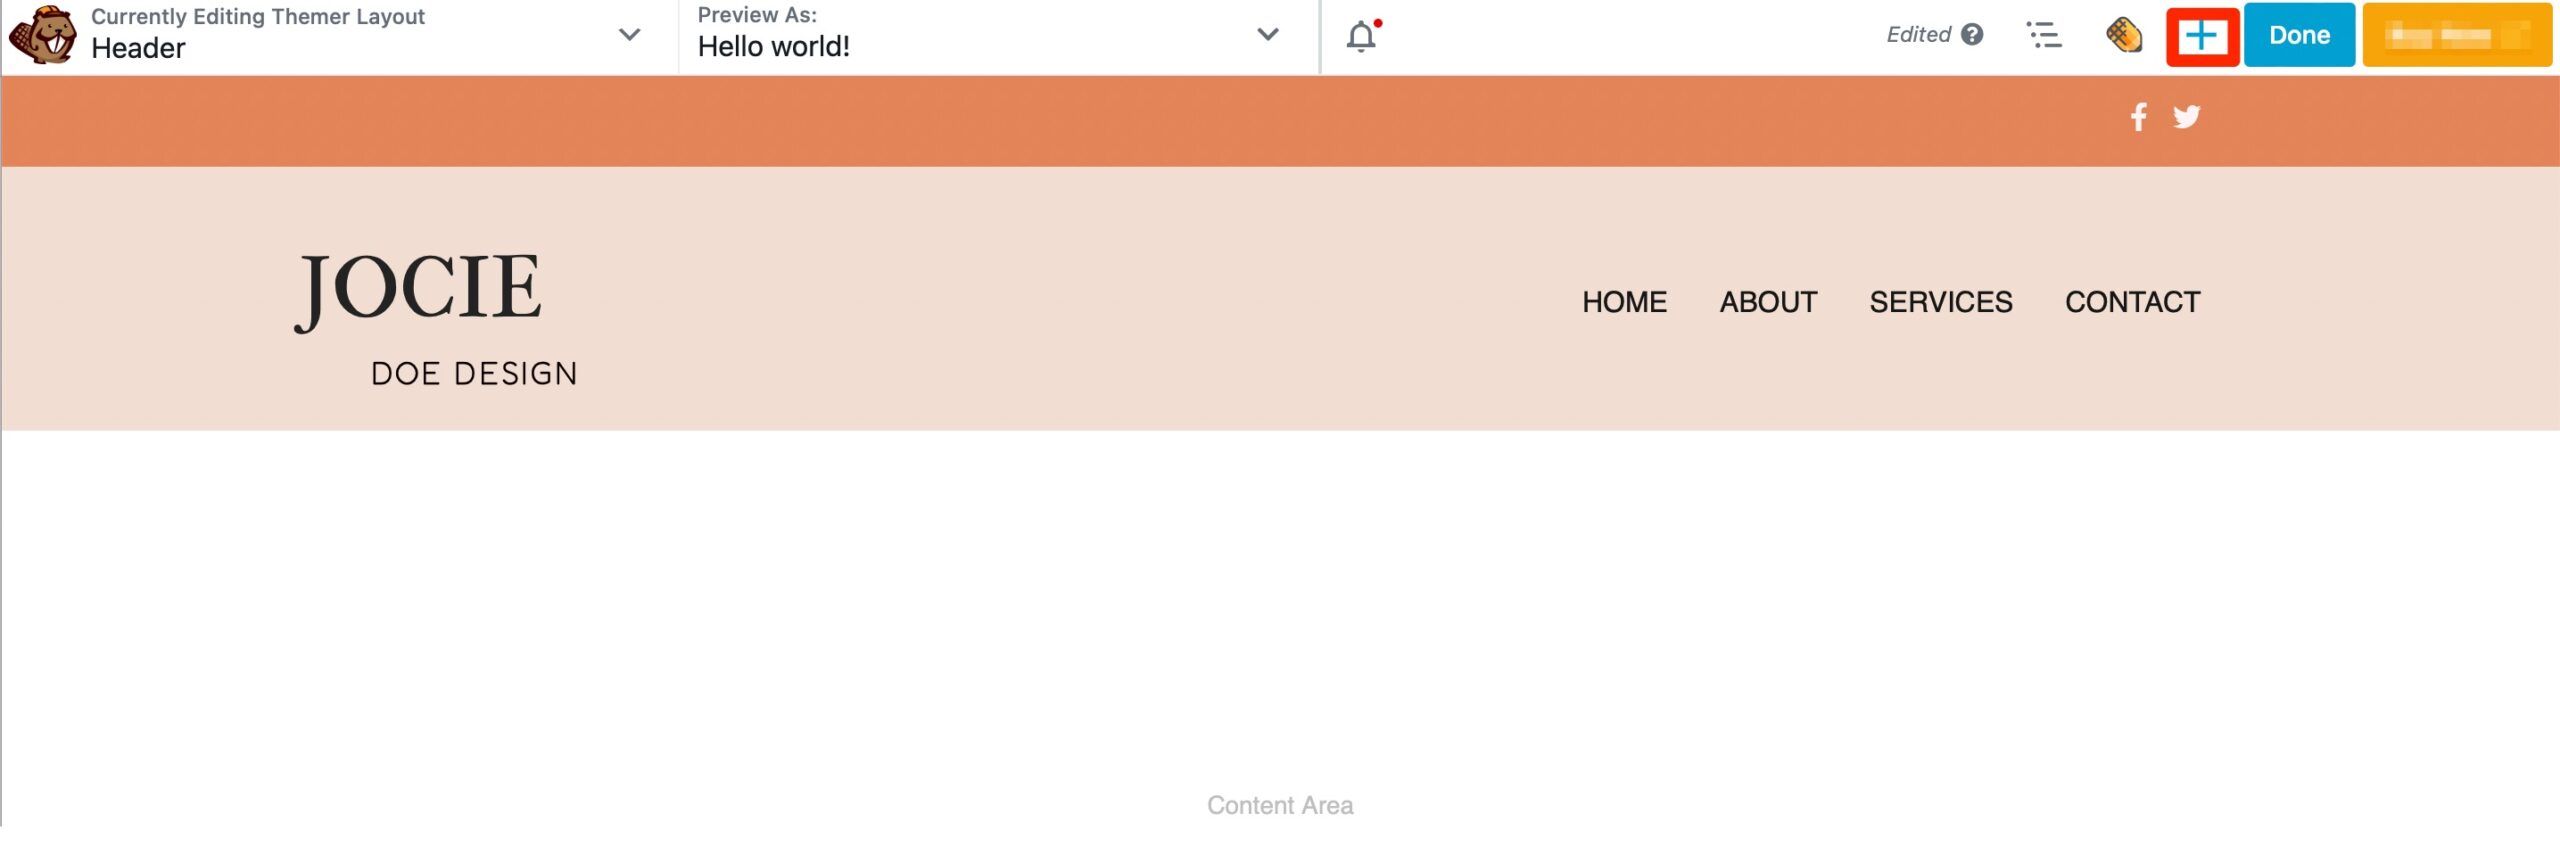
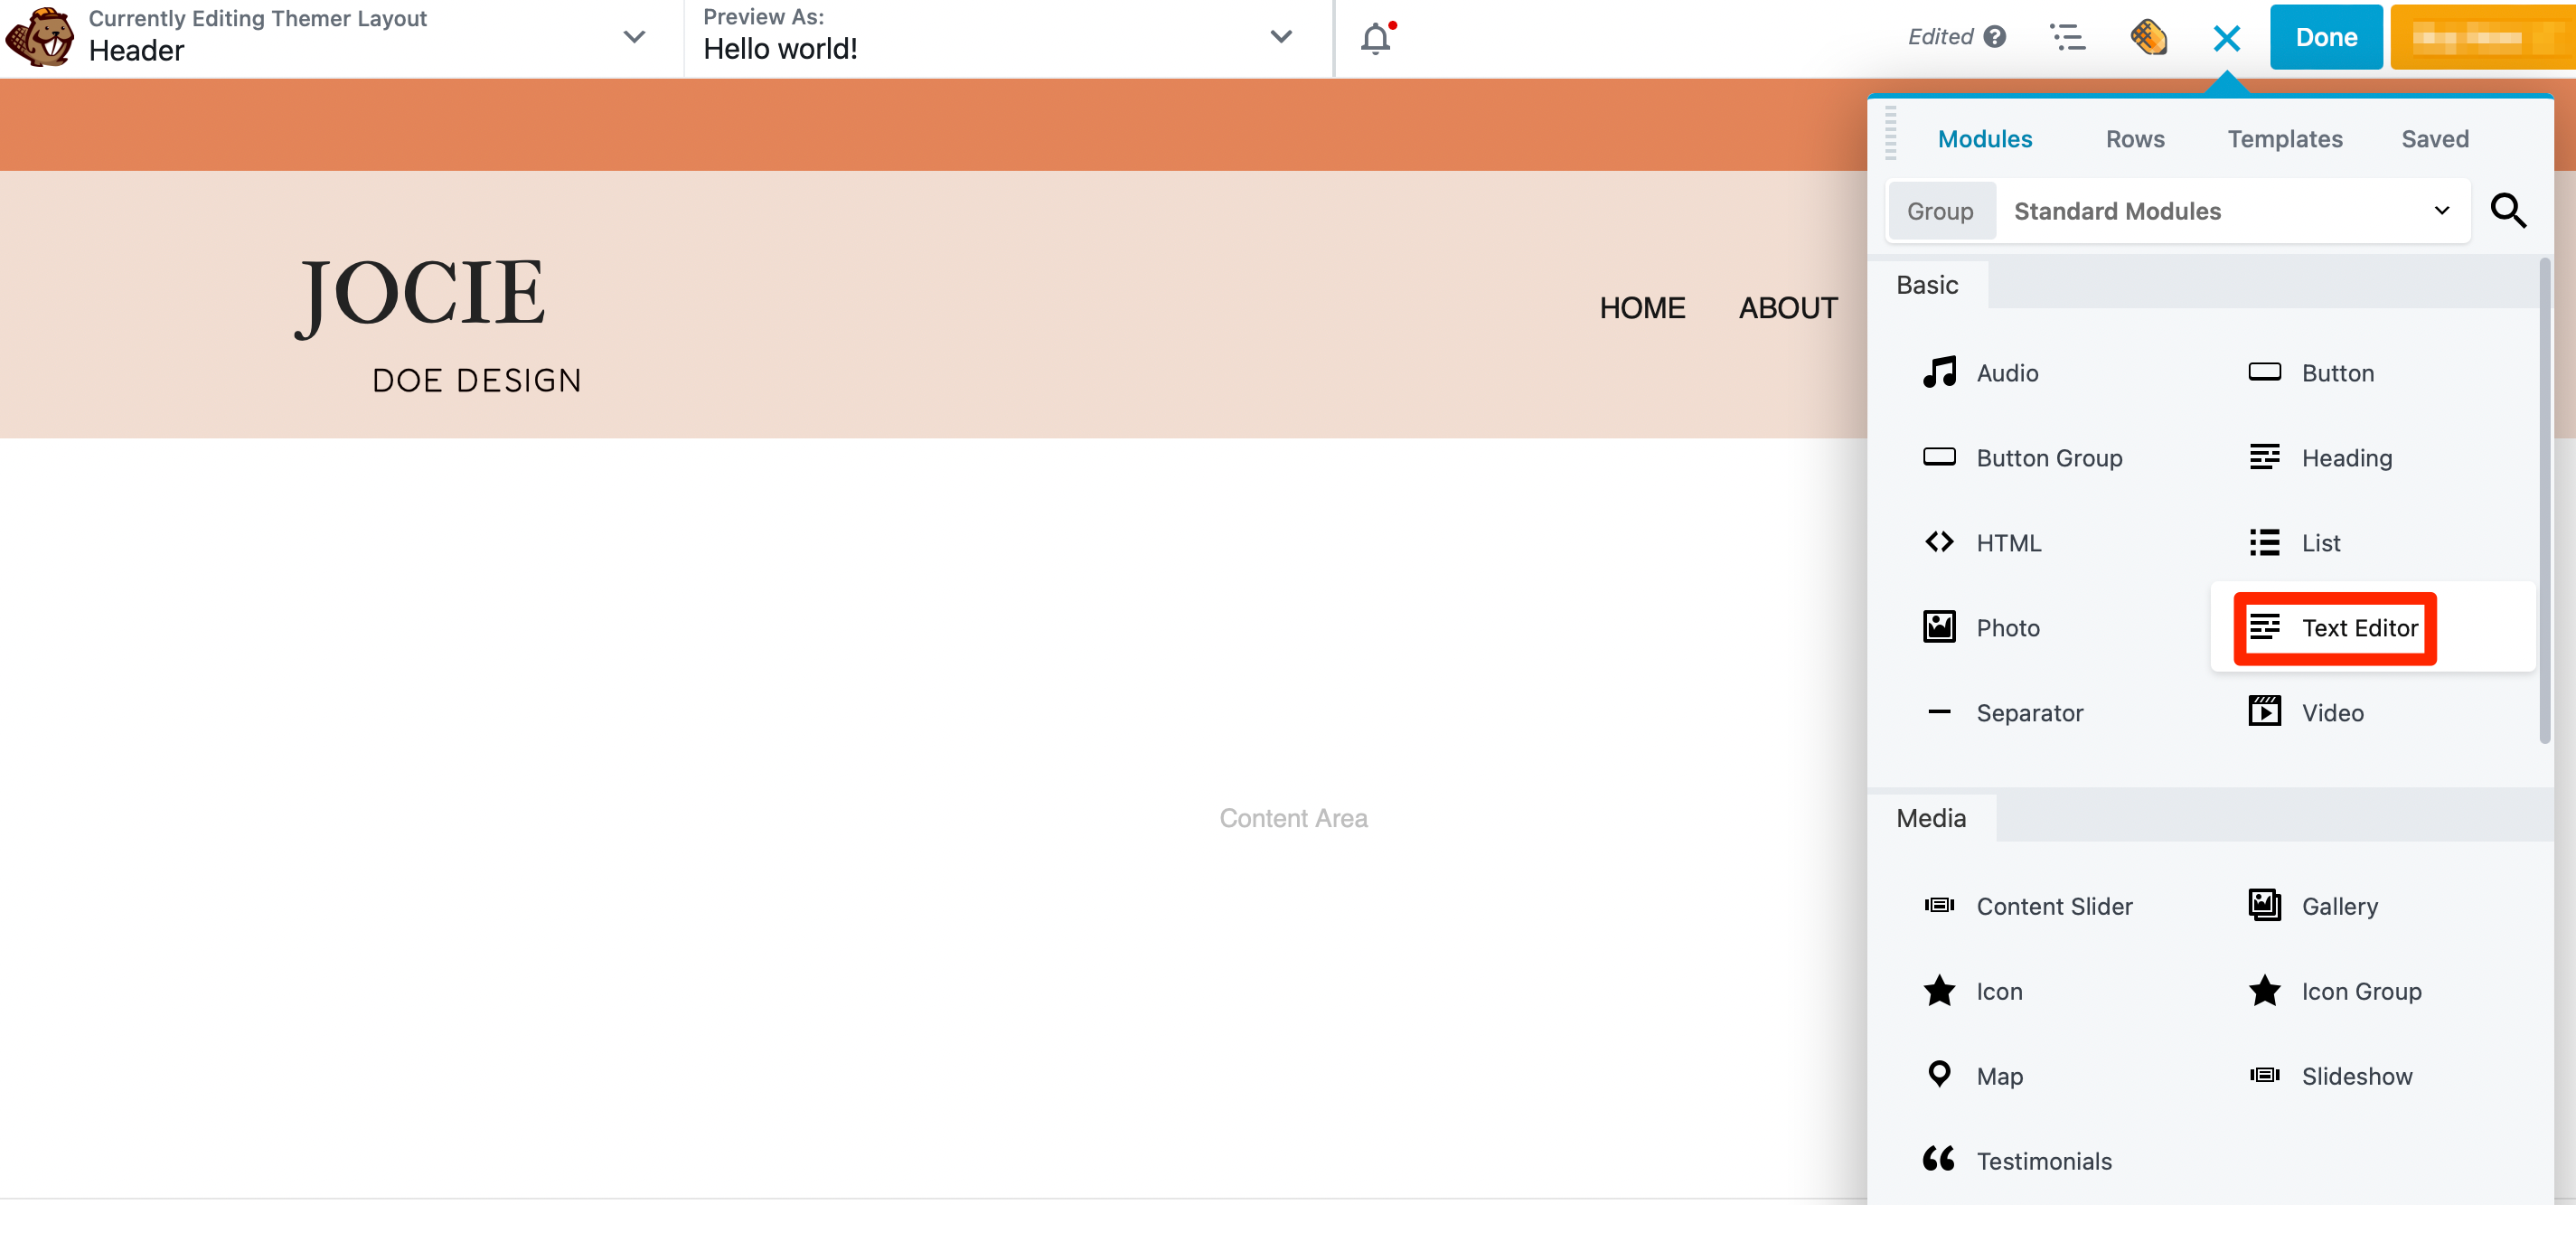
This action opens the Content panel. If you’d like to add your company slogan to the header, simply locate the Text Editor module and drag it into your layout:
When you drop it on the page, a popup will appear where you can add your text. Then, switch over to the Style tab to change the font, color, and size of your text:
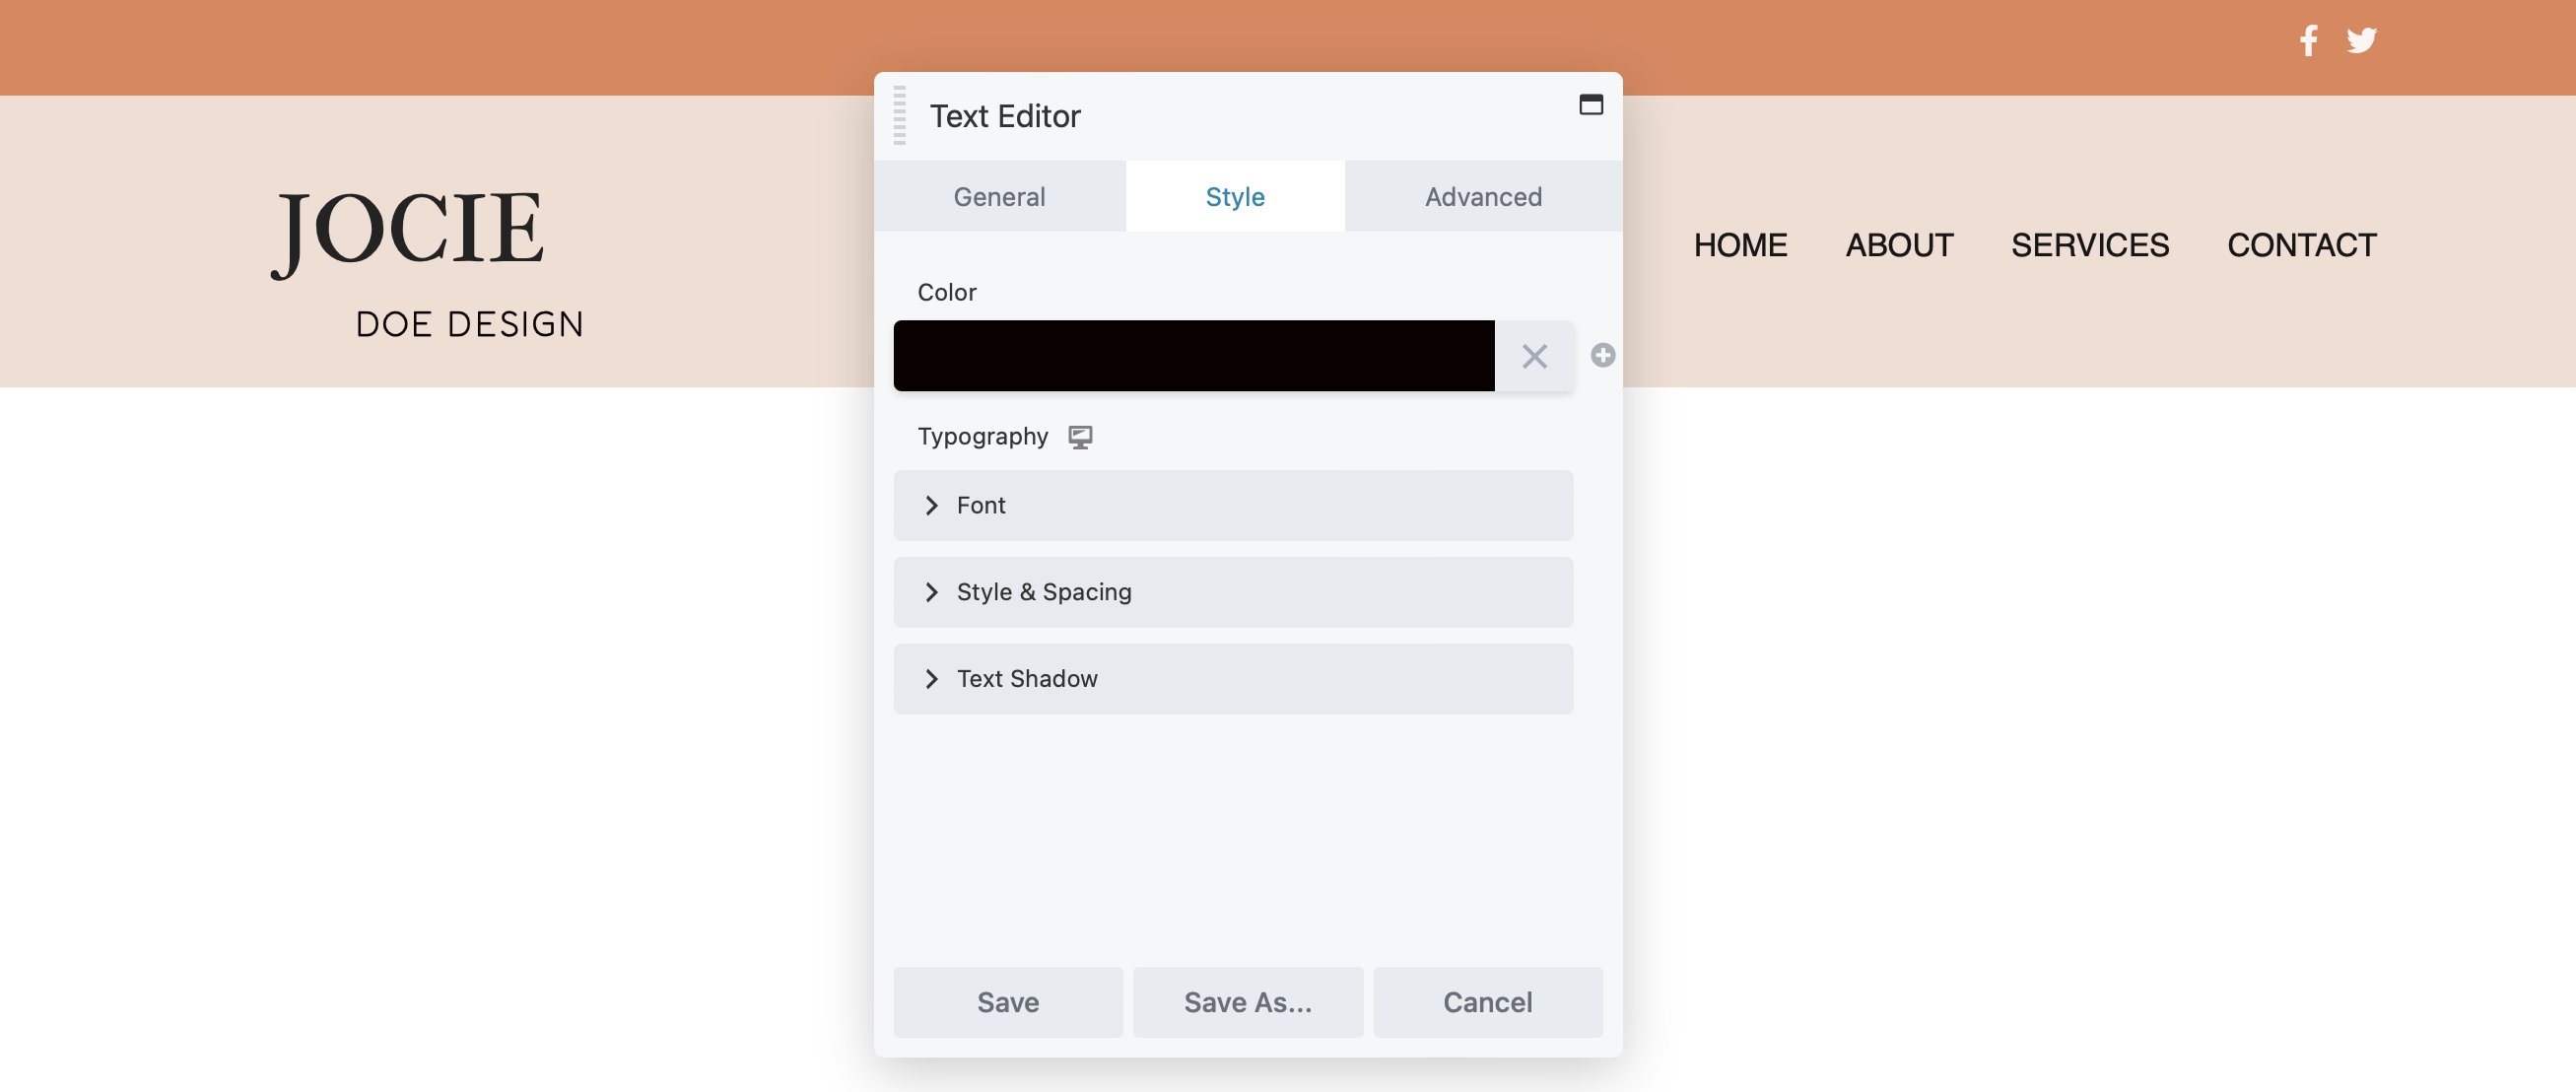
To adjust the padding, add custom CSS, or incorporate animations in your text module, click on the Advanced tab.
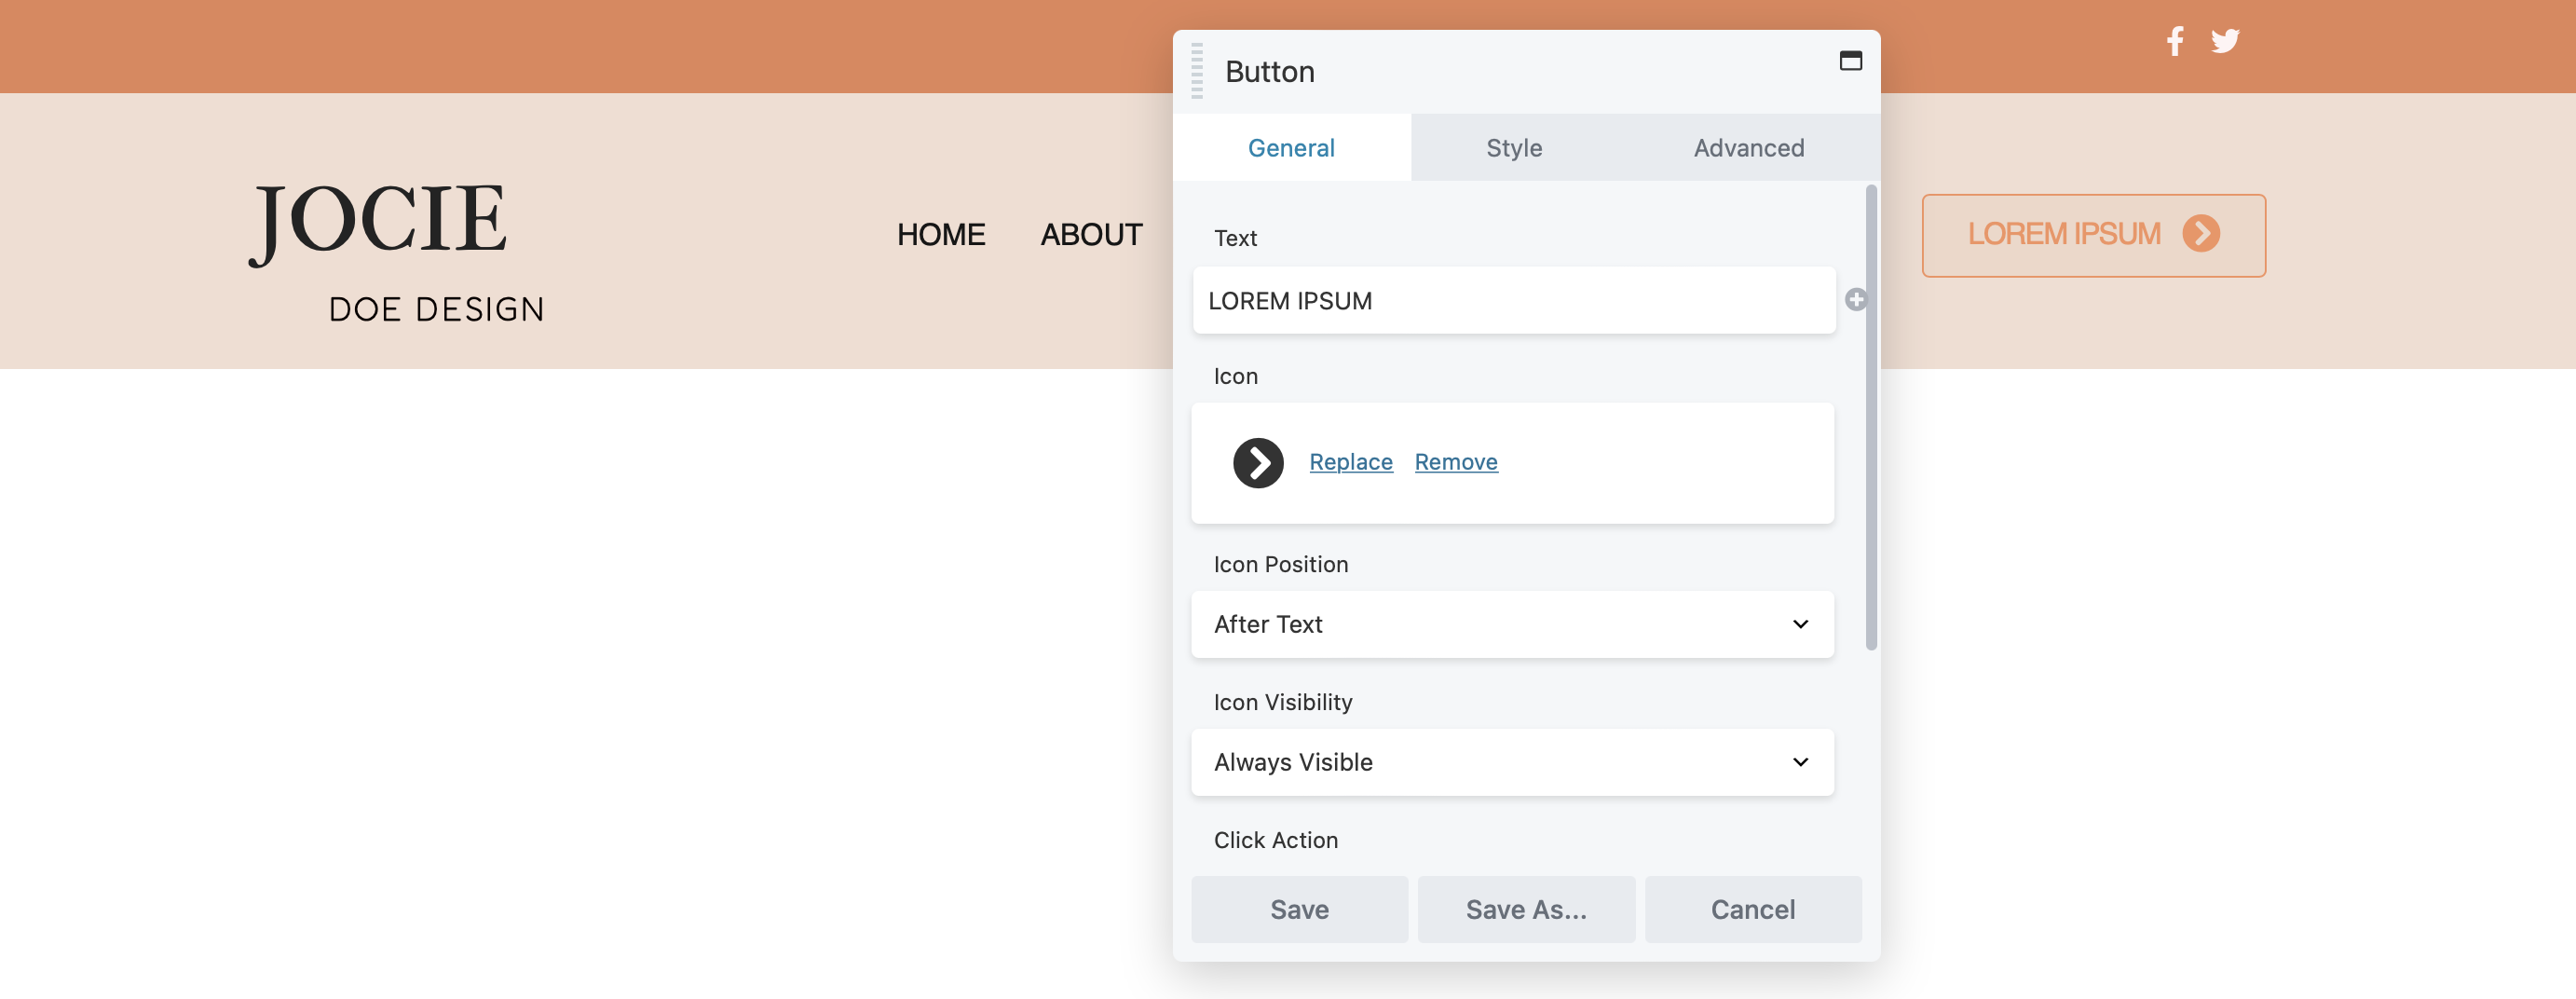
You might also want to include a CTA in your header. To do this, add a Button module, then use the General tab to customize the text, insert your link, and add an icon:
In the Style tab, you can adjust the width, choose text and background colors—including hover colors—and modify the alignment and padding:
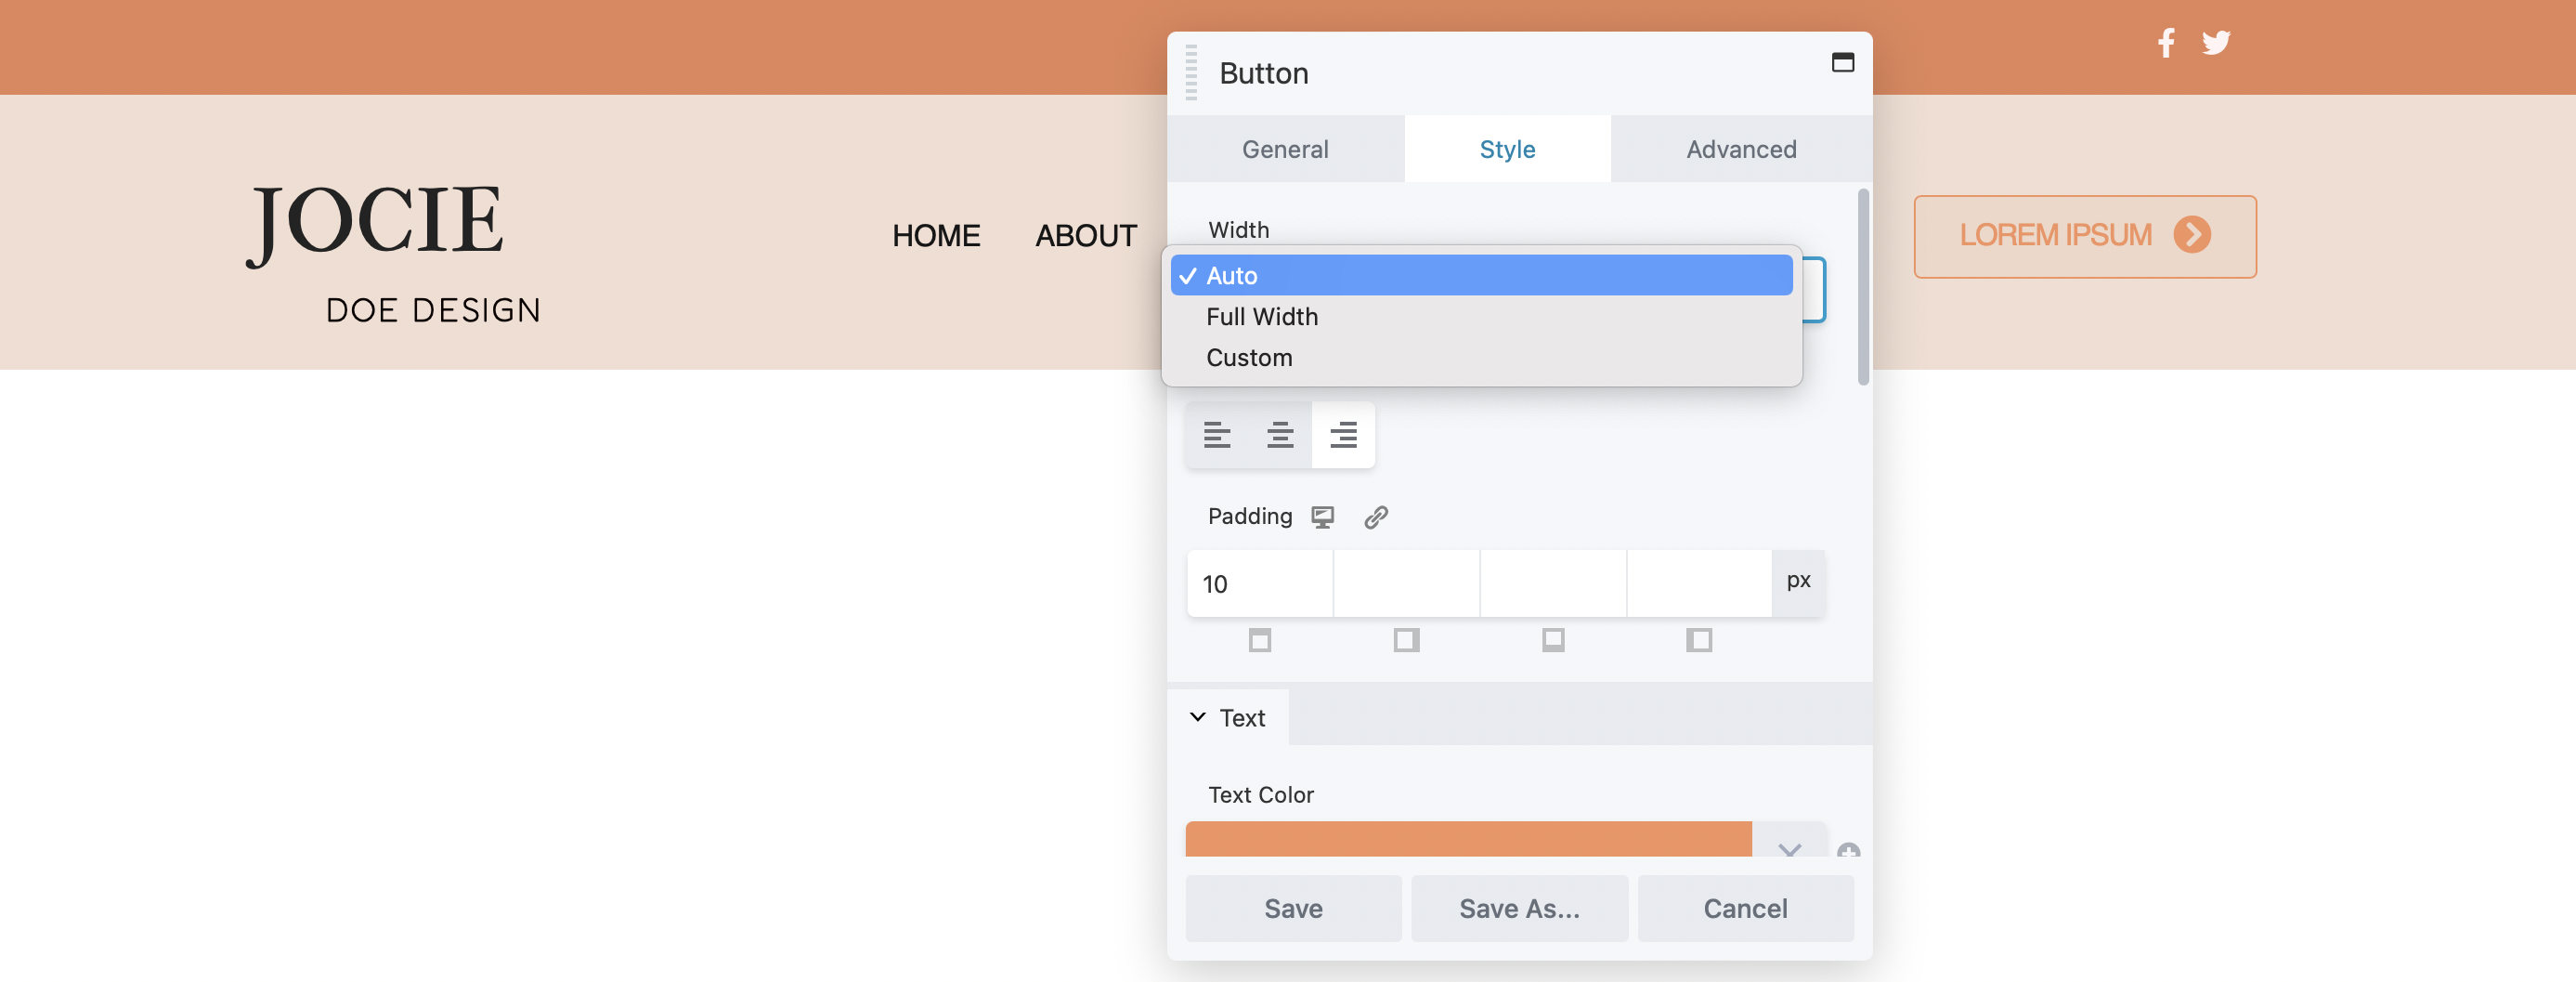
The process is consistent across all modules, whether you wish to add a photo, a post carousel, or a countdown timer.
How to Create Footers with Beaver Themer (In 4 Steps)
Designing a custom footer for your website is also a smart move. It can help with regulatory compliance and enhance the user experience. For example, if you collect personal information, adding a link to your privacy policy is beneficial. Including a sitemap can also make it easier for users to navigate your site.
Additionally, you can display your contact details on all pages, making them easily accessible. You might even consider adding a signup form to encourage conversions.
To create your custom footer, you’ll follow a similar process as when building your header, using the premium Beaver Builder page builder plugin along with Beaver Themer.
Step 1: Set Up a New Themer Layout
Just like with your header, you’ll start by creating a layout for your footer. Go to Beaver Builder > Themer Layouts and click on Add New.

The steps are almost the same as before—name your footer, select Themer Layout for the Type, and choose Footer for the Layout:

Then, click on Add Themer Layout.
Step 2: Configure the Footer Settings
You’ll arrive at a new page to edit your footer layout. These settings are simpler than the header’s.
Select where you want your footer to display on your website. Use the Location dropdown menu to set this:
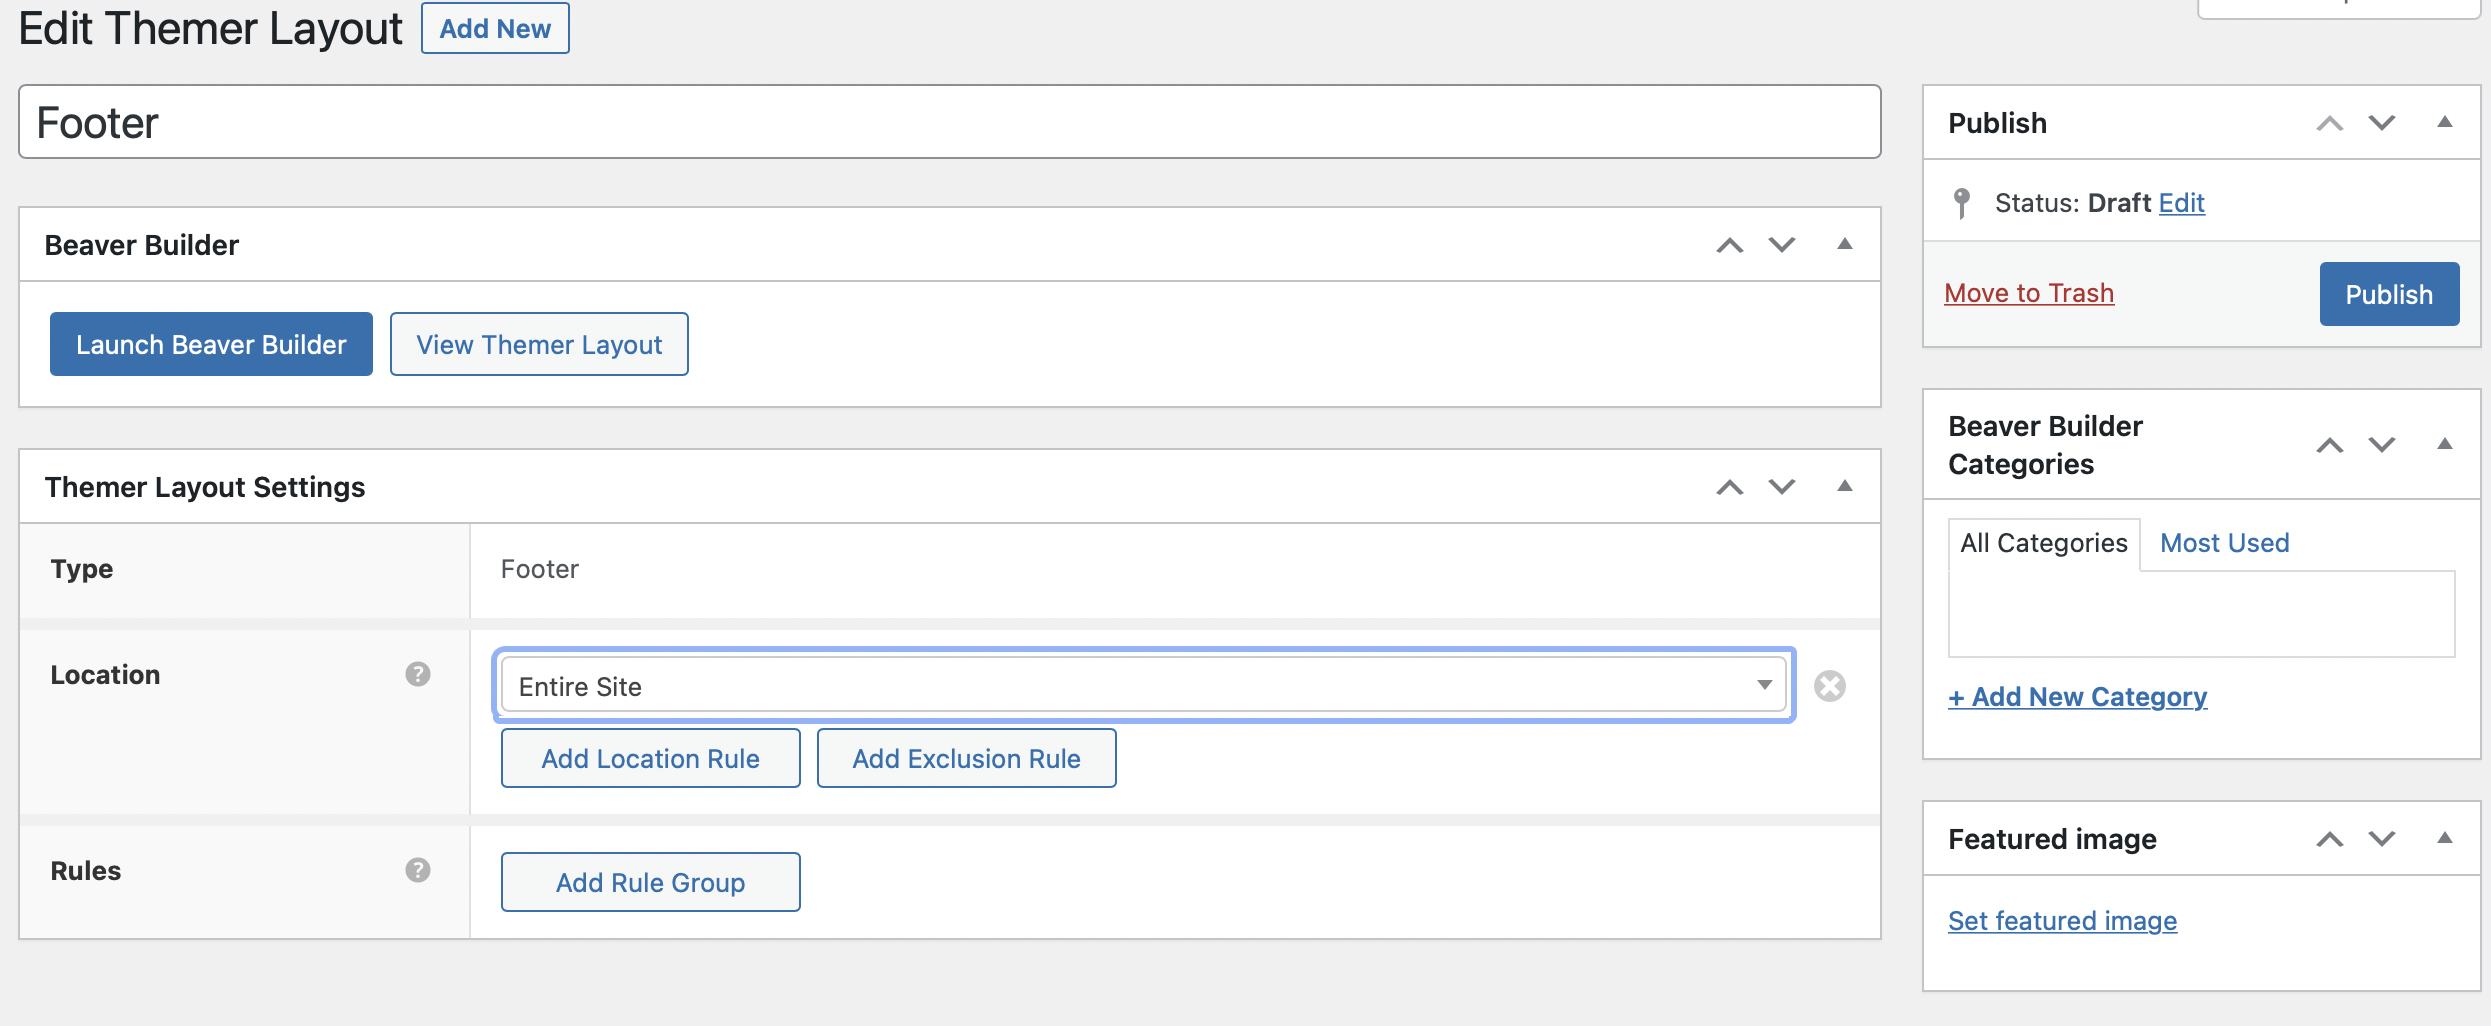
Click the relevant button to add location and exclusion rules. Choose the specific page(s) you want to include or exclude.
Repeat this in the Rules section. Once you’re happy with your footer settings, click on Publish.
Step 3: Customize Your Footer Layout
Now, select Launch Beaver Builder to open the editor:

As with the header, Beaver Builder has provided a default layout template for your footer:
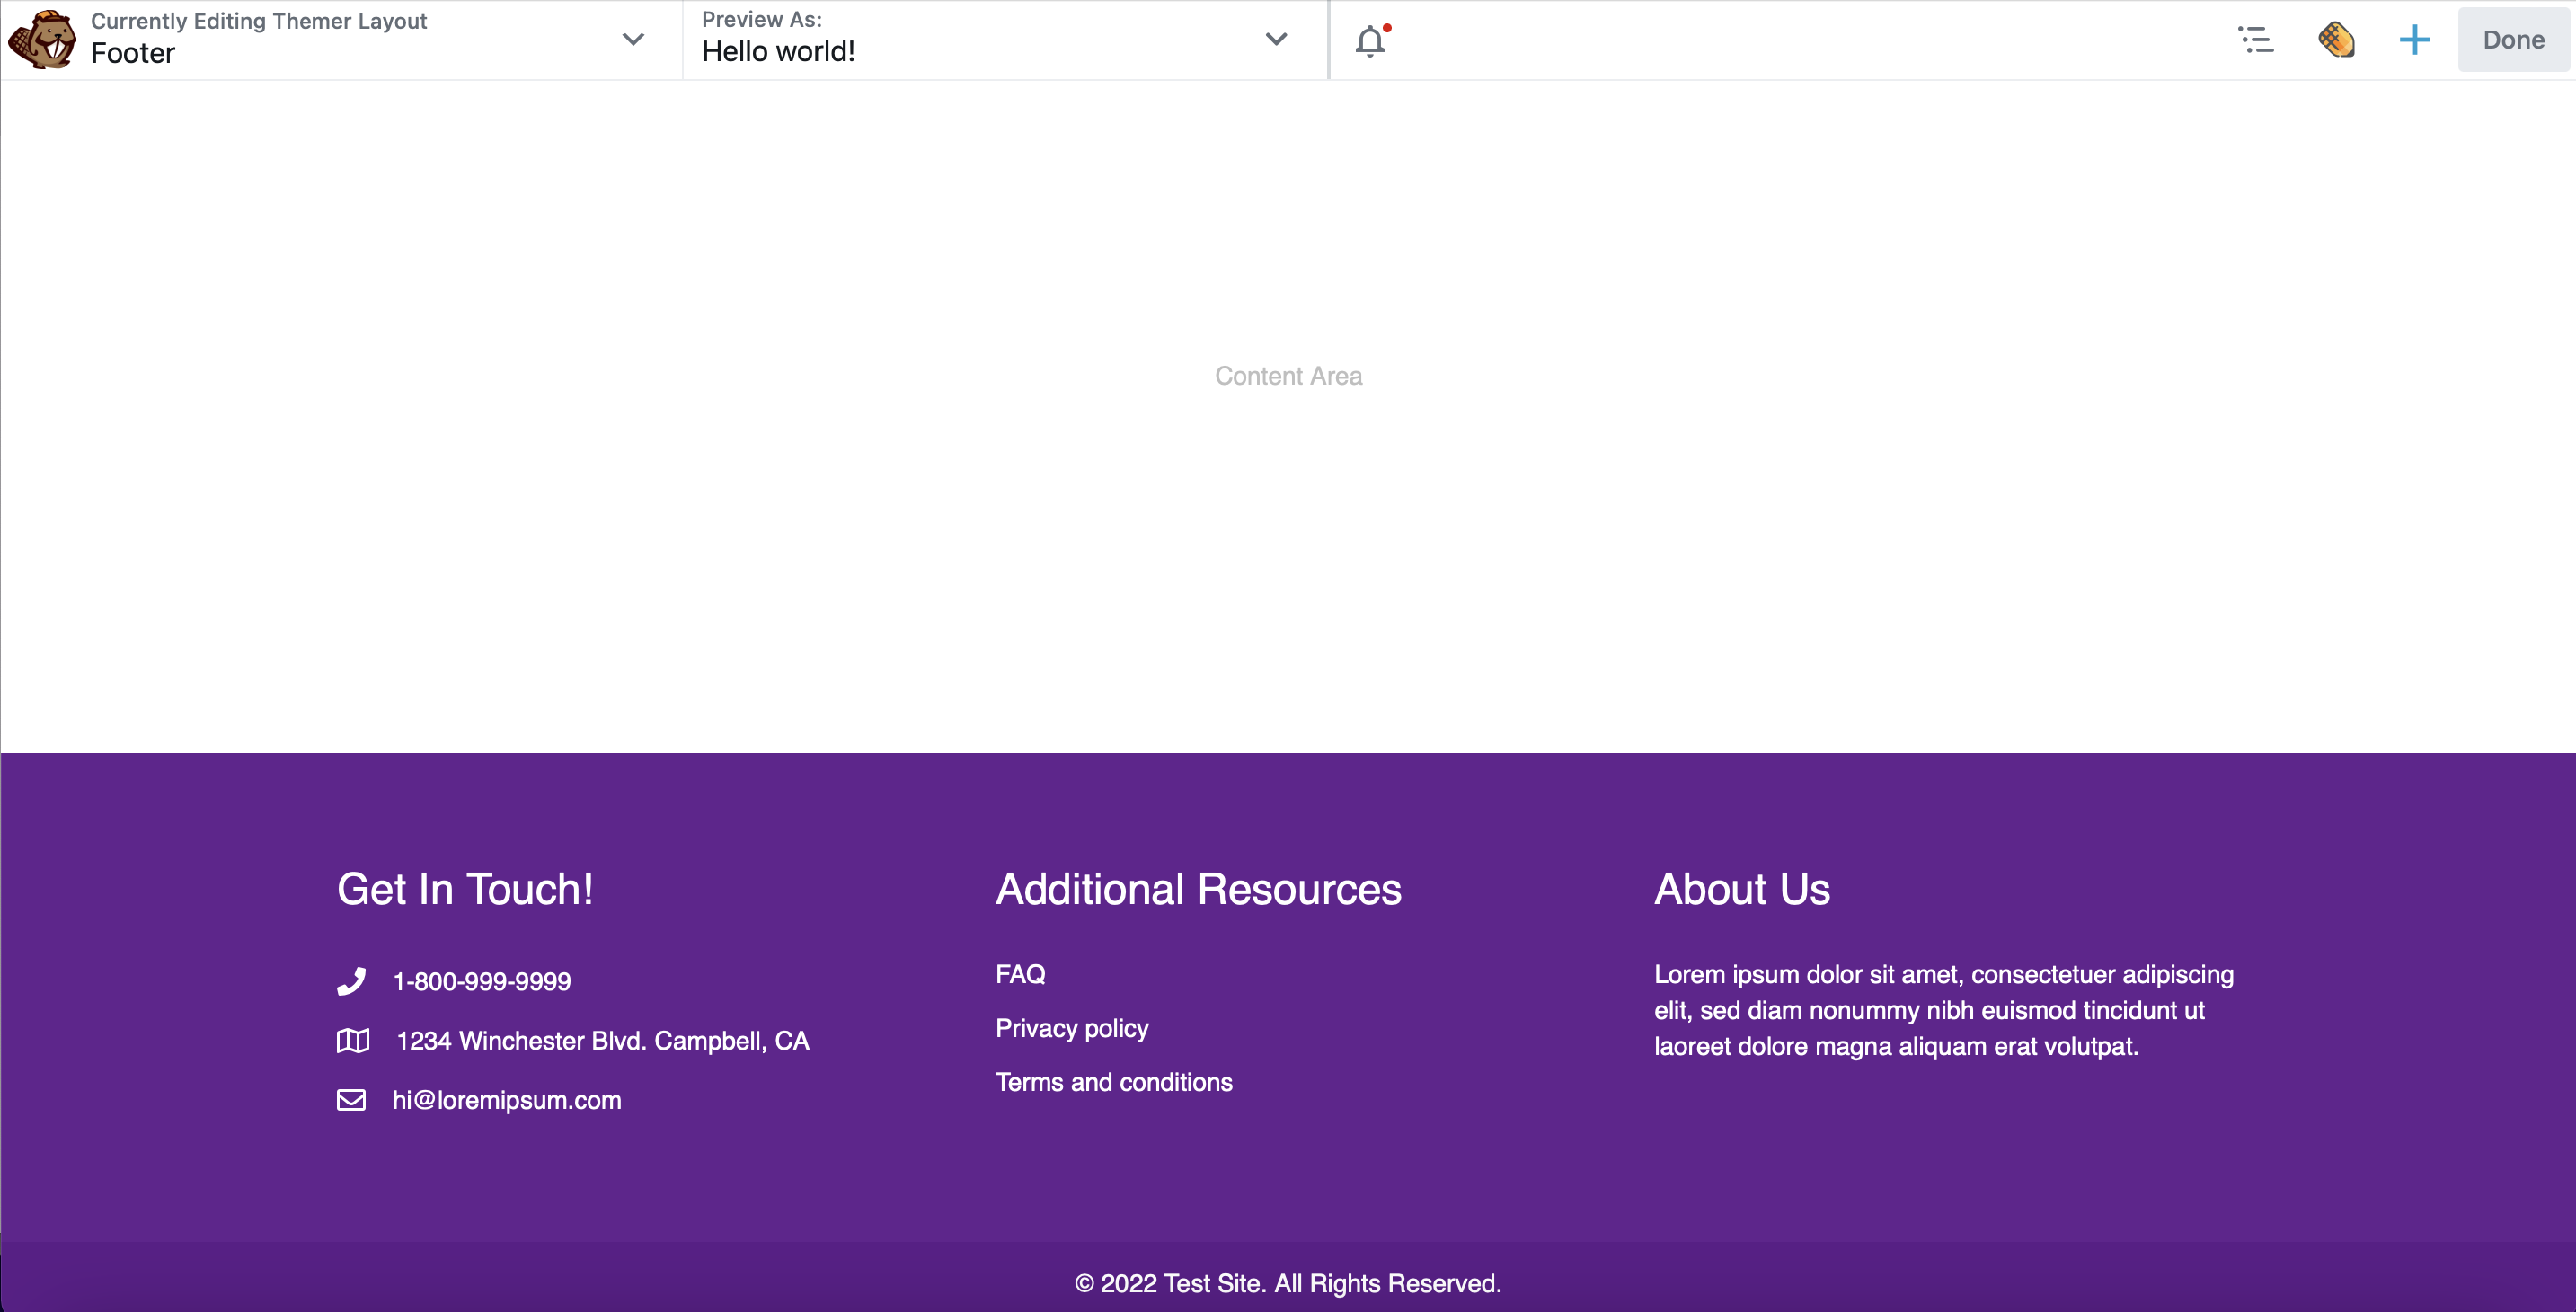
For example, there’s a section for you to include your company contact details, navigational links to useful resources, and a brief description of your business. You can either delete these columns and build your footer from scratch, or you can modify the existing content.
For instance, instead of Additional Resources, you might like to feature your most popular blog posts or product pages. You can do this by navigating to the Wrench icon and selecting Heading Settings:

Then, in the General tab, you can type your new heading. Switch to the Style tab to apply custom colors, select unique fonts, and adjust the size of the heading:
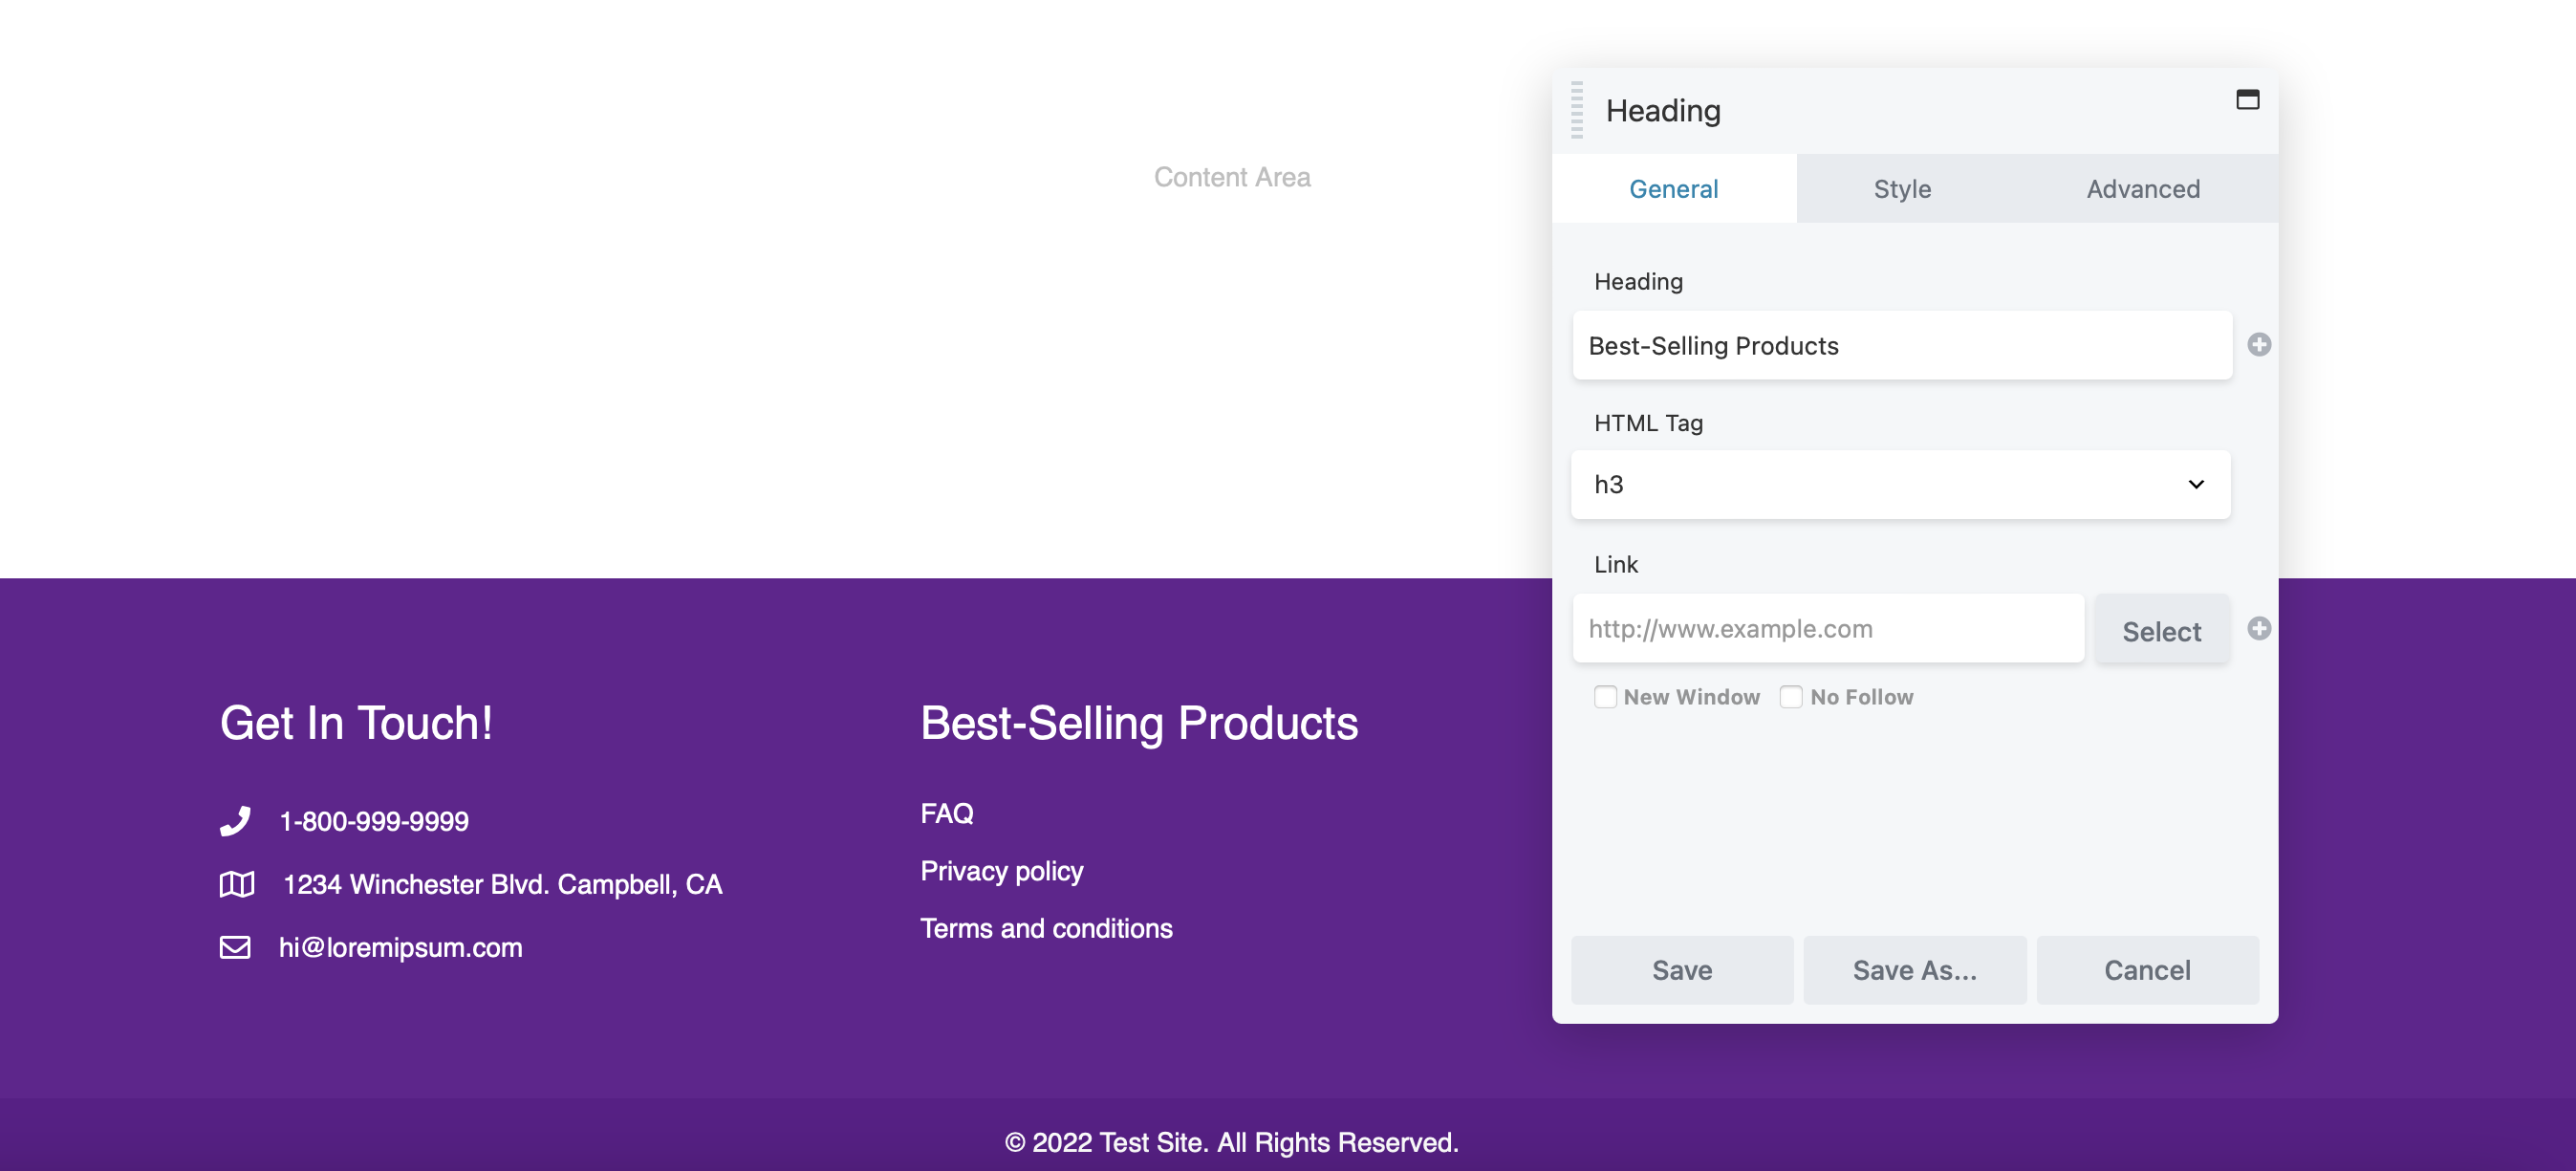
Click on Save to apply your changes.
Now, you’ll need to add your links to the text box below. Again, hover over the Wrench icon and choose Text Editor Settings.
Here, you can delete the current entries and replace them with your own pages. In the text editor, you can add the titles of your pages and add your links by clicking on the Link icon:
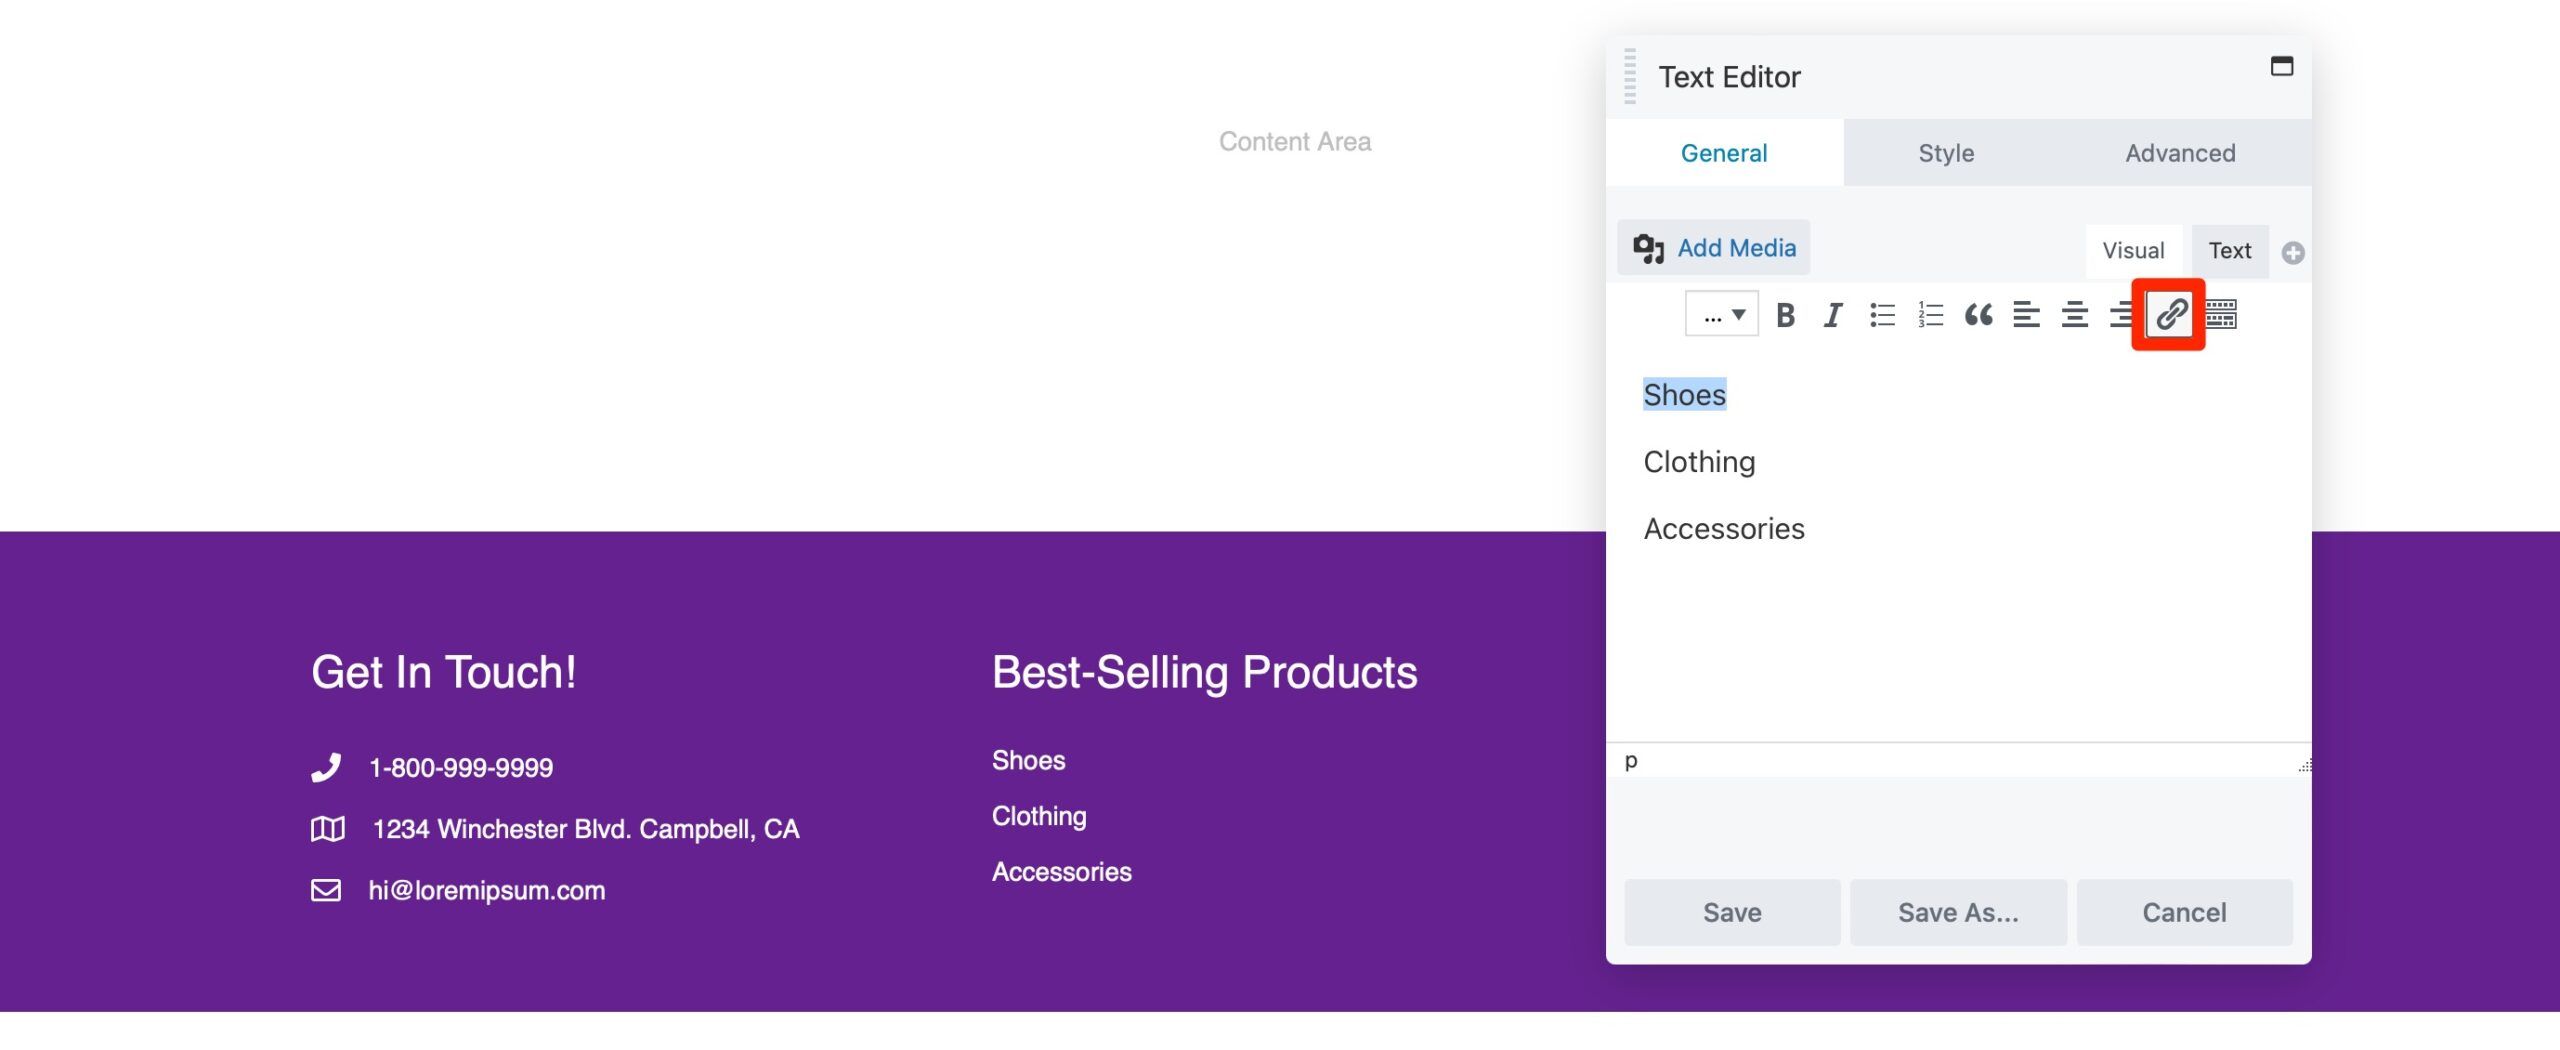
Paste in your URL and select Save. You can also add your contact number and company email address in the same way.
Beaver Builder includes a copyright notice by default. Adjust it by clicking on the module and adding your own statement:
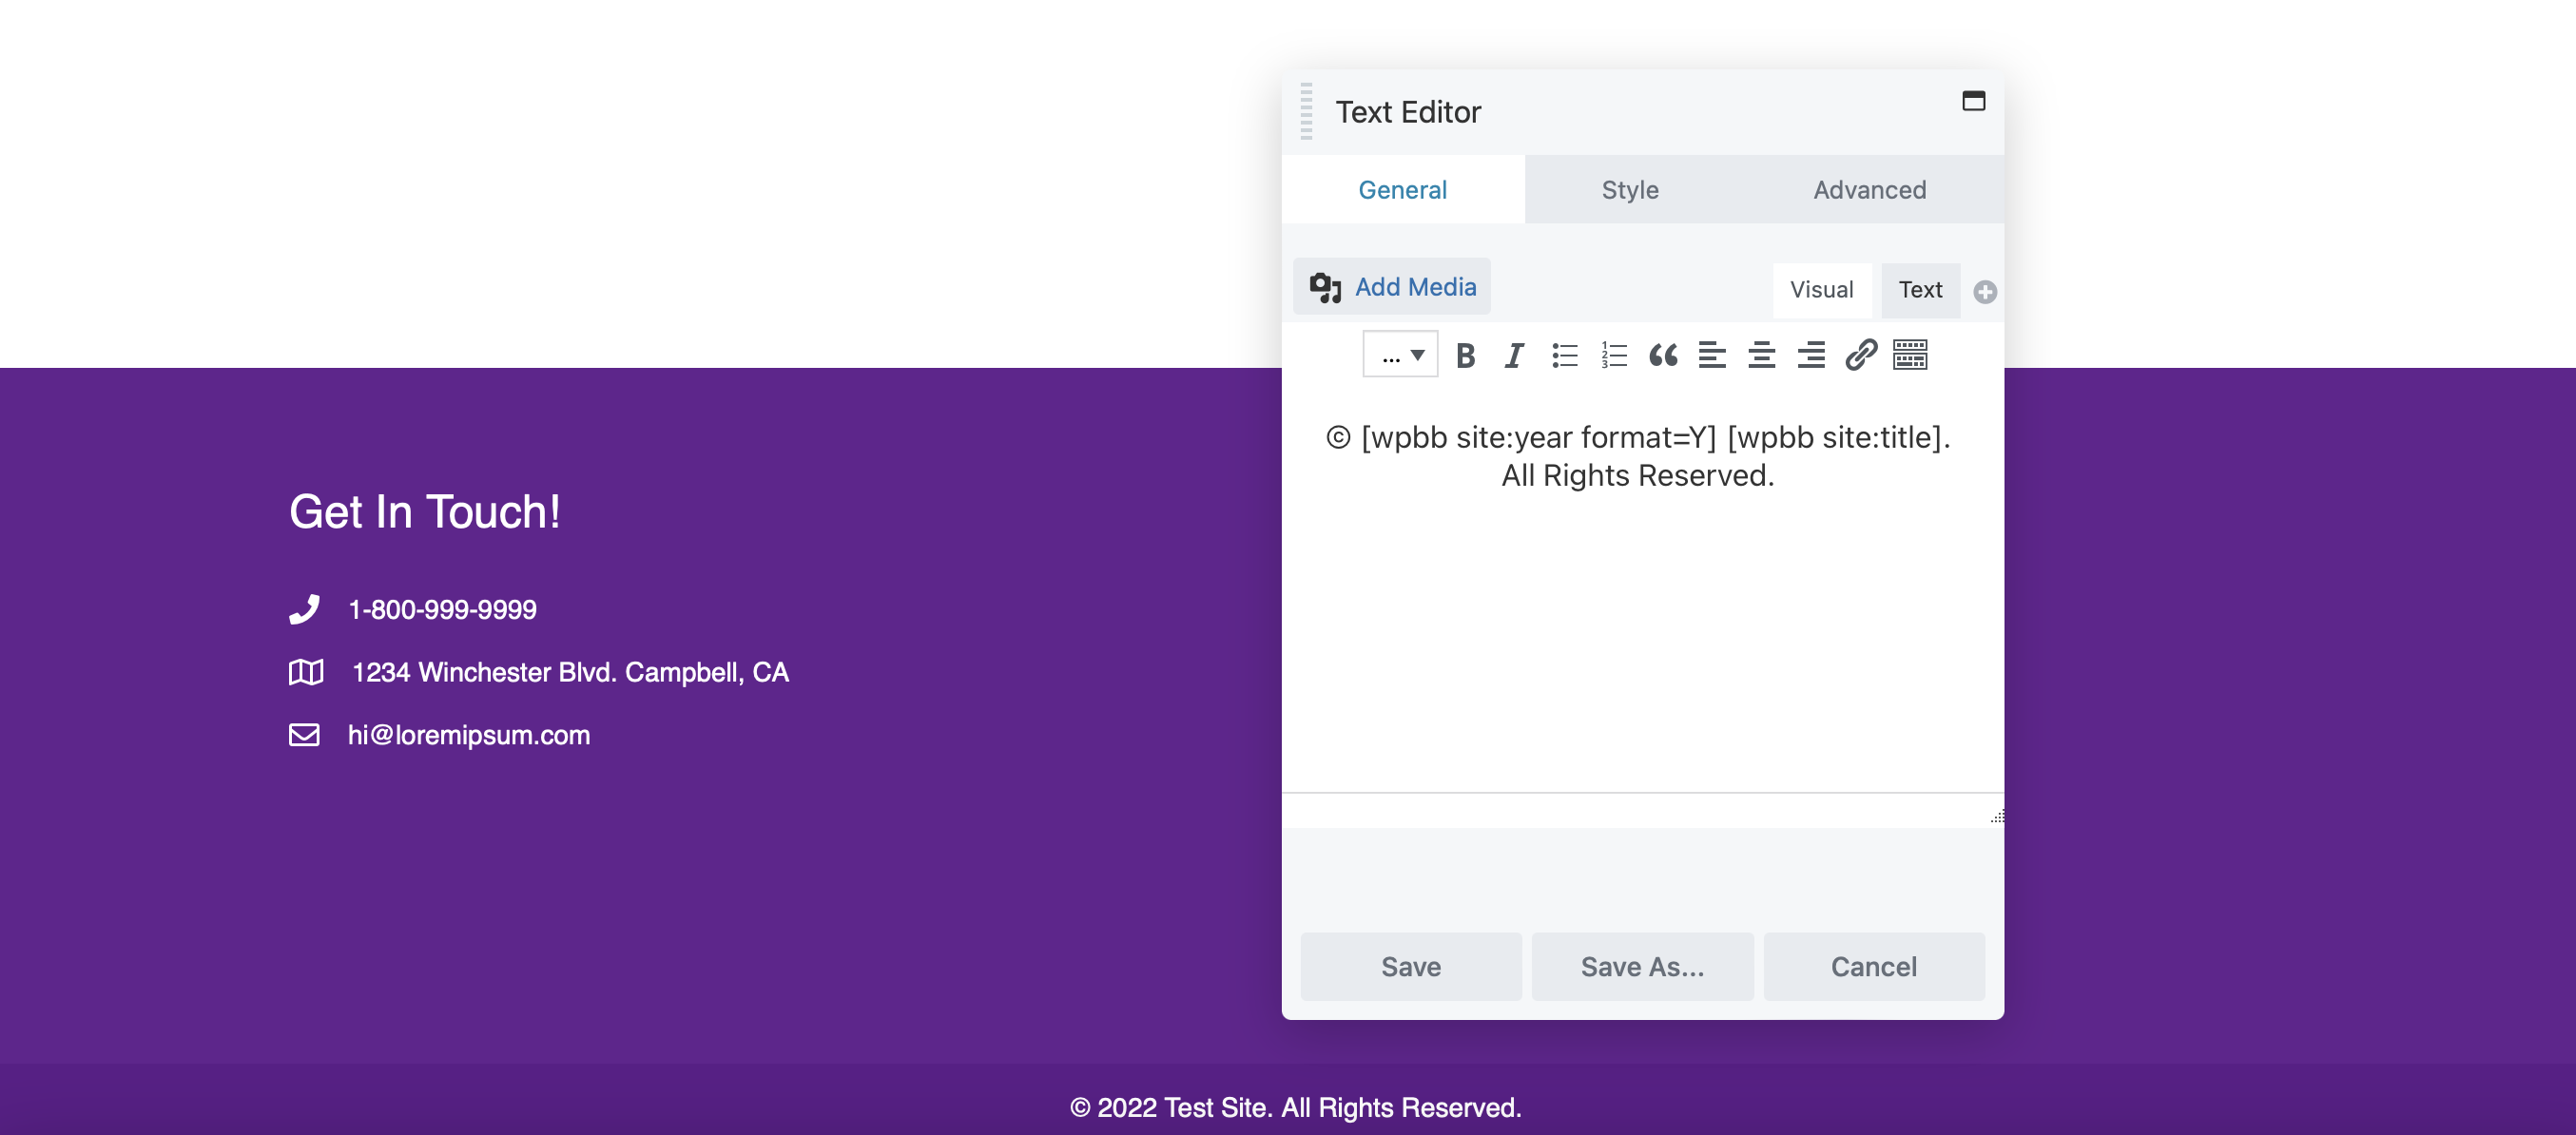
With your footer layout set up, it’s time to add content that enhances navigation and user experience.
Step 4: Add Content to Your Footer
We’ve covered essentials like contact details, resource links, and a copyright notice. However, you can add any Beaver Builder module to enhance your footer layout.
For instance, consider adding a signup form to boost engagement. Locate the Subscribe Form module and drag it into your footer:
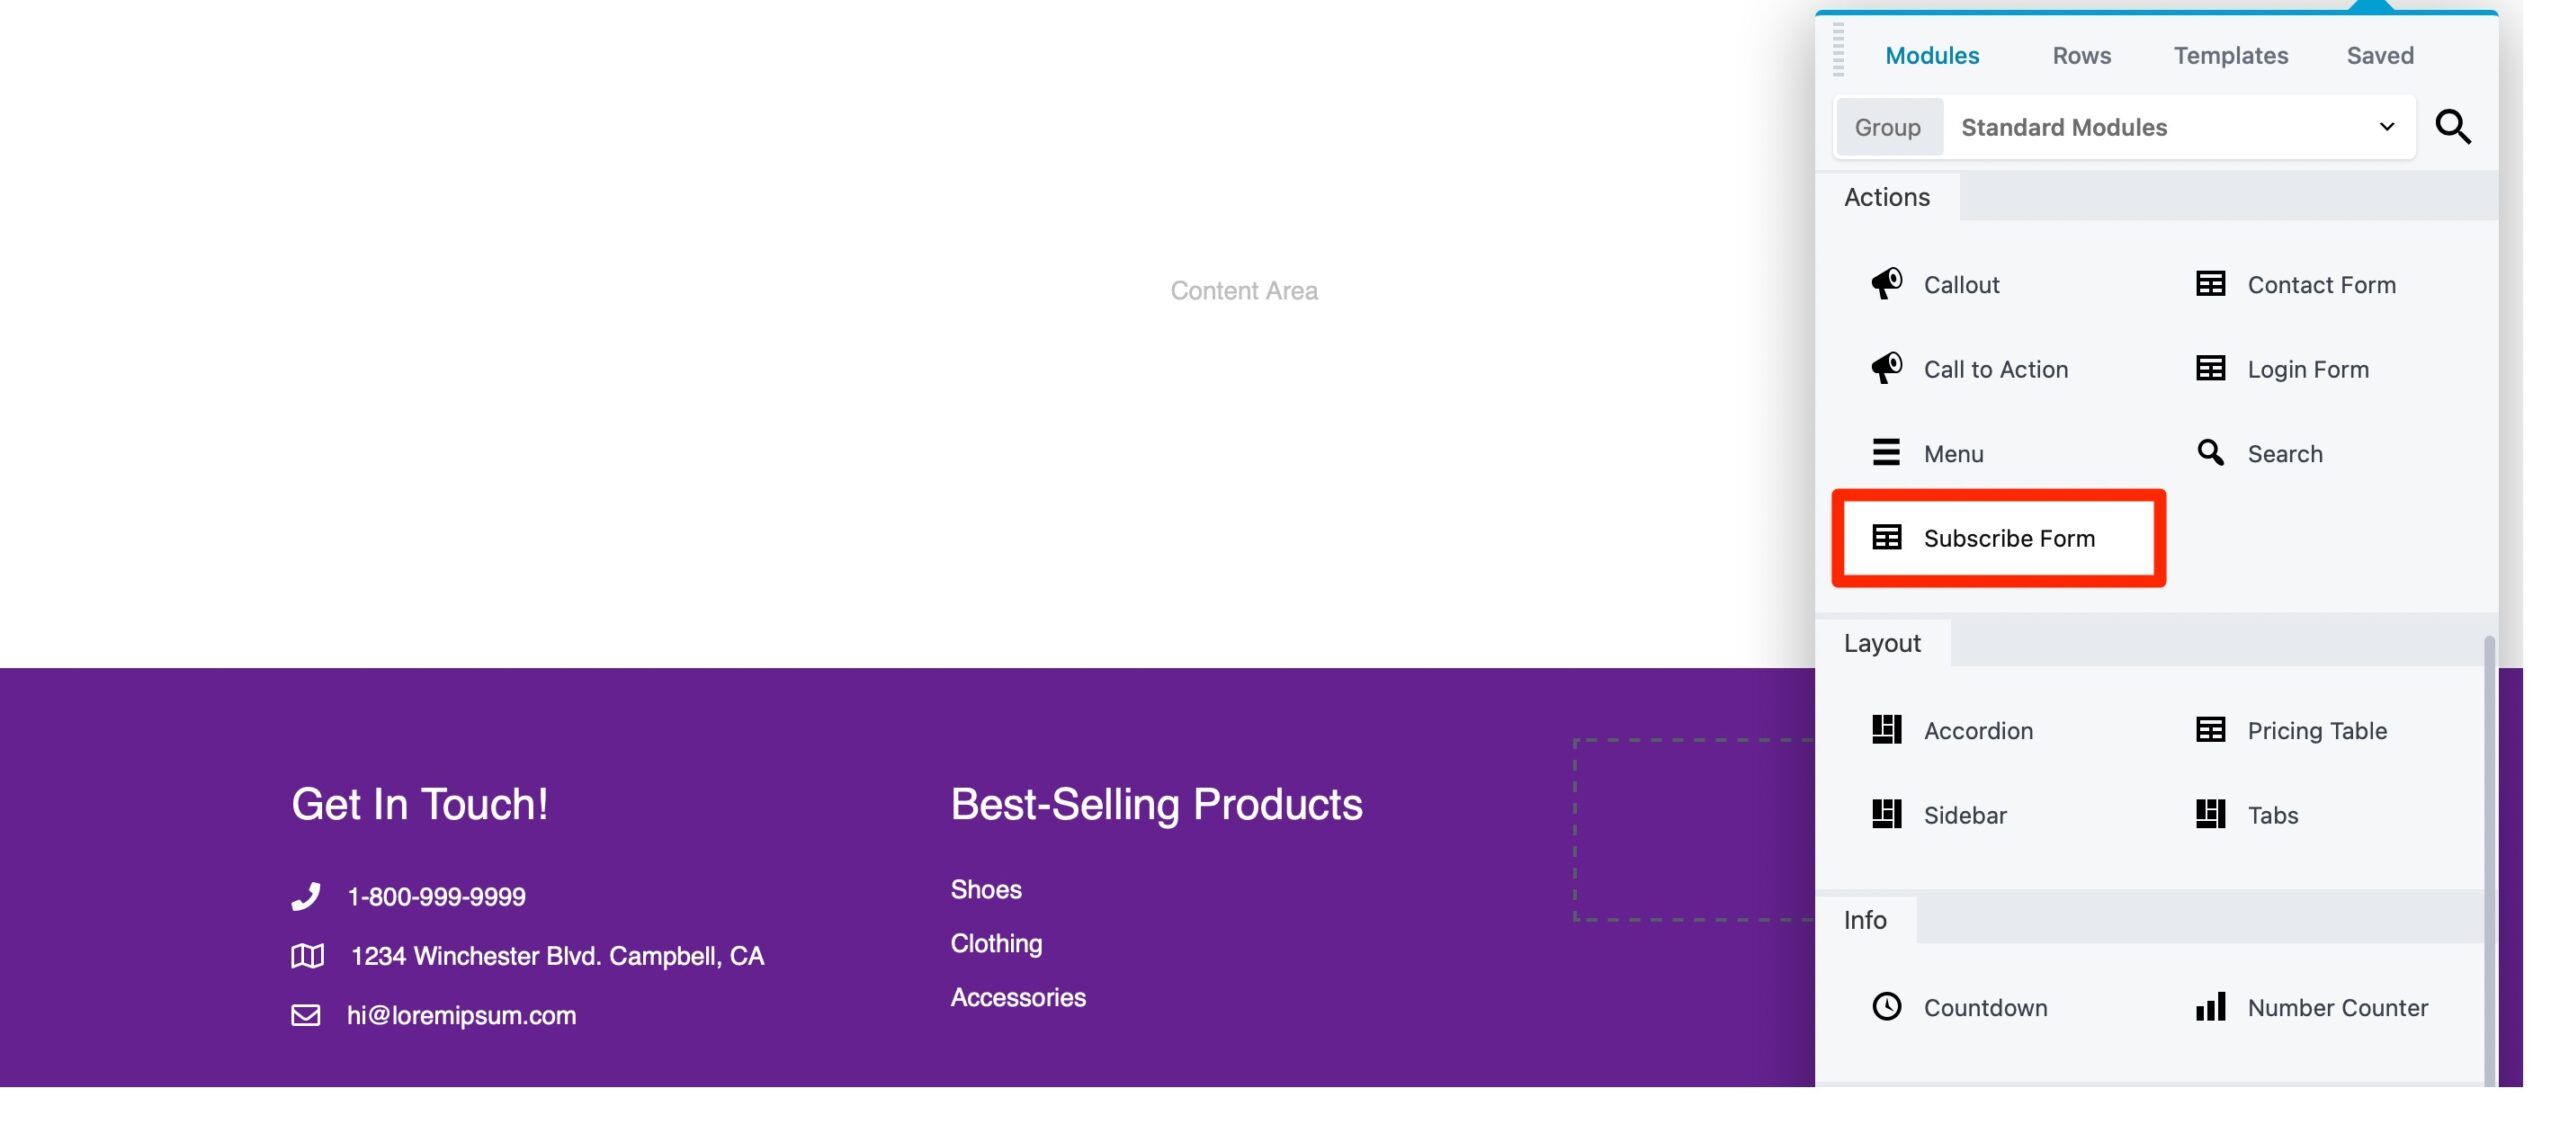
Beaver Builder integrates with many email marketing providers, allowing you to choose your preferred service from the dropdown menu:
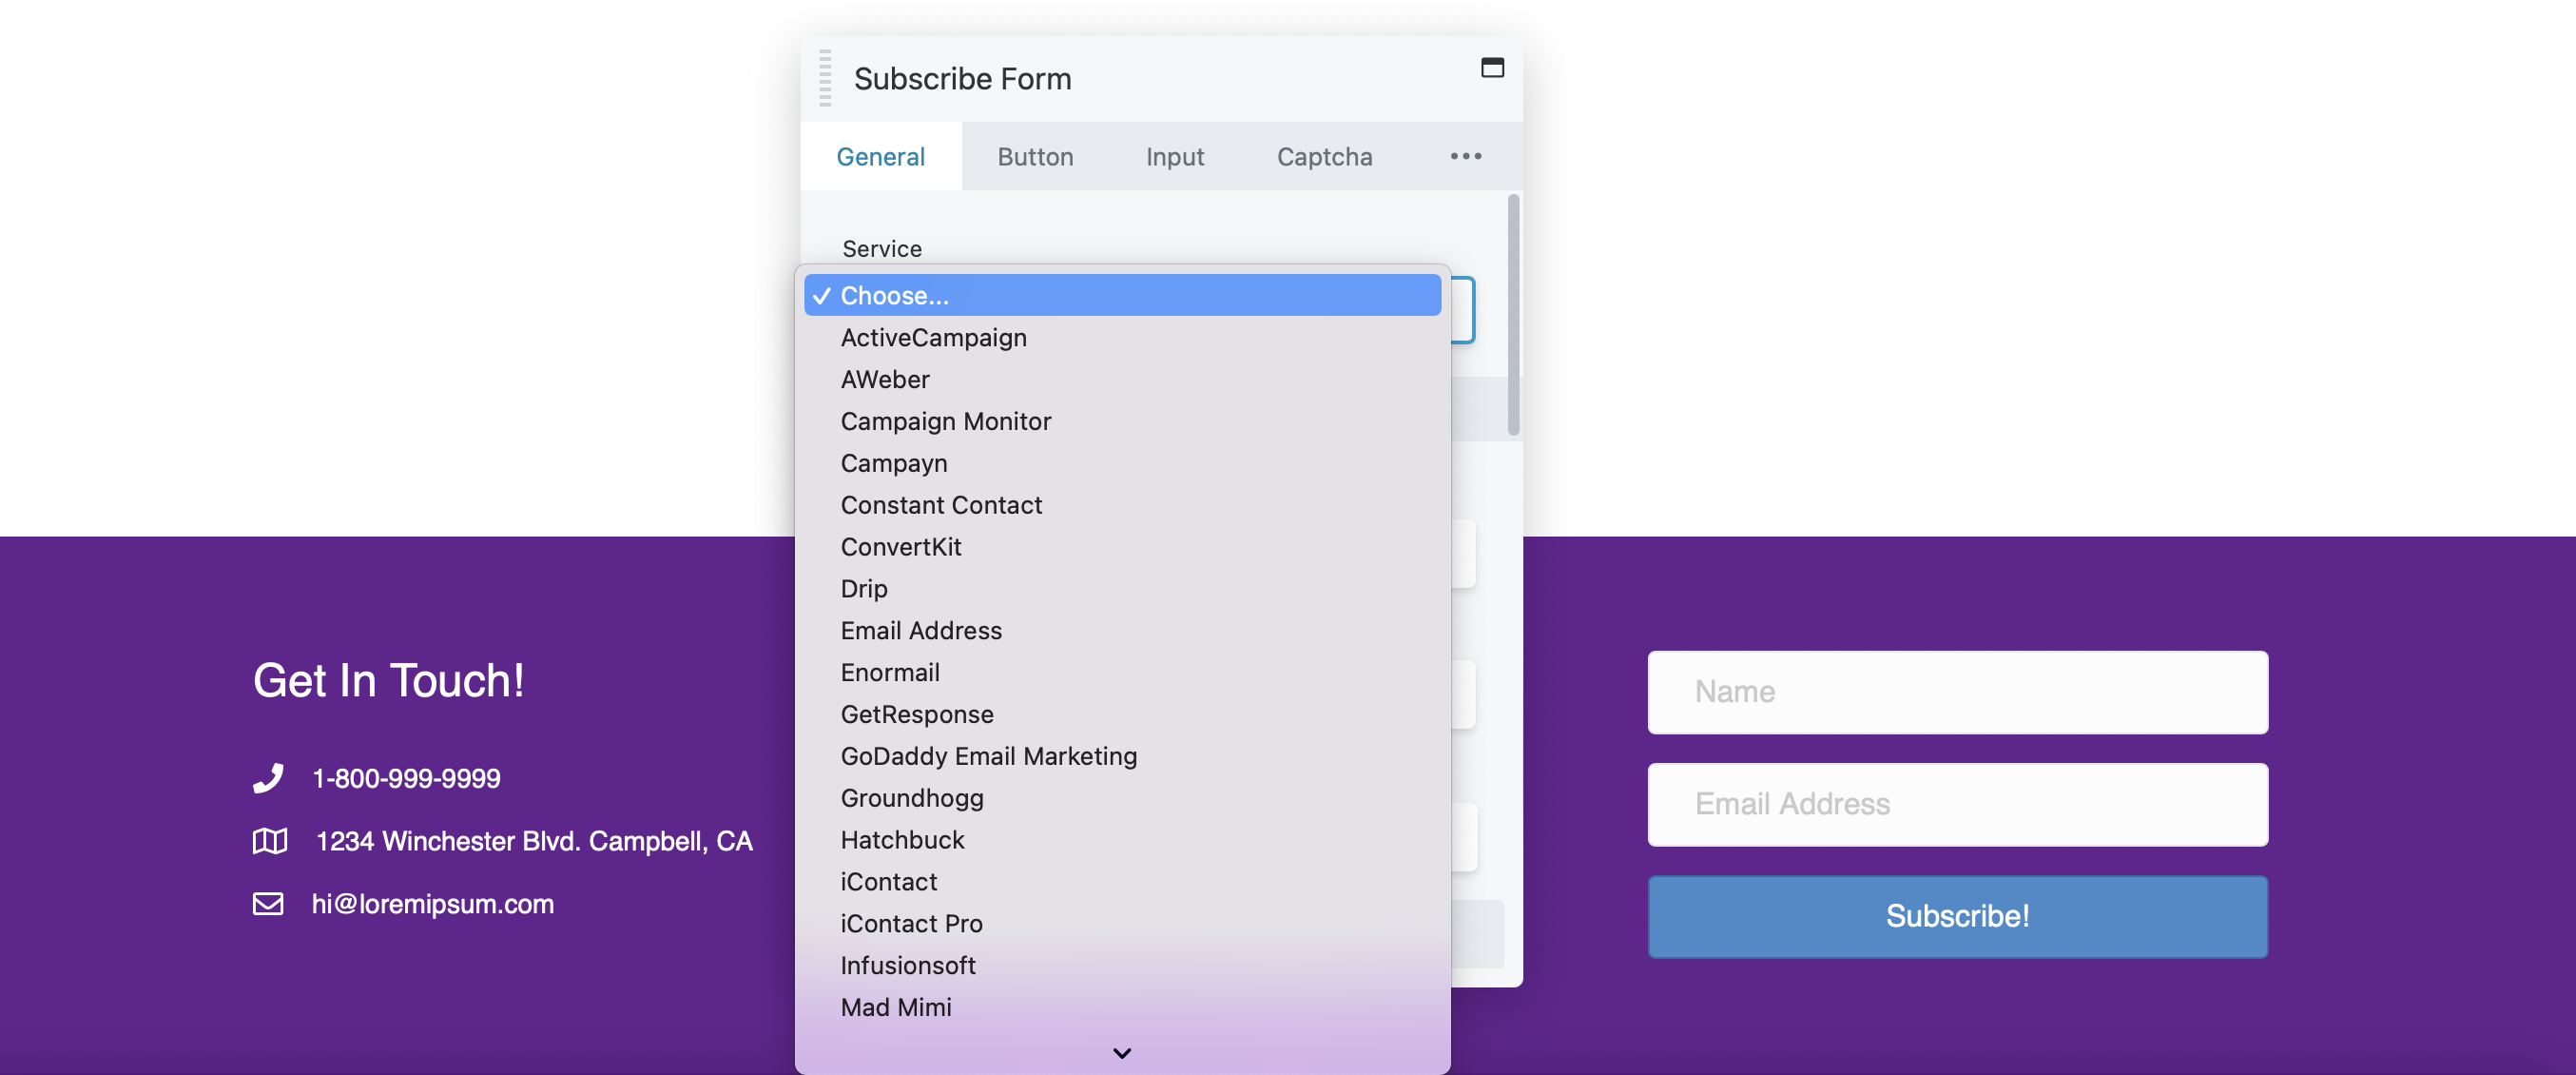
In this tab, you can add a terms and conditions checkbox or customize the message users see after subscribing.
Switch over to the Button tab to edit button text, adjust colors, add padding, and more:

You might find the Captcha tab helpful if you want users to verify they’re not bots.
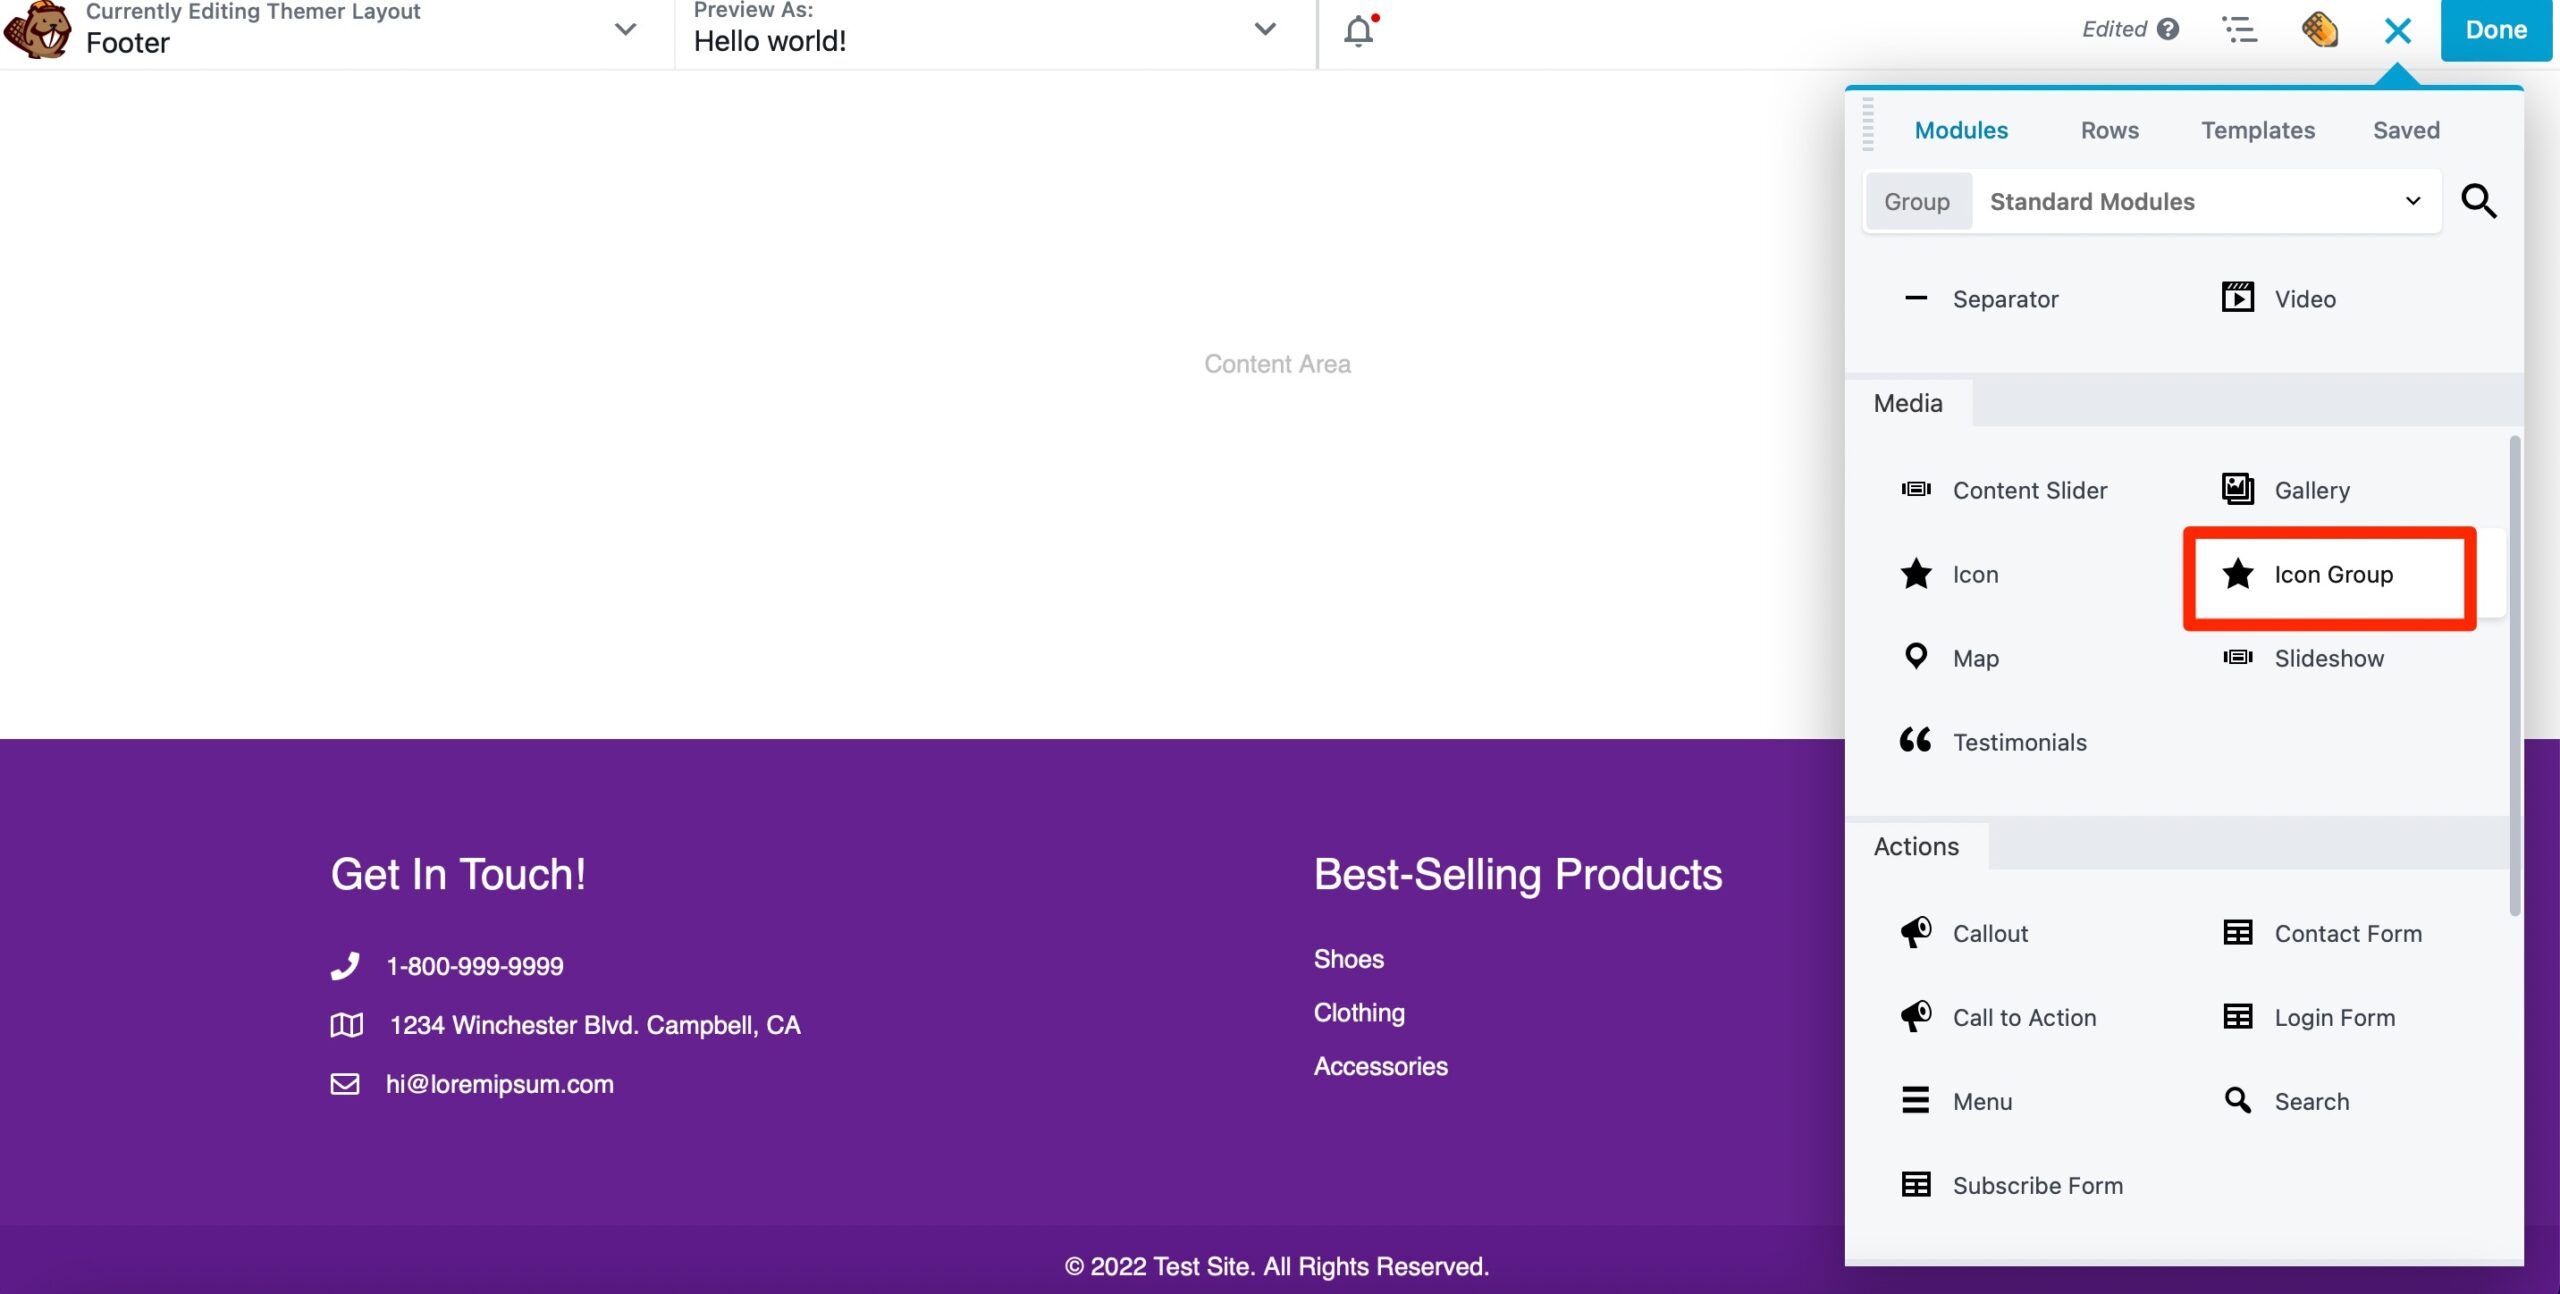
Consider adding links to your social accounts as well. Use the Icon Group module and drag it into your footer:
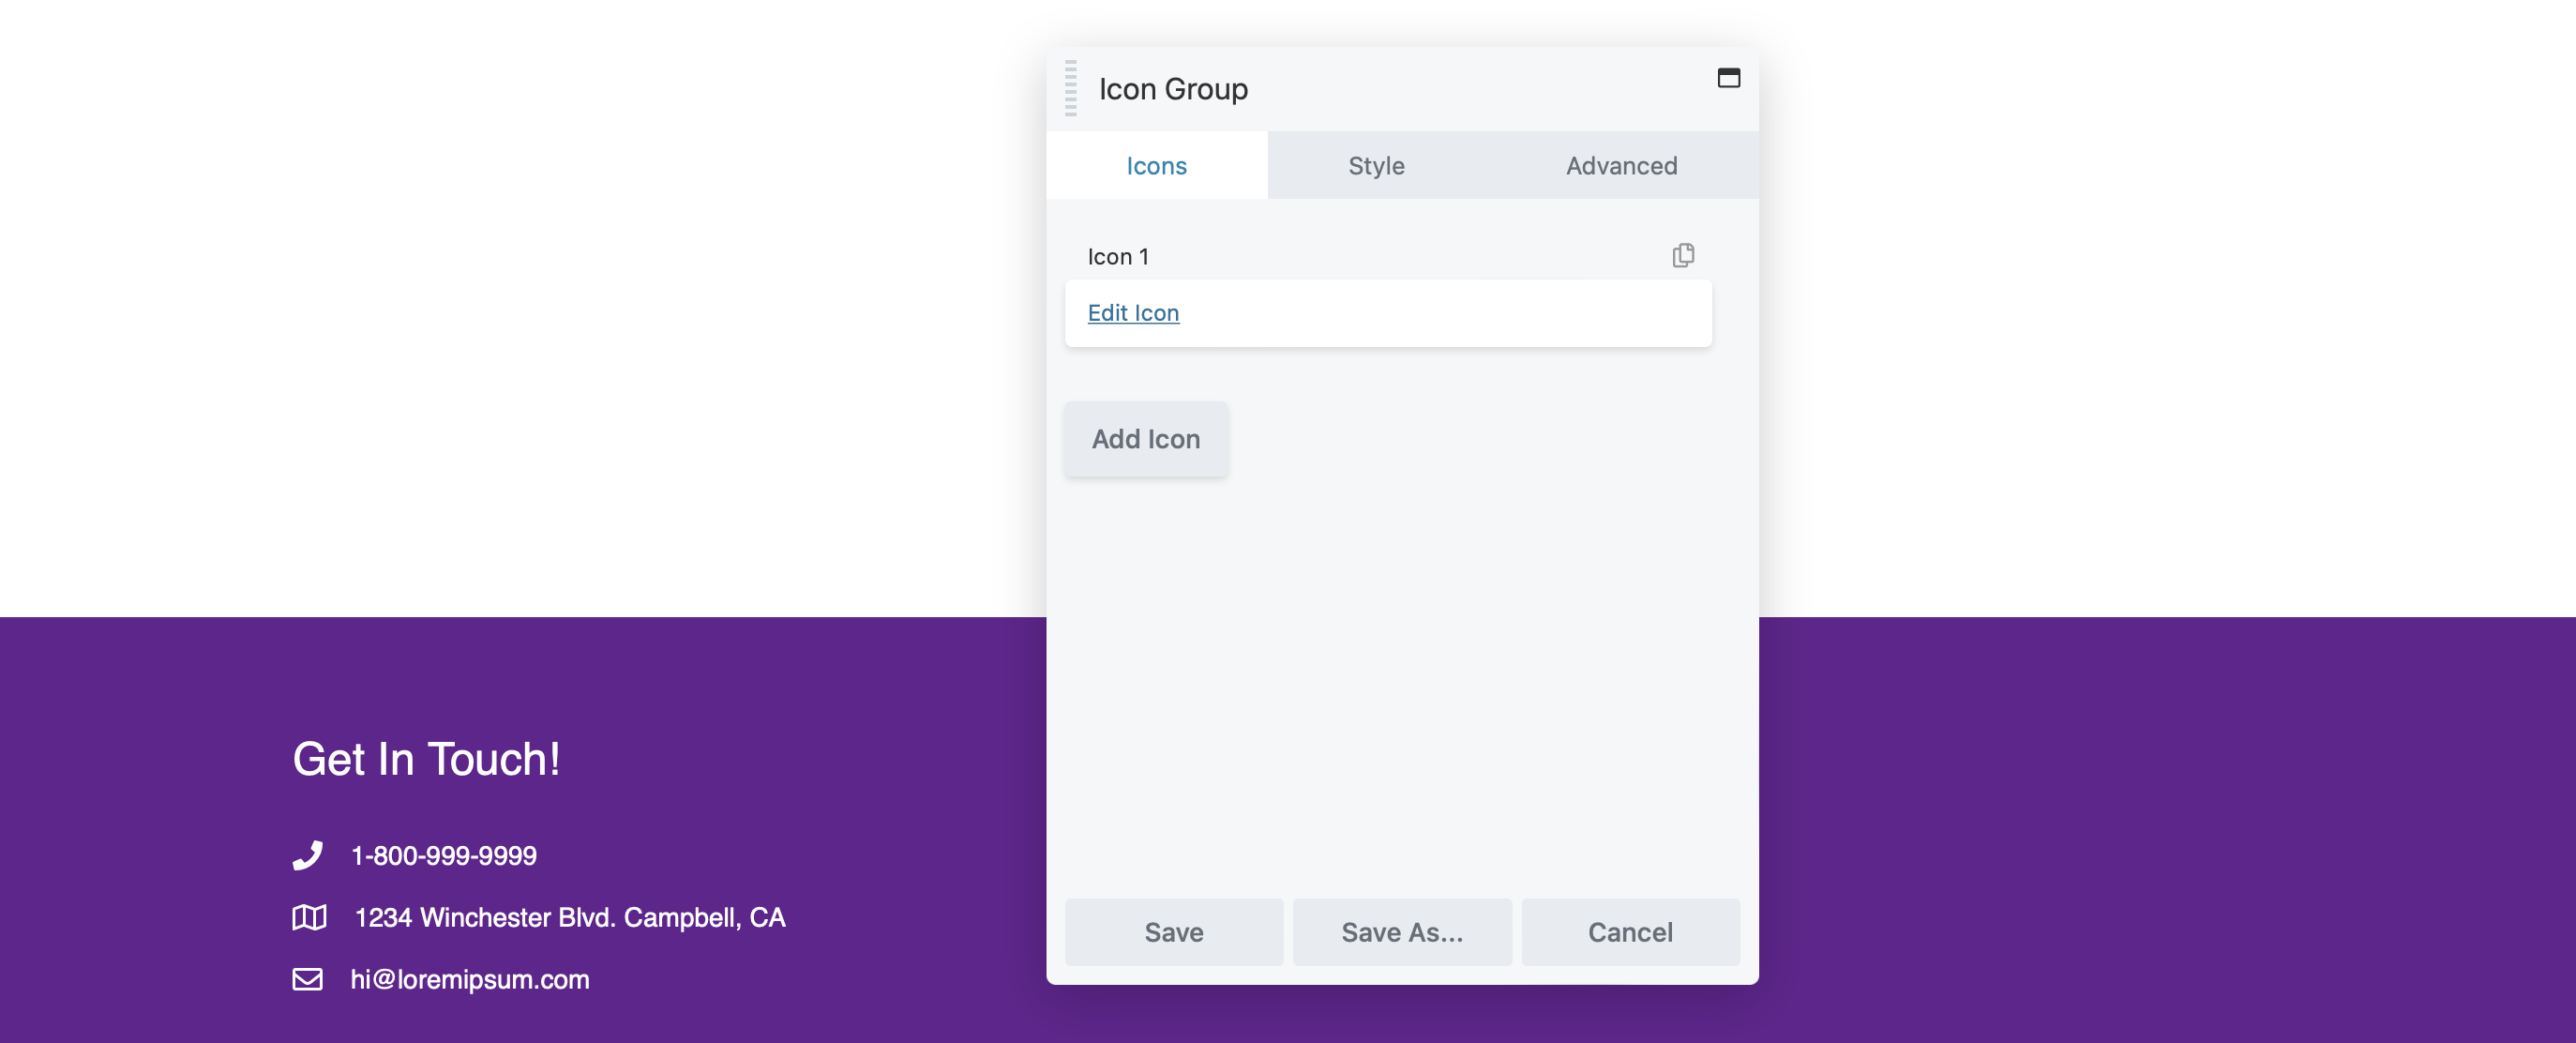
Then, in the Icons tab of your popup, click on Edit Icon:
Click on Select Icon to choose the relevant one. You’ll find icons for major social media platforms like Facebook, LinkedIn, and Twitter. Then add the link to your profile:
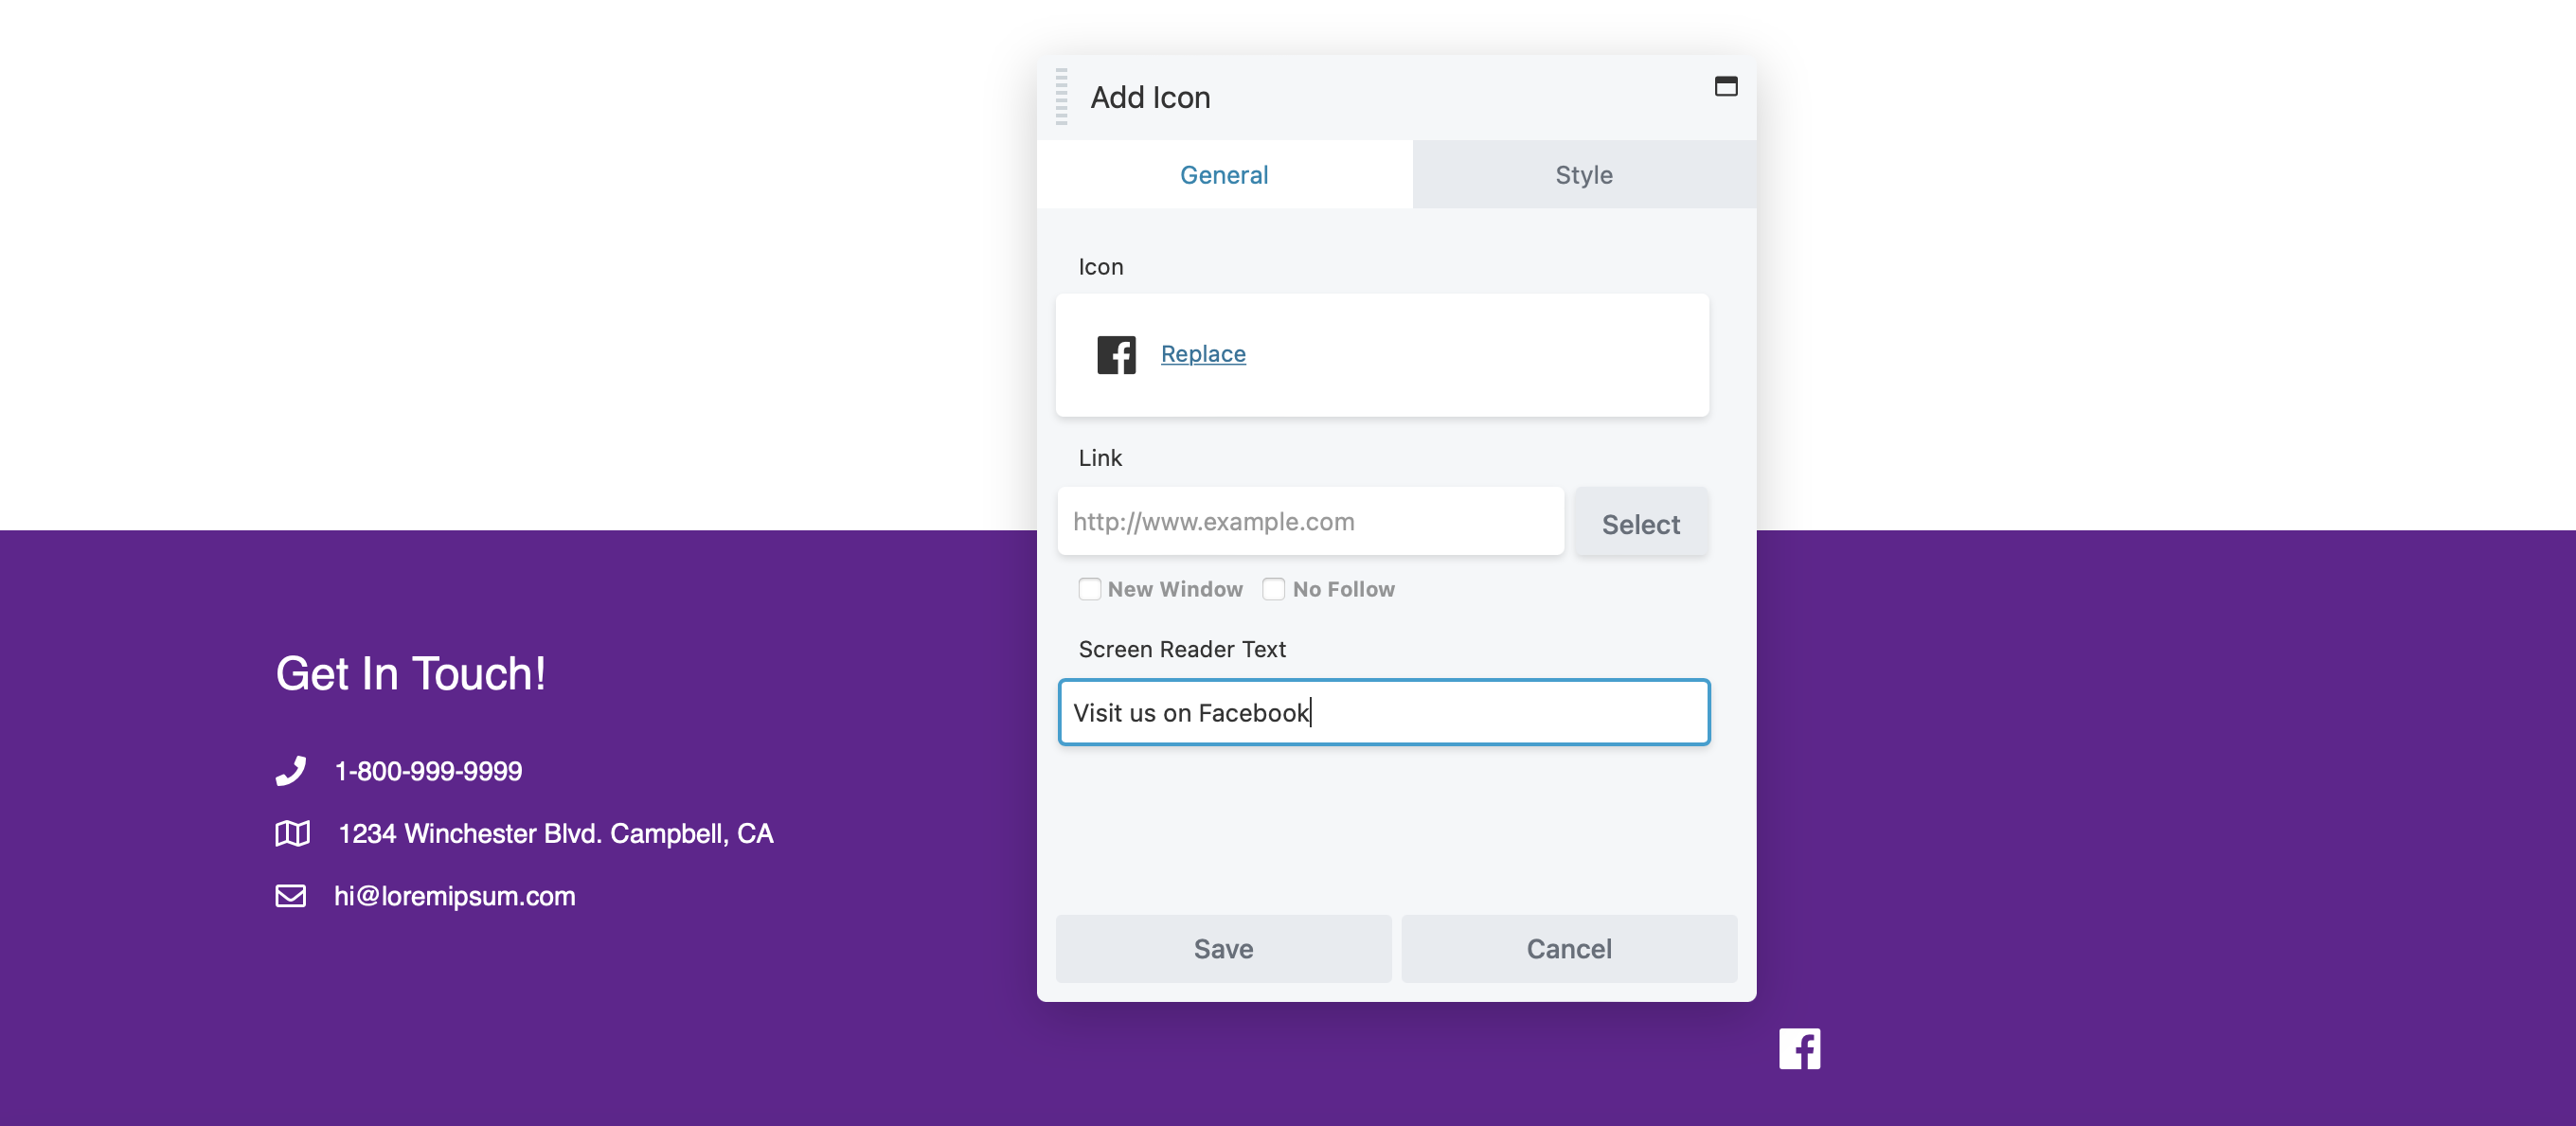
Click Save to go back to where you can add the rest of your social links:
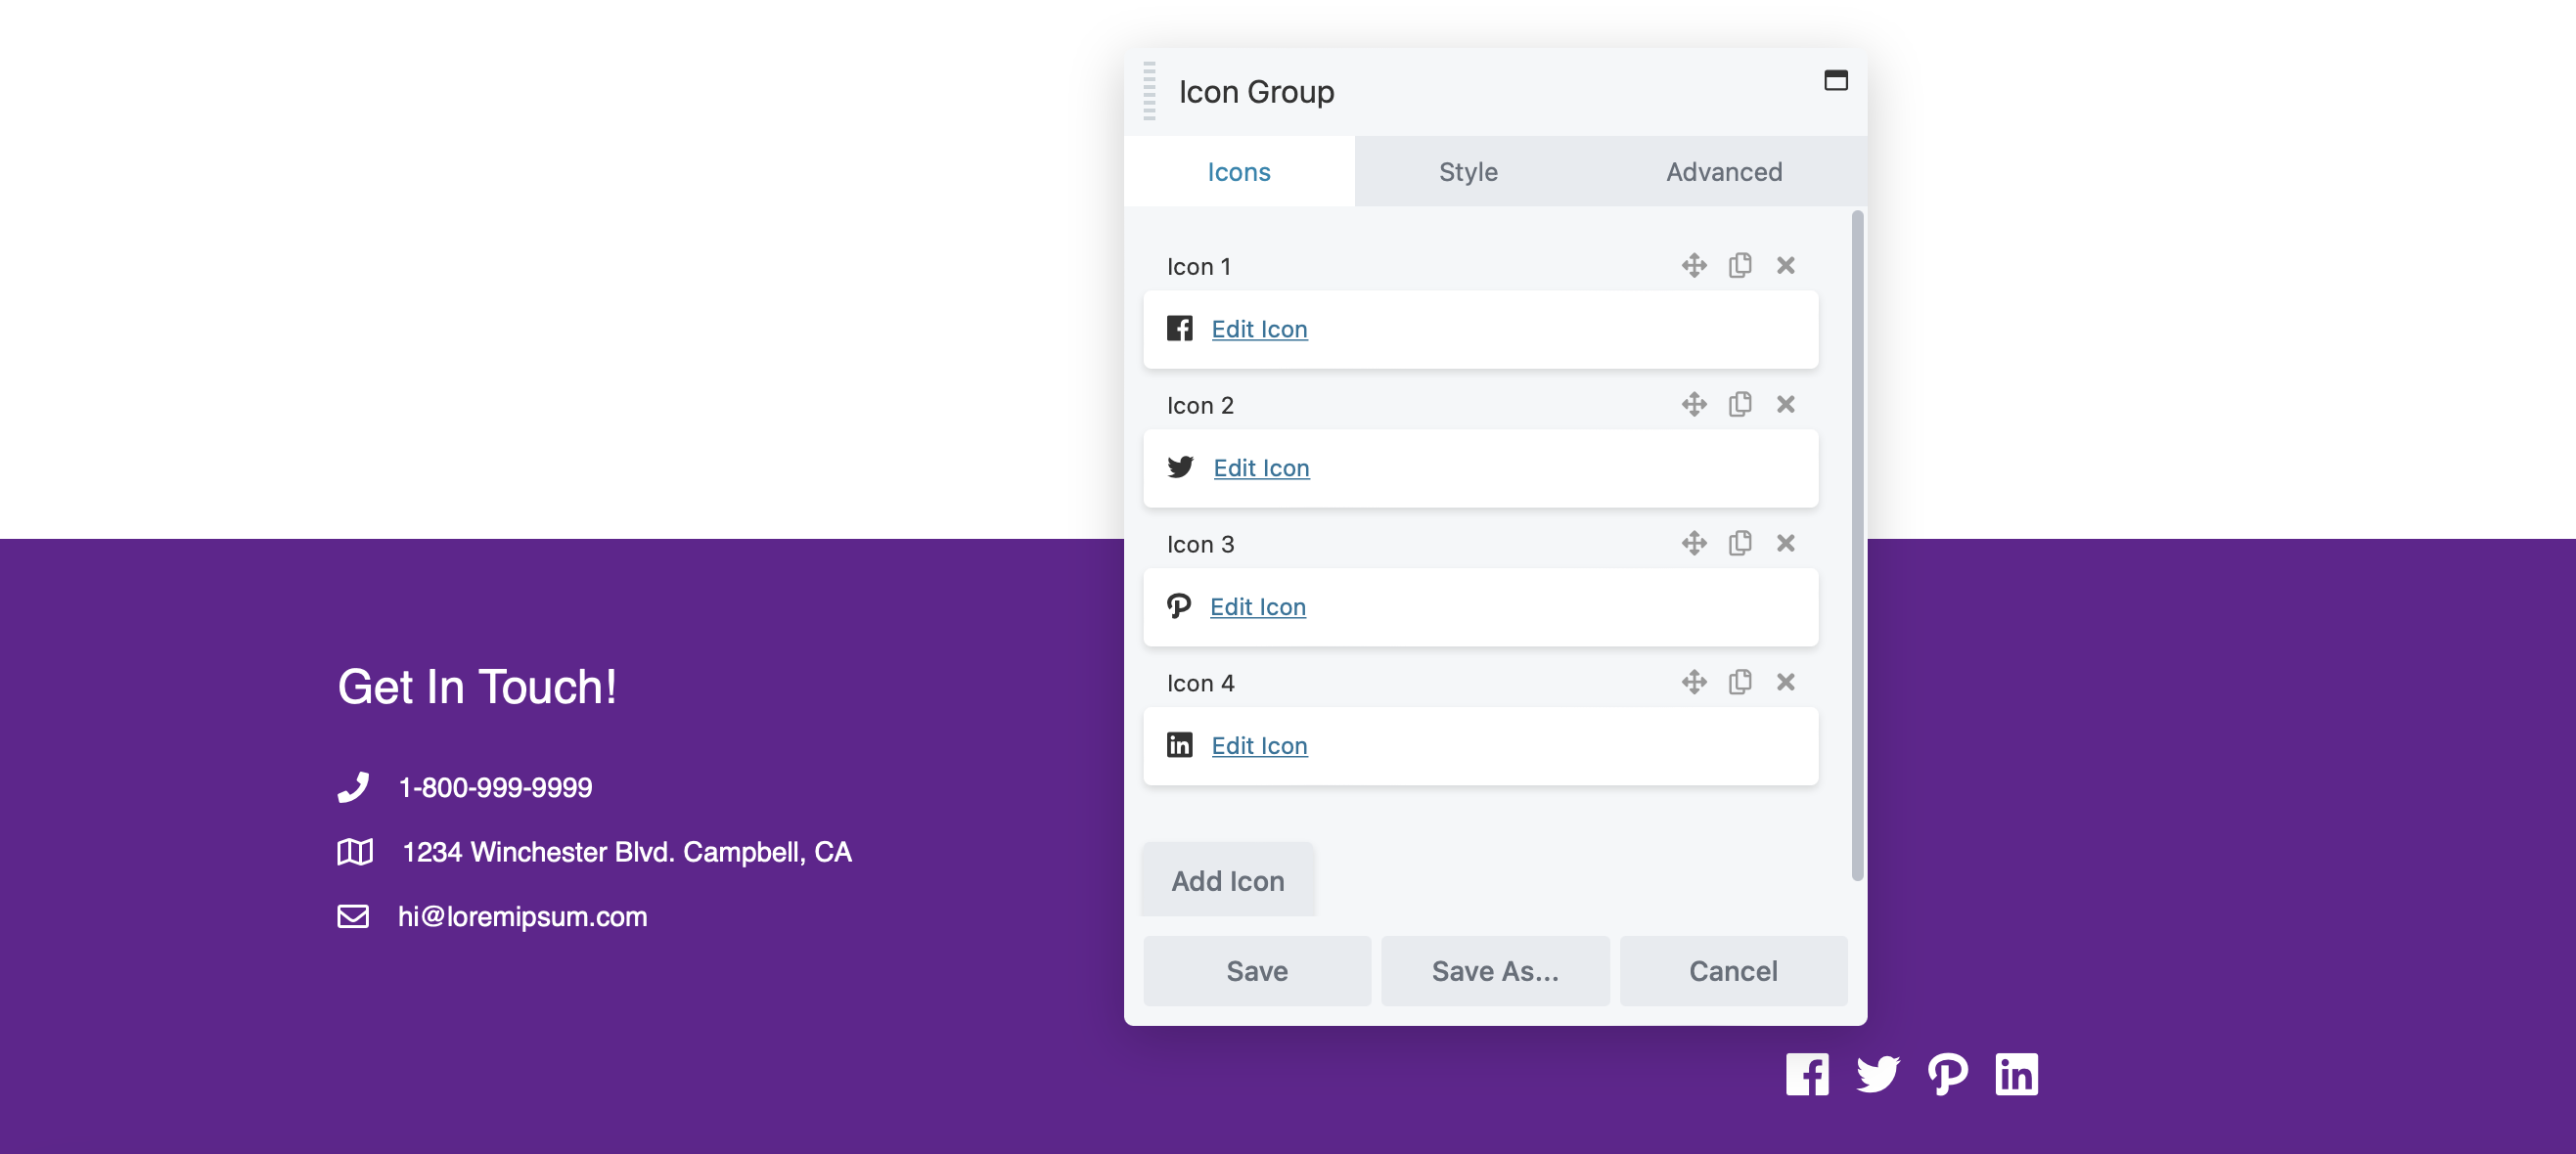
Keep adding modules to your footer. When you’re satisfied with the layout, click Done > Publish.
Final Thoughts
Page builders simplify the design of posts and pages, but they often limit customization for headers and footers. Luckily, Beaver Themer gives you full control over your website’s design.
Here’s a quick recap of how to create headers and footers with Beaver Themer:
- Create a new Beaver Themer layout.
- Configure your settings.
- Customize your header and footer layouts.
- Add content to your header or footer.
With these steps, you can enhance your website’s functionality and ensure it reflects your unique brand identity.
Related Questions
What are the benefits of using Beaver Themer for headers and footers?
Beaver Themer offers extensive customization options, enabling you to create unique headers and footers that fit your brand. It provides control over layouts and the ability to integrate dynamic content easily.
How Do You Use Beaver Themer?
Beaver Themer gives you full control over your website’s design. You can easily edit headers, footers, 404 pages, and other essential sections. Start by creating a new Themer layout and configuring the settings to manage how your content displays. After that, customize colors and add various modules to enhance your site’s appearance
How do I make my header mobile-friendly?
To make your header mobile-friendly, check the responsive settings in Beaver Builder. You can adjust the layout and font sizes specifically for mobile devices to improve usability.
Related articles
How to Customize WordPress Website Header
Many elements make up a well-designed website. Your WordPress website header is particularly important because it’s the first thing visitors…
How to Use a Header Template in WordPress
Customizing a WordPress header isn’t often an easy process. If you’re not comfortable editing theme files, there aren’t many ways…
How to Create a WordPress Author Page with Beaver Themer (In 5 Steps)
If your blog has multiple contributors, readers may want to browse posts by a specific author. While WordPress provides a…
Join the community
We're here for you
There's a thriving community of builders and we'd love for you to join us. Come by and show off a project, network, or ask a question.
Since 2014
Build Your Website in Minutes, Not Months
Join Over 1 Million+ Websites Powered By Beaver Builder.
 Beaver Builder

